
Choose a Finish That Preserves the Redwood Look You Actually Want
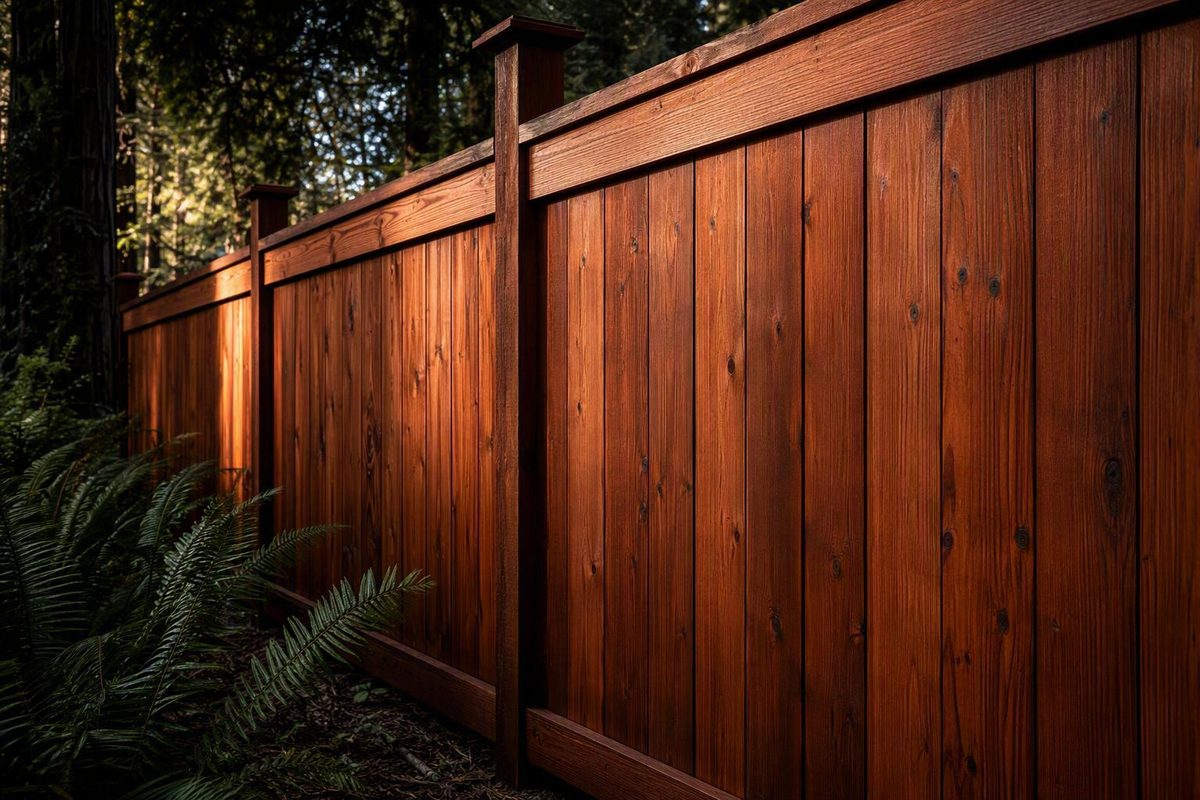
Choose a finish that preserves the redwood look you actually want.
A redwood fence does not have one universally correct finish. You can let it weather naturally, use a lightly pigmented finish to retain something close to its original tone, deepen the color while keeping the grain visible, or cover much of the variation with a solid stain.
Start with the appearance you want. Then verify that the exact product is suitable for redwood lumber, compatible with any existing coating, available in your area, and practical for your weather window and application method. A stain named Redwood does not automatically pass those tests.
Start Here: Redwood Lumber Is Not the Same as Redwood Stain Color
Terminology check
- Redwood lumber is the wood from which the fence is built.
- Redwood stain color is a manufacturer’s color name. It may be shown on cedar, pine, redwood, or another substrate.
- Documented compatibility means the label or technical data sheet identifies redwood—or an approved substrate category that clearly includes it—for the intended exterior application.
These terms are not interchangeable.
Retailer categories can obscure this distinction. A page labeled “Redwood exterior wood stains” may group products by color while separately offering filters for transparency, base, substrate condition, protection type, and surface location. That organization is useful for shopping, but it does not prove that every result is approved for a fence made from redwood lumber. The Home Depot Redwood stain category demonstrates this color-and-filter structure.
Look for explicit substrate language instead. Wood Defender describes its Transparent Fence Stain & Seal as a penetrating oil-based product intended to enhance new cedar, redwood, and cypress fences. That is direct manufacturer language about the wood species and application, not merely a color name.
Compare that with the Huemiller listing titled “Redwood Wood Stain & Sealant.” The retailer identifies Redwood as the color but names Western Red Cedar and pressure-treated pine in its compatibility statement. The Huemiller product listing therefore does not document compatibility with redwood lumber. This does not prove the product is incompatible; it means the supplied listing is insufficient. Obtain the current specification sheet or written manufacturer confirmation before using it on redwood.
Use this sequence to evaluate every candidate:
- Approved substrates: Does the documentation name redwood or clearly include it?
- Location and orientation: Is the product approved for exterior vertical surfaces or fences?
- Transparency: Is it clear, transparent, semitransparent, or solid?
- Base and resin system: Is it oil-based, water-based, or another formulation?
- Preparation: Does it require cleaning, brightening, sanding, stripping, or treatment of mill glaze?
- Existing-coating compatibility: Can it be applied over the finish already present?
- Coverage: What rate applies to the fence’s surface condition and the intended application method?
- Coat count: Does the label specify one coat, multiple coats, or wet-on-wet application?
- Wood-moisture limit: How dry must the boards be?
- Application conditions: What temperature and humidity limits apply?
- Rain-free window: How long must the finish be protected from rain, dew, or irrigation?
- Drying and recoating: When can another coat be applied, and when is the finish ready for exposure?
- Tools: Are brushing, rolling, and spraying permitted? Is back-brushing required?
- Cleanup and safety: Does cleanup require soap and water or mineral spirits? What protective equipment does the label require?
- VOC status and availability: Can the product legally be sold and practically obtained in your location?
- Future maintenance: Can it be cleaned and recoated, or will sanding or stripping be required?
If a material answer is missing, use the current label or technical data sheet as the deciding document—not the front of the can, retailer filters, an online swatch, or generic marketing copy.
Does a Redwood Fence Need to Be Stained?
No. Two strategies are reasonable:
- Leave the redwood unfinished and accept its changing color.
- Apply a compatible finish to retain, deepen, or replace its natural color.
Unfinished redwood does not remain reddish brown indefinitely. Sunlight fades surface pigments, moisture affects exposed fibers, and oxidation contributes to a silver-gray or grayish-brown surface. A redwood lumber supplier describes this progression in its guide to redwood fence weathering.
That makes appearance management the strongest supported reason to stain. Pigment can help retain a warmer redwood appearance, deepen the existing tone, or create a different color. The more closely you want the fence to resemble freshly installed redwood, the more important pigment selection, preparation, and timely maintenance become.
Individual products may also claim UV screening, moisture resistance, or mildew resistance. Evaluate those benefits at the product level. A pigmented exterior stain with documented UV claims is meaningfully different from an unlabeled clear coating, but the word “stain” does not guarantee every protective characteristic.
The available commercial guidance disagrees about what staining accomplishes beyond appearance. Bob Easley of California Fencing calls staining primarily aesthetic and says natural graying does not itself indicate a loss of structural integrity. His published opinion on staining redwood does not provide independent long-term test data, however.
C&J Fencing, by contrast, attributes added weather protection to staining. That contractor guidance also lacks independent testing quantifying how many years a particular stain adds to a redwood fence. The evidence therefore does not support either extreme:
- Redwood does not have to be stained simply to remain structurally sound.
- Not every stain is purely decorative, because particular formulations may make documented UV- or moisture-resistance claims.
Choose natural weathering if you like a gray patina and want to avoid a recurring color-maintenance cycle. Choose a compatible pigmented finish if preserving or changing the color matters enough to justify preparation and future recoating.
Choose the Look: Transparent, Semitransparent, or Solid
Opacity determines how much redwood grain and board variation remain visible. It also affects how well the finish can visually unify weathering, repairs, and boards with different tones.
| Desired result | Finish direction | What remains visible | Main tradeoff |
|---|---|---|---|
| Natural silver-gray weathering | Unfinished wood, or a compatible clear water repellent if desired | Natural grain and weathering variation | Does not preserve the original reddish-brown color |
| Near-natural color retention | Transparent or lightly pigmented exterior finish | Maximum grain and most natural variation | Discoloration, repairs, and mismatched boards remain noticeable |
| Richer color with visible grain | Semitransparent penetrating stain | Grain remains visible beneath noticeable pigment | Changes the natural tone and must be tested for excessive red or amber color |
| Opaque, uniform coverage | Solid stain | Surface texture may remain, but much of the grain and prior color is masked | Sacrifices the characteristic redwood look and may require more involved maintenance |
Transparent finishes
Transparent products reveal the most grain and board-to-board variation. That can be attractive on new, consistently colored redwood.
“Transparent” does not necessarily mean colorless.
Semitransparent stains
A penetrating semitransparent exterior stain is a sensible starting point—not a universal prescription—when you want visible grain plus enough pigment to retain or deepen the color. The Lumber Baron recommends a semitransparent UV-blocking stain for color retention while suggesting a clear water repellent with UV inhibitors for owners who accept natural weathering.
Semitransparent finishes often provide a useful balance between wood character and color control. The label must still establish redwood compatibility, exterior use, preparation, coverage, and maintenance requirements.
Solid stains
A solid stain masks more grain and existing color variation. It may be useful when uniform color matters more than showcasing the wood, especially on a fence with repairs, persistent discoloration, or noticeably different board tones.
Greater opacity is not a substitute for preparation. Dirt, biological growth, loose old coating, and excess moisture remain defects even if a new color initially hides them. Check whether future recoating will require cleaning alone or more extensive scraping, sanding, or stripping.
Whatever opacity you choose, test it on the actual fence. Prepare a representative area, apply the specified number of coats, and wait for the label-specified drying period before judging it. Redwood tone, age, porosity, exposure, weathering, and prior coatings can all make the dried result differ from a printed or online swatch.
Oil-Based vs. Water-Based Stain: Compare the Product, Not Just the Base
The supplied commercial sources conflict. Some favor penetrating oil-based finishes for exposed fences, while others favor newer water-based products or characterize them as suitable for redwood. The evidence does not support naming either base universally superior.
Use category-level tendencies to identify practical tradeoffs, then let the exact product specifications decide.
| Factor | Water-based tendency | Oil-based tendency | What to verify |
|---|---|---|---|
| Drying behavior | Usually faster | Usually slower | Dry-to-touch, recoat, cure, and rain-ready times |
| Working time | Shorter and may require quicker section control | Longer and may allow more blending time | Direct-sun and temperature restrictions |
| Cleanup | Commonly soap and water | Commonly mineral spirits | Label instructions and disposal requirements |
| Odor and VOC tendency | Often lower odor and lower VOC | Often stronger odor and higher VOC | Actual VOC value, ventilation, and local rules |
| Color character | Often lighter or less amber | Often richer, warmer, or more amber | Dried test result on the actual redwood |
| Grain behavior | May raise fibers | May emphasize warm undertones | Whether conditioning or light sanding is needed |
| Safety | Spray mist and additives still require precautions | Solvent vapor, flammability, and oily-rag hazards require attention | Label, safety data sheet, PPE, storage, and disposal |
| Existing finish | Product-dependent | Product-dependent | Written approval for the old coating and its condition |
| Recoating | May require cleaning, abrasion, or removal | May allow cleaning and recoating, but not always | Exact maintenance procedure |
These are tendencies, not specifications. U-C Coatings, for example, gives generic drying estimates of one to two hours for water-based stain and eight or more hours for oil-based stain, while other manufacturers publish different ranges. Its oil-versus-water comparison also describes the familiar contrast between soap-and-water and mineral-spirit cleanup, and between lighter and richer color. Those figures are seller guidance, not a substitute for the selected product’s label.
Treat broad claims about penetration, peeling, breathability, moisture resistance, and durability cautiously. Commercial sources also tend to favor the chemistry they sell.
Compare actual products by asking:
- Which opacity and final color do you want?
- Will ambering complement or distort the redwood?
- How quickly can you work while maintaining an even edge?
- How long is the available dry and rain-free period?
- Are neighboring buildings, vehicles, plants, or enclosed spaces sensitive to odor or overspray?
- Do you prefer soap-and-water cleanup, or can you safely manage mineral spirits?
- What VOC or product-availability rules apply where the fence is located?
- How much sun, rain, irrigation, fog, or coastal moisture reaches each face?
- What coating is already on the fence?
- What preparation will be required at the next recoat?
Compatibility deserves special caution. Some supplied sources say a water-based stain can be applied over an oil-based finish; another says changing from oil to water requires stripping and sanding. Neither statement is safe as a universal rule. Identify the existing finish if possible, inspect its condition, and obtain written guidance for the exact new product.
Test for both color and surface texture. Water-based products may raise the grain, while oil-based products may introduce richer or amber undertones.
How to Compare Redwood Fence Stain Products Without a False ‘Best’ Ranking
The available evidence is not broad enough for a defensible market-wide ranking. Only one supplied manufacturer page provides substantial specifications for a product explicitly promoted for redwood; another retailer listing does not establish redwood-lumber compatibility, and the available editorial test was short and did not identify redwood as the test species.
Accordingly, treat this section as a worked specification example, not a comparison of all viable products.
Create a worksheet with these fields:
- Explicit compatibility with redwood lumber
- Exterior vertical-surface or fence approval
- Transparent, semitransparent, or solid appearance
- Oil- or water-based formulation
- Documented UV, moisture, mold, or mildew claims
- Coverage by wood condition and application method
- Required coat count and application rate
- Wood-moisture maximum
- Application-temperature range
- Dry, recoat, cure, and rain-ready times
- Brush, roller, and sprayer approval
- Back-brushing requirement
- Cleanup method
- VOC information and current local compliance
- Warranty terms and exclusions
- Current price and package size
- Local stock and shipping eligibility
- Maintenance and recoating procedure
Wood Defender Transparent Fence Stain & Seal is a documented example, not a universal winner. The manufacturer describes it as a penetrating oil-based transparent finish for new cedar, redwood, and cypress fences. On the product page checked August 25, 2026, the listed specifications were less than 200 g/L VOC, 100–200 square feet of practical coverage per gallon, a two-year manufacturer’s warranty, and claimed life expectancy of up to four years, depending on application rate and exposure. Listed prices were $58.25 for one gallon and $235.53 for five gallons. The same Wood Defender product page said this version could not be shipped to California and directed California buyers to the 200 Series.
Prices, product versions, shipping eligibility, and availability can change. A shipping restriction is also not the same as a legal determination about whether another product complies with current California or local rules. Verify both availability and compliance before purchase, and confirm that any substitute series independently meets the project’s substrate, appearance, application, and maintenance requirements.
The Huemiller example shows why a specification worksheet matters. Its listing establishes an oil-based product in a Redwood color, but the stated compatibility names Western Red Cedar and pressure-treated pine. Without current technical documentation that includes redwood lumber, it should not be presented as a proven redwood-fence option.
Editorial product tests may help generate a shortlist, but they cannot replace those checks. A four-week comparison selected Ready Seal as best overall and Storm System as best for new wood after considering application, drying, color, and simulated exposure. The wood species was not specified, however, and the highlighted colors were not redwood-specific. The Bob Vila fence-stain test therefore cannot establish multi-year performance on a redwood fence.
The supportable process is to identify products explicitly approved for redwood, obtain their current labels or technical sheets, compare the same fields, eliminate products that conflict with the old coating or local requirements, and test the finalists on the actual fence. Do not create a “best” ranking from incomparable or incomplete documentation.
Prepare New, Weathered, and Previously Finished Redwood
Preparation should match the fence’s condition. Do not apply one generic cleaning routine to every project.
New redwood
New does not necessarily mean ready to stain. Check for:
- Excess surface moisture
- Mill glaze or burnishing
- Dirt from construction and handling
- Chalk, pencil marks, adhesive, or metal residue
- Uneven absorption between boards
- Sprinkler or soil splash
Ready Seal recommends using a wood cleaner or brightener to remove mill glaze from new fencing, but that is manufacturer guidance rather than a universal requirement. The selected stain’s instructions control.
Use a moisture meter on multiple boards and exposures. If the manufacturer prescribes an absorption test, follow that exact procedure; do not substitute an improvised test for a stated moisture limit or preparation requirement.
Weathered or gray redwood
If the goal is to stain rather than preserve the gray patina, gently remove loose weathered fibers, dirt, and surface contamination. A cleaner or brightener may be appropriate if the coating manufacturer permits it. Rinse thoroughly and allow the boards to dry completely.
Do not assume stain will make heavily weathered wood look new. Prepare and test a full-height section that includes both sun-exposed and shaded boards.
Dirty, moldy, or mildewed wood
Remove dirt, organic matter, and biological growth using a method suitable for the wood and intended coating. Protect surrounding plants, and do not mix cleaning chemicals unless their labels explicitly permit it. Rinse away residue thoroughly.
Correct recurring moisture sources where practical. Sprinkler spray, soil contact, dense vegetation, poor drainage, and debris trapped against lower boards can interfere with drying and finish performance.
Pressure-washed wood
Pressure washing can speed cleaning, but excessive pressure can damage surface fibers and leave fuzzy wood or uneven absorption. Ready Seal advises using no more than 1,000 PSI, allowing at least 48 hours of drying after pressure washing, and treating wood moisture below 12% as ideal in its fence-preparation guidance. These are that manufacturer’s recommendations, not universal limits.
Use the gentlest method that cleans effectively. Keep the nozzle moving and avoid cutting close arcs into the boards. After the fence dries, inspect it for raised or damaged fibers and sand affected areas lightly as needed rather than automatically sanding the entire fence.
Previously coated redwood
Identify what is already on the fence:
- Is it a penetrating stain that has faded without forming a visible film?
- Is it a film-forming stain or paint?
- Is the coating intact, chalky, cracked, peeling, or flaking?
- Does water absorb or bead consistently?
- Are multiple old coatings present?
Cleaning may be enough for one compatible system; another may require abrasion or complete stripping. The new manufacturer’s written compatibility instructions take priority over generic rules about oil and water.
Resolve the moisture-limit conflict
The supplied guidance does not establish one universal threshold. Ready Seal calls moisture below 12% ideal, while Fence Fanatics recommends wood moisture below 16% in its oil-versus-water fence-stain guidance.
Use a moisture meter on several boards, heights, and exposures, and comply with the selected product’s stated maximum. If the label is silent, ask the manufacturer rather than choosing whichever published number is more convenient.
Run a proper test patch
A useful test patch is more than a quick dab on an offcut:
- Choose a small but representative area of the installed fence.
- Prepare it exactly as you plan to prepare the full surface.
- Confirm that the wood meets the product’s moisture requirement.
- Apply the specified number of coats at the stated rate.
- Use the intended tool and back-brush if required.
- Let the sample dry for the full specified period.
- Inspect it in shade, direct light, and evening light.
- Assess color, ambering, absorption, adhesion, blotchiness, raised grain, and grain visibility.
- If the fence contains replacement boards, include both old and new wood in the test.
Buy the full project quantity only after the sample has dried and you accept its appearance and application behavior.
Apply the Stain Safely and Within the Right Weather Window
Start with the selected label. It governs application temperature, wood-moisture maximum, rain-free period, coat count, drying and recoating, tool selection, and whether back-brushing is mandatory.
Choose the tool for the fence—not just for speed
Brush: Offers the most control around board edges, end grain, posts, gates, hardware, and narrow gaps. It is slower on large faces but helps control drips and detailed application.
Roller: Covers broad, accessible faces efficiently. It is less effective between boards and around hardware, so keep a brush available. Confirm the recommended nap and whether rolling is permitted.
Sprayer: Moves quickly across long runs and complex profiles, but it increases overspray risk and may not produce an even finish without follow-up brushing. Wind, vehicles, siding, windows, landscaping, and property lines can turn a fast application into an expensive problem.
Work in manageable sections. If the instructions require a wet edge, finish logical board groups or complete board lengths before moving on. Do not assume every stain requires two coats, wet-on-wet application, or back-brushing; those instructions are product-specific.
Weather guidance varies. Ready Seal gives 50°F to 85°F and no expected rain for 24–48 hours as general conditions for most oil stains, while noting different temperature guidance for its own product. These figures are examples to compare with the selected label, not universal application limits.
“Dry” and “rain ready” may be different milestones. Follow both periods whenever the product documentation distinguishes them.
Protect the site and applicator
Before opening the stain:
- Cover masonry, patios, plants, pools, siding, windows, and hardware as appropriate.
- Move or cover vehicles.
- Notify neighbors if spray could approach their property.
- Shut off nearby sprinklers for the required period.
- Use spray shields and stop if wind threatens drift.
- Keep children and pets away for the label-specified period.
- Position ladders, hoses, and drop cloths so they do not create trip hazards or contact wet finish.
Contractor guidance identifies gloves, goggles, a dust mask, and canvas drop cloths among the basic equipment used for fence preparation and staining. Use the exact eye, skin, and respiratory protection required by the cleaner, coating label, and safety data sheet—especially when sanding or spraying—and do not assume a simple dust mask is suitable for solvent vapor or spray mist. See the C&J Fencing application and PPE guidance.
Oil-based products require additional care. Provide the ventilation required by the label, keep the product away from heat and ignition sources, and follow the stated mineral-spirit cleanup and disposal instructions. Oil-soaked rags can present a fire hazard and should never be left crumpled in a pile or discarded as ordinary dry waste. Follow the product directions and local disposal requirements for containment and disposal; the oil-versus-water safety comparison from Outdoor Furniture Plus specifically warns that oil-soaked rags can self-combust.
Estimate Gallons, Budget for Waste, and Know When to Recoat
Calculate the nominal area first:
Fence length × fence height × number of faces stained = nominal square footage
Then divide by the chosen product’s coverage rate:
Nominal square footage ÷ square feet per gallon = nominal gallons
Count gates, exposed posts, rails, caps, trim, lattice, and board edges if they will also be stained. Then allow for porous weathered wood, rough-sawn surfaces, spray loss, test areas, spills, and touch-ups. An allowance should supplement an accurate measurement, not conceal a poor estimate.
Quantity example
A fence that is 100 feet long and 6 feet high has:
- One face: 100 × 6 = 600 square feet
- Two faces: 600 × 2 = 1,200 square feet
Wood Defender lists practical coverage of 100–200 square feet per gallon, with actual coverage varying by substrate and application method:
- At 200 square feet per gallon: 1,200 ÷ 200 = 6 gallons
- At 100 square feet per gallon: 1,200 ÷ 100 = 12 gallons
The nominal requirement is therefore 6–12 gallons before accounting for posts, rails, edges, gates, waste, and touch-up material. That range comes from the Wood Defender product specification and must not be transferred to another stain.
Package size also matters. If the project needs slightly more than five gallons, one five-gallon pail will not be enough. Retain leftover material only if the product label permits storage after opening, and follow its container-sealing, shelf-life, storage-temperature, and disposal instructions.
Recoat by condition, not calendar alone
A rough planning range is two to five years, not a warranty or fixed schedule. The Lumber Baron suggests two to three years for the finishes and conditions it describes, while Bob Easley recommends about five years when maintaining a stained color. C&J Fencing likewise gives a broader two-to-five-year inspection and reapplication range. These are commercial recommendations rather than independently established service intervals.
Inspect the fence annually for:
- Fading or uneven color
- Exposed or unusually dry-looking wood
- Rapid or uneven water absorption
- Mold, mildew, or persistent dirt
- Peeling, flaking, cracking, or loss of adhesion
- Extra wear near sprinklers, gates, vegetation, and the fence base
- Different behavior on full-sun and shaded faces
Use visible wear and the manufacturer’s maintenance procedure to choose the actual recoat date. A faded penetrating finish may need cleaning and renewal, while a peeling or incompatible film may require scraping, sanding, or stripping before another coat can adhere.
Routine care can reduce avoidable problems. Clean gently, keep soil and mulch away from the fence base, maintain drainage, trim vegetation that traps moisture, redirect sprinklers, and let boards dry after rain. These practices support more even weathering whether the fence is stained or allowed to gray naturally.
Frequently Asked Questions
How long should a new redwood fence dry or weather before staining?
There is no universal waiting period. New redwood should be clean, receptive to the finish, and below the selected product’s moisture limit. Mill glaze or construction contamination may also require treatment.
Use a moisture meter on multiple boards and exposures. The reviewed commercial sources differ between an ideal below 12% and a recommendation below 16%, so the exact stain label must control. If the manufacturer specifies a waiting period or absorption test, follow that procedure instead of a generic rule to stain immediately or wait a fixed number of weeks.
What is the best type of stain for keeping redwood grain visible?
Start with an exterior transparent or semitransparent product explicitly documented for redwood. Transparent stain reveals the most grain but also exposes the most variation. A semitransparent penetrating stain is often a practical balance when you want visible grain, noticeable color, and documented UV screening.
There is no universal best formula. Compare opacity, redwood compatibility, existing-finish compatibility, exposure, maintenance requirements, and the dried appearance of a test patch.
Can water-based stain be applied over an existing oil-based stain?
Sometimes, but not as a universal rule. The supplied commercial guidance conflicts: some sources say water-based stain can go over an oil-based finish, while another advises stripping and sanding before making that switch.
The answer depends on the old coating’s chemistry, age, condition, contamination, and cure, as well as the new product’s adhesion requirements. Identify the existing finish, remove loose material, prepare a representative test area, and obtain approval from the new stain’s manufacturer.
How many gallons of stain do I need for a redwood fence?
Multiply the fence length by its height and by the number of faces being stained. Divide that area by the selected product’s coverage rate, then add gates, posts, rails, lattice, trim, and treated edges. Finally, allow for porosity, application loss, test areas, and touch-ups.
For example, a 100-foot-by-6-foot fence stained on both faces has 1,200 nominal square feet. At a product-specific rate of 100–200 square feet per gallon, that equals 6–12 gallons before allowances. Use that range only for a product carrying that coverage specification.
How often should a redwood fence be restained?
Use two to five years as a budgeting range, not a fixed schedule.
Inspect the fence annually. Recoat when fading, uneven absorption, exposed wood, or other wear reaches the threshold described by the manufacturer. If the existing finish is peeling or incompatible, maintenance may require sanding or stripping rather than simply adding another coat.
The final decision sequence is straightforward: decide whether to accept natural graying or preserve color; choose how much grain should remain visible; verify that the exact product is approved for redwood and compatible with the old finish; prepare and moisture-test the fence according to its label; test the dried color on the actual wood; and calculate quantity from product-specific coverage. Specifications and surface preparation are more reliable than a Redwood color name, a generic oil-versus-water rule, or an unsupported “best stain” ranking.