
How to Choose a Cedar Fence That Preserves Privacy as the Wood Moves
A captured 100-foot package combined cedar pickets, Douglas fir rails and treated posts. Compare package and installed prices using identical scopes.
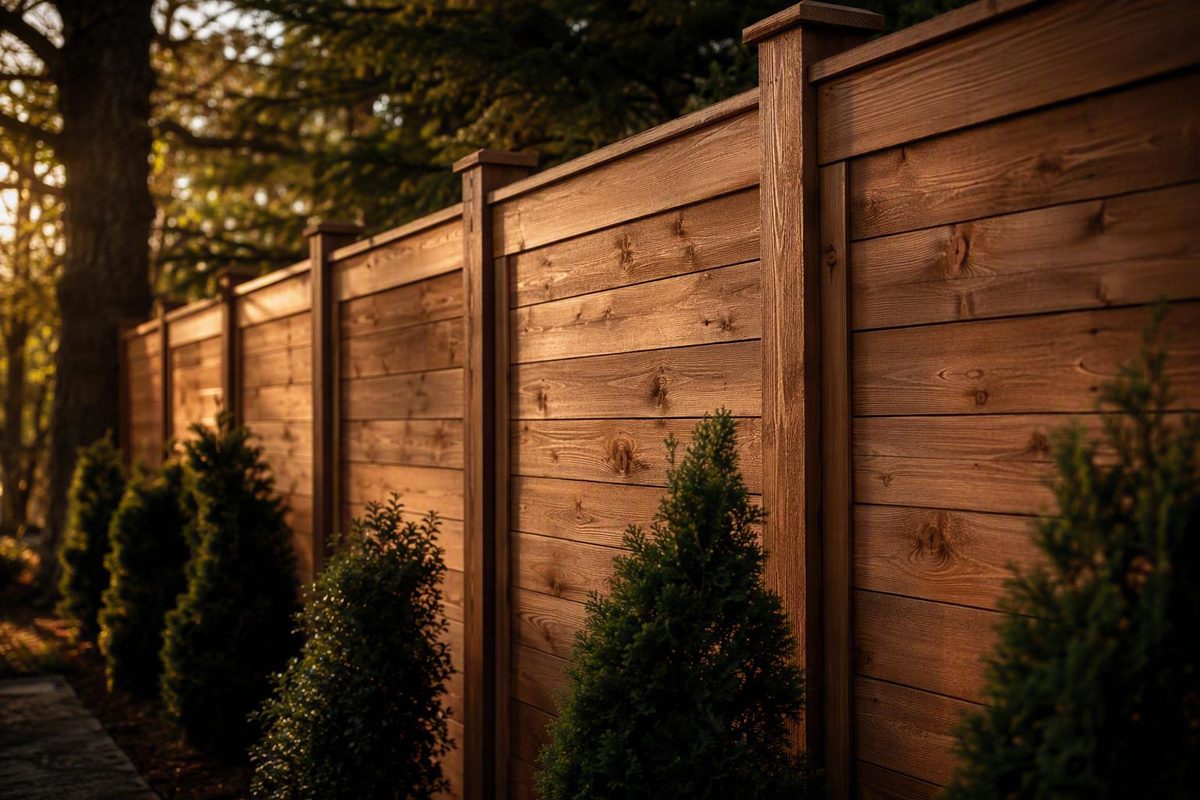
A cedar privacy fence is not defined by its pickets alone. Its long-term appearance depends on the board layout, the materials behind the visible face, the post and footing system, drainage, fasteners, gate framing, and how well the design anticipates natural wood movement.
Start by deciding how much screening and airflow you want. Then verify every component in the proposed fence, compare prices using identical scopes, and adapt the construction to local soil, frost, drainage, wind, terrain, product instructions, and code requirements. A “cedar fence” label cannot make those decisions for you.
Start With the Privacy Design, Not the Wood Label
The first question is not simply “Do I want cedar?” It is “How should the fence keep interrupting sightlines after its boards shrink, cup, or shift?”
| Design | Initial sightline control | Exposure to shrinkage gaps | Airflow | Material use | Slope adaptability | Framing demands | Typical appearance |
|---|---|---|---|---|---|---|---|
| Tongue-and-groove | Tight when properly fitted | Interlocking edges help cover joints, but movement can affect fit | Low | Moderate to high | Rigid panels can be difficult to fit to changing grades | Accurate alignment and stable rails matter | Formal and architectural |
| Side-by-side solid picket or stockade | Strong when boards are tightly arranged | Openings can develop between individual boards | Low initially | Lower than overlapping layouts | Component-built sections can be stepped or cut to grade | Conventional posts and rails | Traditional vertical privacy fence |
| Board-on-board | Strong because boards overlap | Overlap can continue covering joints as boards contract | Low to moderate, depending on overlap | Higher than a single layer | Adaptable when assembled board by board | Rails support two overlapping layers | Substantial, layered finish |
| Shadowbox | Moderate straight-on screening | Movement changes angled sightlines | Higher than solid layouts | Higher than a basic single layer | Generally adaptable when component-built | Alternating boards require consistent layout | Finished appearance on both sides |
| Horizontal board-on-board | Strong while overlaps remain adequate | Overlap masks many direct gaps, but long boards can bow | Low to moderate | High | Grade changes need careful transitions | Often needs intermediate attachment points | Modern and linear |
| Cedar frame with metal or other infill | Depends on whether the infill is solid or spaced | Cedar can move even if the infill does not | Design-dependent | Varies | Often panel-dependent | Connections between unlike materials need planning | Contemporary mixed-material look |
Tongue-and-groove
Tongue-and-groove boards interlock instead of merely meeting edge to edge. That makes the layout attractive where tight visual screening and a refined face are priorities.
One made-to-order example uses vertical 1x4 cedar tongue-and-groove boards, three 2x4 back rails, top trim, a cedar cap, and 304 stainless-steel ring-shank nails. Its seller describes the panel as providing full visual privacy, strength, stability, and longevity, but those are commercial product claims rather than independent performance findings. The seller also warns that weather can cause expansion, contraction, checking, splitting, and warping, so even an interlocking layout should not be treated as permanently gap-proof. See the seller’s panel construction and natural-movement terms.
Side-by-side solid pickets and stockade layouts
A solid stockade-style fence places boards tightly together to block direct views. It is economical in board count because it uses one face layer, but that layer has no backup coverage. If adjacent boards contract, the joint can become visible.
That does not mean every board should be forced together regardless of its moisture condition or the supplier’s instructions. Initial placement should account for the board condition, expected movement, airflow strategy, and installation guidance. The important distinction is that a single side-by-side layer has no overlap to conceal a joint that later opens.
Board-on-board
Board-on-board construction uses overlapping boards. A first layer is installed with spaces or staggered joints, and a second layer covers those openings. As an individual board contracts, the other layer can continue interrupting the sightline.
That resilience requires more boards and fasteners than a single-layer layout. It also creates a more solid surface, so the framing and wind exposure deserve attention. The overlap must be calculated from the boards’ actual width and expected movement rather than from nominal size alone.
Shadowbox
Shadowbox and solid privacy fencing are not equivalent. Shadowbox boards alternate across opposite sides of the rails. The offset arrangement interrupts straight-on views and permits more airflow, but angled visibility remains possible. Board-on-board and tightly joined stockade layouts are intended to provide more complete sightline coverage. Hurricane Fence distinguishes board-on-board, shadowbox, and stockade construction.
Shadowbox may be the better choice when airflow, a finished appearance on both sides, or neighbor-facing symmetry matters more than screening from every angle.
Horizontal board-on-board
Horizontal cedar can create a clean, modern face, but long boards have greater unsupported spans. Intermediate attachment points can help restrain bowing and keep their visual lines aligned.
In one personal DIY project—not an engineering specification—the builder used 5.5-inch cedar pickets. The first layer had 4-inch gaps, and the second layer overlapped each side by 3/4 inch. Center vertical supports allowed every horizontal board to be attached at both ends and in the middle. Review the project’s horizontal board-on-board layout.
Those dimensions document one project only. They do not establish the correct overlap, support spacing, post layout, footing design, or wind capacity for another site.
Mixed-material cedar-frame designs
Some fences use cedar as a frame around corrugated metal, wire, or another infill. Others place cedar boards on steel posts. These systems can retain cedar’s visual warmth without being all-cedar structures.
Mixed construction can separate functions effectively: cedar provides the visible face, while treated wood, steel, or manufactured panels perform other roles. Buyers should still ask how the different components are connected, replaced, finished, and treated under the warranty.
No cedar privacy-fence layout guarantees permanent full privacy. Shrinkage, warping, installation gaps, changing terrain, loose framing, and angled views can all alter screening. Greater solidity also means less airflow. A tall, nearly gap-free fence in an exposed location may need site-specific structural review rather than a copied retail or DIY detail.
What Is Actually Cedar? Audit Every Fence Component
A product called a “cedar privacy fence” may have cedar pickets, an all-cedar panel, or a mixed system with cedar only on its visible face. Break the proposal into components before comparing it:
- Pickets, boards, or infill
- Horizontal rails or panel framing
- Line, corner, end, and gate posts
- Trim, cap, lattice, or kickboards
- Nails, screws, brackets, and connectors
- Concrete, gravel, sleeves, anchors, or other footing materials
- Gate frame, hinges, latch, and anti-sag hardware
- Stain, sealer, primer, or other finish
Mixed packages are common
A captured 100-foot package illustrates why the title is not enough. It was marketed as a six-foot-tall cedar solid-privacy package, but its listed contents were 230 cedar pickets, 39 Douglas fir rails, and 13 green-treated posts. The pickets were described as 1 by 5.5 inches by 6 feet, while the posts were listed as 3.5 inches square by 8 feet. See the 100-foot package’s listed components.
The corresponding 200-foot package listed 459 cedar pickets, 81 Douglas fir rails, 27 green-treated posts, two latches, and two pairs of 8-inch strap hinges. That is reasonably described as cedar-facing fencing, but not as an all-cedar structural system. See the 200-foot package quantities and hardware.
Other systems use steel posts or cedar frames around corrugated-metal infill. These may be suitable choices, but the buyer should know which material performs each job.
An all-cedar description should still be specific
The cited tongue-and-groove panel discloses:
- 1x4 cedar tongue-and-groove boards
- Three 2x4 back rails
- 1x4 top trim
- A 1x4 cedar cap
- 304 stainless-steel ring-shank nails
That is more useful than “premium cedar panel,” but it does not answer every question. Nominal dimensions are not necessarily actual measured dimensions, and the supplied evidence does not identify one universally superior cedar species, grade, or board thickness.
For every component, request:
- Wood species
- Grade
- Nominal dimensions
- Actual dimensions
- Treatment status
- Moisture or conditioning information, if available
- Intended exterior or ground-contact use
- Finish status
- Product and workmanship warranty terms
Retail category labels can also be ambiguous. “Cedar” may describe a material category, product family, or color. The individual product specification—not a search filter, photograph, or page heading—should control.
Quote-audit table
| Field | Quote A | Quote B | Questions to resolve |
|---|---|---|---|
| Picket species and grade | Is the exact species stated? What natural variations or defects are allowed? | ||
| Board dimensions | Nominal or actual? What are the thickness, width, and length? | ||
| Rail material | Cedar, Douglas fir, treated lumber, steel, or unspecified? | ||
| Post material | Cedar, treated wood, steel, or another system? | ||
| Fastener type | What metal, coating, length, shank, and exterior rating? | ||
| Footing method | Concrete, gravel, sleeve, anchor, dry-set product, or combination? | ||
| Gate frame | Wood frame, steel kit, diagonal brace, or anti-sag system? | ||
| Cap and trim | Included on panels, posts, both, or neither? | ||
| Finish | Unfinished, factory finished, or field applied? How many coats? | ||
| Warranty exclusions | Are checking, warping, color change, movement, posts, and finish covered? |
Do not accept “cedar fence” as a complete material schedule. Boards, rails, posts, and trim can have different species, dimensions, treatment levels, and warranty terms.
Cedar Privacy Fence Cost: Compare Equal Scopes
Cedar-fence prices commonly appear in four incompatible formats:
- A single panel or decorative screen
- A yard-length material package
- Separately priced additions such as gates and posts
- A professionally installed project estimate
A material-package price should not be compared directly with an installed contractor quote. Two panel prices are also not comparable if one listing omits the dimensions or intended use.
The evidence supplied for this article does not provide reliable retrieval dates for the captured retail prices below. Treat them as historical listing snapshots, not current offers. Recheck the live listing, local availability, taxes, delivery, and written scope before budgeting.
Individual panels and screens
A made-to-order tongue-and-groove cedar panel was captured at $219.99, with a stated production lead time of one to two weeks. Its dimensions were not clearly disclosed in the supplied page text, so the listing cannot support a reliable price per square foot or linear foot. The seller’s lead time, price, and availability may change.
A Fairfax, Virginia, retail snapshot displayed a 3.5-by-8-foot Western Red Cedar privacy panel kit at $135.61 and a 5-by-3.2-foot cedar privacy screen at $94.99. Prices, ratings, availability, and result counts are location- and time-sensitive, and a live category page may no longer reproduce the snapshot. Review the Fairfax cedar-panel category listing.
A screen intended to hide bins or equipment is not interchangeable with a boundary fence panel. Compare height, width, structural use, mounting method, species, board thickness, framing, and hardware.
Yard-length material packages
The captured 100-foot, six-foot-tall package was displayed at $2,114.66, equivalent to approximately $21.15 per advertised foot. It combined cedar pickets, Douglas fir rails, and treated posts; it was not an installed all-cedar fence.
The captured 200-foot, six-foot-tall package was displayed at $4,370.92, or approximately $21.85 per advertised foot. The same page listed extra fencing at $17.97 per foot, an additional four-foot gate at $200.55, and extra corner or end posts at $26.74 each.
The supplied package pages do not establish inclusion of every fastener, concrete, delivery charge, tax, permit, finish, demolition task, grading expense, disposal fee, or installation service. The 100-foot listing also does not establish gate inclusion. “Complete” is a product description, not proof that the package contains everything required for a particular property.
Installed project estimates
A Portland and Vancouver-area contractor reports $60 to $120 per linear foot for installed wood privacy fencing and $7,000 to $17,000 for cedar privacy-fence projects. The company does not define one standard length or scope for those totals, so they are regional commercial estimates rather than national benchmarks. See the contractor’s regional estimates.
Do not average those figures with retail material prices. Contractor pricing may include labor, equipment, footing work, business overhead, project management, cleanup, and warranty obligations that a material package does not.
Total-budget worksheet
| Budget item | Quantity or assumption | Unit price | Extended cost |
|---|---|---|---|
| Total layout length | |||
| Fence height and style | |||
| Line, corner, end, and gate posts | |||
| Rails or framing | |||
| Boards or pickets | |||
| Extra boards required for overlap | |||
| Caps and trim | |||
| Fasteners and brackets | |||
| Footing materials | |||
| Gates | |||
| Hinges, latches, and anti-sag hardware | |||
| Finish and application supplies | |||
| Waste and cut allowance | |||
| Delivery or freight | |||
| Existing-fence demolition | |||
| Disposal | |||
| Permit or review fees | |||
| Taxes | |||
| Labor | |||
| Difficult access | |||
| Rock excavation | |||
| Grading or slope work | |||
| Contingency |
Record the date of every quote, service area, fence height, style, board dimensions, post system, number of gates, finish scope, and exclusions. Without those fields, a per-foot number can conceal more than it reveals.
Plan the Line Before Buying Materials
A fence built in the wrong place is not corrected by better cedar. Complete the legal, site, and layout work before ordering panels or authorizing excavation.
Preconstruction sequence
- Define the purpose. Identify the views to block, areas needing airflow, gate access, preferred appearance, and which sides need a finished face.
- Locate the legal boundary. Use a current survey or qualified local professional rather than relying on an old fence, landscaping edge, informal marker, or recollection.
- Review setbacks and easements. Ask the relevant local authority or qualified professional how they affect the proposed line.
- Check municipal and HOA requirements. Confirm height, location, materials, finished-side rules, corner visibility, and approval procedures.
- Determine permit requirements. Pool barriers, retaining conditions, corner lots, gates, and unusually tall fences may be governed separately.
- Plan gates. Establish the clear opening, swing direction, latch location, grade clearance, and required post support.
- Request utility marking before excavation. In the United States, the cited retailer guide directs builders to call 811 before digging; elsewhere, use the applicable utility-location service. Confirm the current procedure through the official service for your jurisdiction. Review the planning and pre-dig guidance.
- Map the site. Mark corners, ends, gate openings, grade changes, obstructions, utility conflicts, and restricted equipment access.
- Only then calculate materials.
Height limits, corner sight restrictions, pool-barrier rules, setbacks, gates, and materials may be governed by different local provisions. Approval under one requirement should not be assumed to satisfy all others.
Gate placement deserves its own plan
A narrow gate may serve a walkway but block a mower, trailer, or future landscaping equipment.
Identify:
- Required clear opening
- Gate leaf width and number
- Swing direction
- Ground clearance through the full swing
- Latch access
- Equipment turning room
- Snow, mulch, or vegetation interference
- Gate-post and frame requirements
Gate posts experience repeated moving loads. Their design should be specified separately rather than assumed to match ordinary line posts.
Establish the bay layout
Retailer and contractor guides commonly use 6 to 8 feet on center as a planning range, but not as a universal specification. Actual spacing depends on panel width, fence height, rails, post material, soil, frost, slope, wind exposure, and gate loads.
Preassembled panels can reduce field assembly and provide a consistent factory layout. They are easiest to use where the grade is reasonably uniform and planned post spacing matches the panel width.
Component-built fencing requires more field work but is generally easier to adapt to:
- Irregular bay widths
- Corners that do not divide evenly
- Changing grades
- Obstacles
- Custom board overlap
- Gate transitions
- Individual-board repairs
On slopes, a stepped fence keeps each section level while changing elevation between sections. That can create triangular openings below some sections unless the bottom is trimmed or otherwise resolved. A racked fence follows the grade more continuously. Contractor guidance describes both methods, but not every rigid panel can accommodate racking. See the cited discussion of post layout and slope methods.
Stop-work checklist
Do not order final quantities, dig, or permit construction to begin while any of these remain unresolved:
- The legal boundary is uncertain
- Utility marks are missing, expired, or unclear
- Permit or HOA status is unknown
- An easement has not been identified or interpreted
- Gate width or swing has not been confirmed
- The selected panel system cannot accommodate the slope
- A tall, highly solid, or exposed design has not received appropriate local review
- The quote assumes a footing design without addressing site conditions or product instructions
The cited planning sources are retail and contractor guidance, not local legal authorities. Final requirements must come from the governing jurisdiction, utility-location service, product manufacturer, and qualified site professionals.
Posts, Drainage, Framing, and Fasteners Determine the Build
Many visible fence problems begin in less visible parts of the system. Leaning posts, bowed boards, stained faces, and sagging gates can originate in framing, footing, connection, or water-management decisions rather than in the cedar face itself.
There is no universal post depth
Examples in the supplied DIY and commercial guidance range from about 24 inches to more than 42 inches. Those numbers reflect different regions, soils, fences, frost conditions, and personal methods. They should not be blended into an average or treated as a specification.
Post-hole depth and diameter must be reconciled with:
- Local code and frost conditions
- Soil and drainage
- Fence height and solidity
- Wind exposure
- Post material and length
- Gate loads
- Footing-product instructions
- The structural design
The same applies to post spacing. A 6-to-8-foot range can help with preliminary estimating, but panel width, rail capacity, board orientation, terrain, and exposure may require a different layout.
Footing guidance conflicts
The supplied guides describe several approaches:
- Posts embedded in wet concrete
- Gravel below a concrete footing
- Dry gravel-and-cement mixtures
- Ground-line sleeves or barriers
- Concrete focused on end and gate posts
- Steel-post or anchored systems
The evidence does not establish one method as universally best. One Midwest contractor guide, for example, describes holes commonly 36 to 42 inches deep in its region and recommends a dry-set mixture for cedar posts, while also directing readers to check local requirements. See the contractor’s regional footing guidance.
Choose the footing as a complete system. Reconcile it with local requirements, frost movement, soil, drainage, post material, wind exposure, and the instructions for the concrete, anchor, sleeve, or footing product.
Manage water at every transition
Common water-management details described across the supplied guides include:
- Drainage material below a post where the selected system calls for it
- Concrete or surrounding grade shaped to shed water
- Ground-line protection where specified
- Clearance between untreated boards and soil
- Caps that reduce direct water entry at post tops
- Grade that does not trap runoff or irrigation against the fence
- Gate clearance that avoids continuous soil contact
These details address different exposure points. A cap does not correct standing water at the footing, and drainage below a post does not compensate for untreated boards buried in damp soil.
Basic frame sequence
A practical workflow is:
- Establish the fence line and post locations.
- Set corner, end, and gate posts as designed.
- Align and plumb the posts.
- Brace them for the specified setting or curing period.
- Install rails, brackets, or horizontal framing.
- Add intermediate support where board span and orientation require it.
- Attach boards while checking spacing or overlap.
- Install trim and caps.
- Build, hang, and adjust gates.
- Apply finish if included in the selected system.
This is a workflow, not an engineering specification. Horizontal boards deserve particular attention because their long visual lines expose misalignment and can make bowing more noticeable. A center attachment point may help, but the appropriate support arrangement remains site- and material-specific.
Choose fasteners by connection
Several supplied guides recommend corrosion-resistant exterior hardware for cedar. The cited tongue-and-groove panel and horizontal DIY project use stainless-steel ring-shank nails, with the DIY author recommending them to reduce rust and dark staining.
That does not make one nail suitable for every connection.
Confirm:
- Exterior-use rating
- Compatibility with cedar, treated framing, and connectors
- Nail or screw length
- Shank or thread design
- Head style
- Withdrawal resistance
- Board thickness
- Splitting risk near board edges
- Compatibility with brackets and gate hardware
Do not assume every galvanized product is interchangeable or that all galvanized fasteners produce the same result. Obtain the hardware manufacturer’s compatibility guidance for the specific wood, treatment, connector, and application.
Treat the gate as a separate structure
A dependable gate generally needs:
- Gate posts selected for the moving load
- A square frame, often using 2x4 members in the cited wood-gate examples
- Diagonal bracing, a steel frame kit, or anti-sag hardware
- Exterior-rated connections
- Hinges sized for the gate’s weight and width
- A reliably positioned latch
- Clearance for grade, mulch, and seasonal movement
Build and square the supporting structure before using pickets to match the fence face.
Construction hold points
Pause and inspect before hiding or loading each stage:
- After post placement: line, spacing, plumb, elevation, and gate opening
- Before completing footings: depth, drainage, and footing method
- Before adding rails: required set or cure conditions
- After rails: level, alignment, connection security, and rail count
- During boarding: overlap, spacing, ground clearance, and fastener placement
- Before final gate fastening: frame square, reveal, swing clearance, and hinge alignment
- At completion: latch operation, caps, exposed untreated wood, cleanup, and drainage at grade
Expect Cedar to Move and Change Appearance
Cedar is a natural material. Boards can vary in color, grain, knot pattern, and texture, even within one order. Buyers should agree in writing on the species and grade rather than expecting every board to resemble a product photograph.
Wood movement can take several forms:
- Graying: The exposed surface changes toward a weathered gray.
The cited panel seller treats natural variation, expansion, contraction, checking, splitting, warping, and surface movement as expected wood behavior rather than product failure. Warranty and return terms should therefore be reviewed before purchase.
Design can manage movement, not eliminate it
In a side-by-side layout, contraction can expose a direct opening between boards. Board-on-board construction places another board behind or over that joint. Tongue-and-groove edges are intended to maintain a more continuous visual plane.
Neither method guarantees permanent coverage. Insufficient overlap, severe warping, unstable framing, loose fasteners, poor installation, or moving terrain can still create sightlines.
Different details address different problems:
- Overlap helps conceal contraction gaps
- Intermediate support helps restrain long boards
- Compatible fasteners hold boards while limiting avoidable corrosion problems
- Drainage reduces prolonged wet exposure
- Post caps reduce direct water entry at post tops
- Gate bracing addresses sag and racking
- Stable posts preserve overall alignment
No single detail establishes a guaranteed service life.
Unfinished versus finished cedar
Leaving cedar unfinished is an appearance choice. It allows the surface color to weather, but it does not promise that the fence will never need cleaning, inspection, adjustment, or board replacement.
Stain or sealer can be used to manage appearance and surface exposure. The supplied retail, contractor, and DIY guidance conflicts on whether finishing is optional or necessary and how often it should be renewed. Those sources do not use consistent assumptions about climate, preparation, product chemistry, or exposure. Lowe’s, for example, presents wood as customizable and repairable while also describing it as requiring more recurring finish maintenance than vinyl. Review the retailer’s wood-versus-vinyl comparison.
Instead of adopting a universal calendar, follow the finish manufacturer’s instructions for:
- Surface preparation
- Wood moisture condition
- Temperature and weather window
- Compatibility with existing coatings
- Number of coats
- Drying time
- Treatment of cut ends
- Inspection and recoating triggers
A finish can change appearance and exposure, but it cannot guarantee that wood will not check, split, cup, or warp.
Annual inspection list
Inspect the fence regularly and after site conditions have visibly changed:
- Leaning or heaving posts
- Standing water or soil buildup at grade
- Loose, backed-out, or corroded fasteners
- Opening sightlines or lost overlap
- Warped, cupped, checked, or split boards
- Soft or visibly damaged wood
- Missing or damaged post caps
- Rails pulling away from posts
- Gate sag or frame distortion
- Hinge movement
- Latch misalignment
- Finish fading, peeling, or uneven wear
- Vegetation or irrigation holding moisture against the fence
Photographs can help distinguish gradual movement from a recent change.
Cedar, Treated Wood, or Vinyl: Choose by Priorities
There is no universal winner among cedar, pressure-treated wood, and vinyl. The best fit depends on appearance, maintenance tolerance, structural design, repair preferences, local exposure, and equal-scope local pricing.
| Priority | Cedar | Mixed cedar and treated framing | Vinyl |
|---|---|---|---|
| Natural wood appearance | Strong fit | Strong visible fit when cedar is the face | Manufactured rather than natural wood |
| On-site cutting and customization | Generally flexible | Flexible, with material-specific precautions | More dependent on the system and manufacturer |
| Finish choices | Can weather naturally or be finished | Cedar face and treated components may have different requirements | Usually supplied in a manufactured color |
| Individual-part repair | Individual boards are generally replaceable | Cedar face boards are generally replaceable | May require system-specific parts or sections |
| Initial expense | Market- and design-dependent | Depends on component allocation | Market- and system-dependent |
| Recurring finish upkeep | A consideration | Applies to exposed wood components | Commonly promoted as lower-maintenance |
| Visible weathering | Color and surface change should be expected | Cedar face still weathers | Does not weather like natural wood |
| Structural material choice | Can be all cedar but need not be | Explicitly combines materials by function | Uses a manufactured post, rail, and panel system |
Cedar’s practical appeal is its natural appearance, finish flexibility, and ability to be cut or adapted on site. Individual damaged boards can generally be replaced without removing an entire run. Commercial sources also promote cedar’s resistance and longevity, but the supplied evidence does not independently establish a universal lifespan or prove that cedar will outperform every alternative in every climate.
The decision is therefore not always “all cedar” versus “all treated wood.” It can be a component-by-component choice involving cedar facing, treated rails or posts, or steel structural elements.
Vinyl is commonly promoted for lower routine finish maintenance. Wood is commonly promoted for its appearance, modification options, and individual-board repairability. Commercial comparisons disagree about long-term value because they use different climates, installation prices, maintenance schedules, and service-life assumptions.
Published cedar and wood lifespan estimates vary too widely to function as promises. Species, grade, dimensions, post system, drainage, installation, exposure, maintenance, and the definition of end-of-service all affect the result. One Southern Wisconsin contractor, for example, frames its comparison around local snow, moisture, storms, and freeze-thaw movement rather than a universal climate. See the climate-specific Wisconsin comparison.
Reader-fit matrix
- Choose cedar when natural wood appearance, finish choice, custom dimensions, and individual-board repair matter more than minimizing maintenance.
- Consider cedar facing with treated or steel structural components when you accept component-specific materials and want to separate appearance from the post system.
- Investigate a broader treated-wood system when you are comfortable with its appearance, treatment, fastening, and finishing requirements.
- Investigate vinyl when reducing recurring finish maintenance is the leading priority and a suitable system is available for the site, style, and grade changes.
For a lifecycle comparison, obtain local quotes using the same:
- Layout length and height
- Privacy style
- Number and width of gates
- Demolition and disposal scope
- Post and footing system
- Slope treatment
- Finish scope
- Warranty terms
- Maintenance assumptions
- Evaluation period
Without equal assumptions, a long-term-value comparison is mainly a comparison of sales claims.
Use a Package and Quote Checklist Before You Buy
A package can be convenient without being complete for your property. The captured 100-foot and 200-foot packages identify important lumber quantities, but their supplied listings do not establish inclusion of every fastener, footing material, charge, service, or installation task.
Package-completeness checklist
Confirm all of the following in writing:
- [ ] Advertised fence length and finished height
- [ ] Board layout and privacy style
- [ ] Board species and grade
- [ ] Nominal and actual board dimensions
- [ ] Board quantity
- [ ] Extra quantity required for overlap
- [ ] Waste and cut allowance
- [ ] Line-, corner-, end-, and gate-post counts
- [ ] Post material and dimensions
- [ ] Rail count, material, and dimensions
- [ ] Caps and trim
- [ ] Nails, screws, brackets, and connectors
- [ ] Concrete, gravel, sleeves, anchors, or other footing materials
- [ ] Gate leaves or gate-building materials
- [ ] Hinges, latches, handles, and anti-sag hardware
- [ ] Finish and application materials
- [ ] Delivery and unloading
- [ ] Taxes
- [ ] Permit handling and fees
- [ ] Demolition and disposal
- [ ] Installation labor
- [ ] Cleanup and grading restoration
Require a material schedule that identifies the species and grade of pickets, rails, and posts. If the seller cannot state what the rails and posts are made from, “cedar privacy fence” remains an incomplete specification.
Questions for a contractor
Ask the bidder to state:
- Post dimensions and material
- Planned post spacing
- Footing method
- Planned depth and how it relates to local requirements
- Number, dimensions, and material of rails
- Board layout and overlap
- Fastener metal, type, and exterior rating
- Gate-post and gate-frame design
- Hinge, latch, and anti-sag hardware
- Finish preparation, product, coats, and exclusions
- Cleanup, grading repair, and disposal
- Product and workmanship warranty exclusions
Then ask how the design addresses:
- Board contraction and expansion
- Long horizontal-board support
- Drainage at grade
- Post-top exposure
- Untreated wood near soil
- Slope transitions
- Wind exposure
- Gate sag
- Future board replacement
Request separate pricing for gates, demolition, difficult access, rock excavation, permit handling, delivery, finishing, and disposal. Separate line items make scope changes easier to evaluate and reduce the risk of mistaking an allowance for a guaranteed price.
Inspect at pickup or delivery
Before accepting or installing materials:
- Count boards, rails, posts, caps, and hardware
- Measure representative components
- Check species and grade documentation
- Inspect board straightness
- Look for visible moisture damage
- Identify major splits or severe checking
- Check milled edges and tongue-and-groove fit where applicable
- Confirm gate hardware and fasteners
- Compare delivered materials with the written order
- Photograph defects and shortages
Review inspection, return, exchange, warranty, and natural-movement terms before delivery. The cited made-to-order seller states that wood sales are final and requires inspection at pickup or delivery.
Red flags
Pause before purchasing or signing if you see:
- Undefined cedar species
- Unspecified post or rail material
- A “complete” price without an inclusions list
- Nominal dimensions presented as verified actual dimensions
- One post depth prescribed for every site
- No utility-marking or permit plan
- No strategy for slope or grade changes
- No gate-frame description
- Unsupported lifetime or permanent-privacy guarantees
- Natural movement disclosed only after the sale
- A tall, solid fence proposed without considering local exposure
- A quote that cannot separate materials, labor, gates, demolition, and extras
Cedar Privacy Fence FAQ
How much does a cedar privacy fence cost per linear foot?
There is no defensible single national price. One captured 100-foot material package was displayed at $2,114.66, or approximately $21.15 per advertised foot, but it combined cedar pickets with Douglas fir rails and treated posts and did not establish a complete installed scope. See the package price and listed composition.
A captured 200-foot package was displayed at $4,370.92, or approximately $21.85 per advertised foot, with the same mixed-material structure. Its listing did not establish inclusion of installation, concrete, all fasteners, taxes, or permits. See the 200-foot package listing.
A Portland and Vancouver-area installer reports $60 to $120 per linear foot for installed wood privacy fencing, but that is a regional commercial estimate rather than a national benchmark. Compare local quotes using the same height, style, post system, gates, demolition, finish, permits, delivery, and site work. The evidence pack does not provide exact capture dates for these prices, so verify current figures directly.
Which cedar fence style provides the most lasting privacy?
Board-on-board and tongue-and-groove designs are intended to maintain stronger sightline coverage as boards move. Board-on-board uses overlap to conceal joints, while tongue-and-groove boards interlock. A side-by-side fence can provide strong initial screening but may reveal openings as boards contract.
Shadowbox construction allows more airflow and some angled visibility. No layout guarantees permanent full privacy because warping, shrinkage, insufficient overlap, terrain, and installation quality can change sightlines.
Does a cedar privacy fence need to be stained or sealed?
Not as a universal rule established by the supplied evidence. Cedar can be left unfinished to weather and change color, or it can be stained or sealed to manage appearance and exposure. Retail, contractor, and DIY guidance disagrees about whether finishing is optional or necessary and about renewal intervals.
Choose according to the desired appearance, local exposure, warranty, and maintenance tolerance. Follow the finish manufacturer’s preparation, moisture, weather, application, and recoating instructions rather than adopting a universal calendar.
How deep and how far apart should cedar fence posts be?
There is no one correct depth or spacing for every cedar fence. The supplied project and contractor examples range from about 24 inches to more than 42 inches deep, while several guides use 6 to 8 feet on center as a preliminary spacing range. These are examples, not universal specifications.
Actual dimensions must reflect local requirements, frost conditions, soil, drainage, fence height, panel or rail design, wind exposure, gate loads, post material, and footing-product instructions. Gate, corner, and end posts may also require different treatment from ordinary line posts.
What fasteners should be used with cedar fence boards?
Use exterior-rated, corrosion-resistant fasteners confirmed as compatible with the cedar, any treated framing, and the connection hardware. Stainless-steel ring-shank nails appear in both the cited commercial panel specification and horizontal DIY project; the DIY author recommends them to reduce rust and dark staining.
Do not assume one fastener suits boards, rails, brackets, hinges, and gates. Confirm the metal, length, shank or thread, head style, withdrawal requirements, board thickness, treatment compatibility, and structural demands of each connection.
Make the Final Choice in the Right Order
Choose the privacy layout first. Then verify the material used for every component and compare quotes with identical inclusions. Let local frost, soil, drainage, wind, code requirements, manufacturer instructions, and site conditions determine the structural details.
Cedar’s natural appearance and customization are meaningful advantages. Lasting privacy, however, depends on adequate overlap, stable framing, drainage, compatible fasteners, gate support, inspection, and realistic expectations about wood movement—not on the cedar label alone.