
Plan a Modern Fence That Stays Private, Straight, and Practical
One treated-lumber project developed gaps of about 1/4 to 1/2 inch after edge-to-edge boards dried. Overlap and opaque backing can preserve screening.
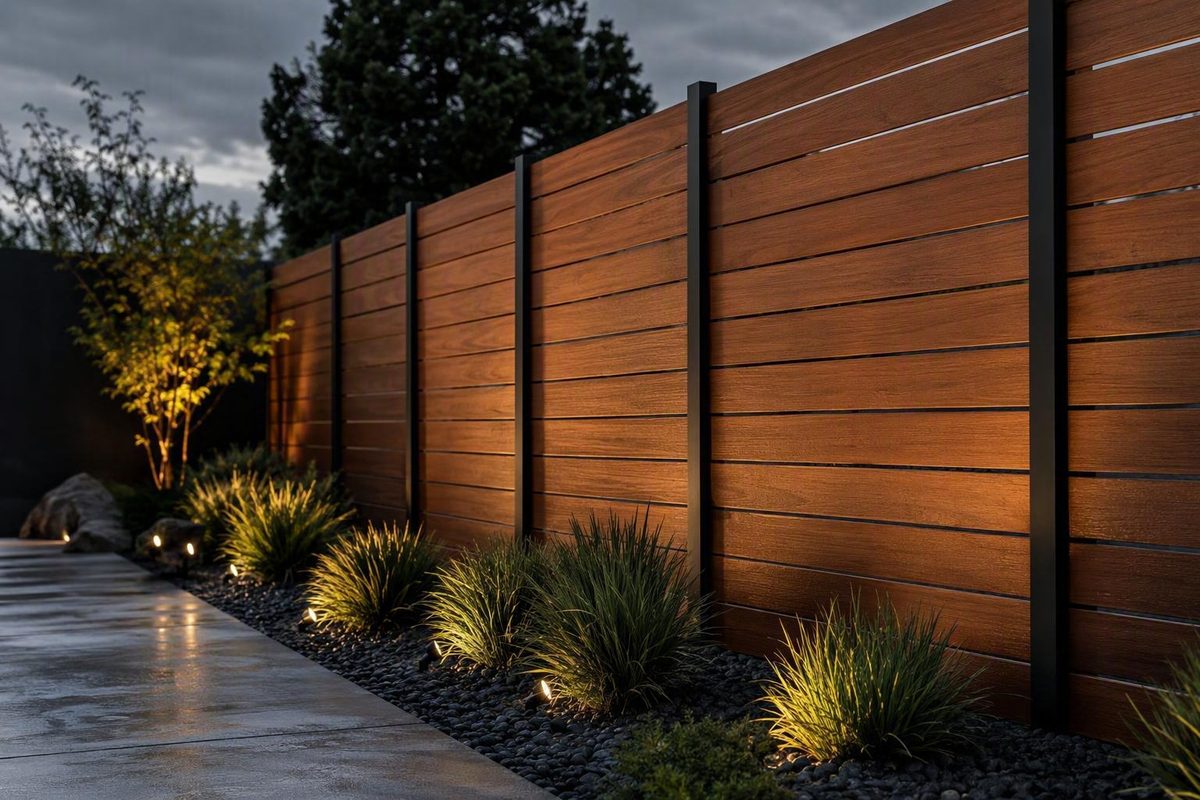
A horizontal privacy fence is more than a row of boards turned sideways. Privacy, alignment, durability, and cost depend on the complete assembly: infill material, board layout, unsupported span, posts, footings, fasteners, terrain, gates, and local requirements.
Two fences with the same horizontal appearance may therefore perform very differently. One may use overlapping cedar boards on a framed structure; another may use composite boards captured in steel channels; a third may use spaced slats over an opaque backing. The right choice follows from the site and required level of screening—not from board orientation alone.
The available examples and commercial guides are useful for comparison and planning, but they do not establish universal spans, footing dimensions, wind capacity, service life, or code compliance. Treat every cited project dimension as project-specific and every manufacturer statement as system-specific. Current product instructions, local requirements, and qualified site review must control the finished design.
A practical decision path is:
- Decide whether you need complete visual screening or partial screening with airflow.
- Select a material-specific assembly rather than choosing by appearance alone.
- verify the boundary, utilities, terrain, approvals, and mounting conditions.
- Match spans, posts, supports, and connections to the selected product and site.
- Design gates, corners, slopes, and board joints before setting posts.
- Compare complete project scopes instead of headline panel or per-foot prices.
What Makes a Horizontal Fence Truly Private?
A horizontal fence is an assembly whose boards, slats, or panels run parallel to the ground between posts or within a supporting frame. “Horizontal” describes orientation; it does not automatically mean full or partial privacy.
Visual privacy depends on whether the assembly closes direct sight lines.
- Tightly butted boards: Boards meet edge to edge. They may initially block views, but installation tolerances and later material movement can create openings.
- Overlapping or board-on-board courses: A second board covers the gap between boards in the first layer. The overlap can preserve screening as individual boards move.
- Interlocking or channel-mounted boards: Shaped boards engage one another or stack inside post channels. Privacy depends on the profile, engagement, perimeter details, and correct installation.
- Spaced slats: Deliberate openings admit light and airflow. They provide partial screening unless an opaque backing or offset second layer blocks direct sight lines.
Tightly fitted, overlapping, interlocking, and opaque-backed layouts can all provide complete visual screening when installed as designed. Spaced slats cannot be assumed to do so. A narrow gap may look private when viewed straight on yet expose the yard from an angle, at close range, or where the grade changes.
One cedar project shows how overlap can close sight lines. It used 5.5-inch pickets, 4-inch gaps in the first layer, and a second layer positioned to overlap each opening by 0.75 inch on both sides. Those dimensions describe that project—not a standard for other lumber, spans, heights, or wind conditions. Maker Gray documents the project-specific board-on-board assembly.
Butting wood tightly is less dependable when the boards contain substantial moisture. In one treated-lumber project, boards installed edge to edge later developed gaps of approximately 1/4 to 1/2 inch after drying. The owners said the openings did not create a clear view through their particular fence, but the result still shows why initial fit does not guarantee lasting screening. The Instructables project records the drying gaps.
An opaque exterior-suitable backing offers another route to privacy. It can preserve the appearance of spaced slats while blocking direct views. Because it changes the assembly, however, its attachment, drainage, reverse-side appearance, and compatibility with the slats and posts should be resolved before construction.
Visual screening is also distinct from other functions:
- Sound reduction: Blocking a view does not establish acoustic performance.
- Security: A visually solid assembly may still be climbable or vulnerable to forced entry.
- Wind resistance: A solid screen and an open slatted fence interact with wind differently, but appearance alone establishes neither one’s capacity.
- Pool-barrier compliance: Height, openings, gates, latches, and climbability may be regulated independently of privacy.
- Containment: A gap acceptable in a visual screen may be unsuitable for a child or animal enclosure.
The selection rule is straightforward: choose overlap or an interlocking profile when screening is the priority. Choose measured gaps when airflow and light matter more. If you want a slatted appearance without open sight lines, investigate a compatible opaque backing or offset multilayer design.
Horizontal Versus Vertical: The Tradeoffs That Matter
Neither orientation is inherently stronger, more durable, or more private. A well-supported horizontal assembly can remain aligned; a poorly framed one can sag. A vertical fence can be fully private or deliberately open. Performance comes from the design as a whole.
Horizontal installation commonly requires close control of the post plane and course elevations. Small placement errors become conspicuous when long lines cross multiple bays. Courses must remain level or follow an intentional stepped pattern, spacing must be consistent, and every board joint needs support. Field-built wood fences may also require sorting and cutting to manage crowns, irregular boards, or color variation.
Vertical boards are often easier to fit to uneven ground because individual boards can follow the grade while rails provide the supporting structure. A horizontal layout on a slope may instead require:
- Stepping: Level bays descend in increments, changing the top line and potentially creating triangular openings below.
- Racking: The panel follows the grade, but only if its connections and profile are designed to rack.
- Custom infill: Boards or lower trim are fitted to the grade, increasing measurement and cutting.
- Grading: Earthwork simplifies fence geometry but adds cost and may change drainage or retaining conditions.
Open horizontal slats can also create footholds. That does not make every horizontal fence insecure, but height alone should not be treated as proof of climb resistance. Gates, adjacent structures, openings, and the applicable barrier rules all matter. Manufacturer comparisons make similar distinctions, but their conclusions remain limited to the configurations they discuss rather than all horizontal fencing.
Wood moisture management deserves attention in either orientation. Upward-facing edges and horizontal seams are planning concerns where water or debris can remain against unfinished or irregular surfaces. That supports careful detailing and finish selection; it does not establish that every horizontal wood fence will fail or that it has a predictable lifespan.
Many owners associate horizontal lines with contemporary architecture or feel they make a yard appear wider. Those are aesthetic preferences, not measurable structural advantages.
| Decision factor | Horizontal orientation | Vertical orientation |
|---|---|---|
| Desired appearance | Emphasizes long, continuous courses | Emphasizes height and repeated upright boards |
| Privacy layout | Can use overlap, tight-fit, interlocking, backed, or spaced designs | Can use tight-fit, board-on-board, shadowbox, or spaced designs |
| Sloped site | Often needs steps, approved racking, custom infill, or grading | Individual boards are commonly easier to fit to grade |
| Installation precision | Post plane, course elevation, joints, and spacing are highly visible | Rail alignment still matters, but individual cuts can absorb some grade variation |
| Maintenance focus | Inspect long spans, seams, supports, fasteners, and finish | Inspect board bottoms, rails, fasteners, and finish |
| Gate complexity | Courses must align within a rigid moving frame | Framing remains essential, but upright infill may be simpler to match |
| Budget | May involve more fitting, reinforcement, or proprietary parts | Conventional assemblies and prebuilt panels may simplify some projects |
| Best reason to choose | The complete assembly fits the desired appearance and site | The complete assembly fits the desired appearance and site |
Orientation should follow the complete assembly. A horizontal design may be practical for a traditional property, while a vertical one may suit a modern building. Terrain, screening layout, structural support, maintenance, and budget matter more than an architectural label.
Choosing Wood, Composite, Aluminum, PVC, or a Mixed System
Material and orientation are separate decisions. Cedar, treated lumber, composite, PVC or vinyl, aluminum, and galvanized steel do not move, fasten, finish, or span in the same way. Products within one category may also use substantially different profiles and connection systems.
Wood
Wood provides a natural surface, can usually be cut and fitted in the field, and works with tight-fit, overlapping, framed, or spaced layouts. It can be stained, painted, sealed, or left to weather when the selected material and desired appearance permit.
Its variability is part of the planning challenge. Boards may arrive crowned, twisted, or at different moisture levels, and their dimensions can change as they dry. Cedar and treated lumber should therefore be compared by actual grade, dimensions, moisture condition, price, availability, and finish plan—not by assuming one is always superior.
Wood assemblies also need exterior fasteners compatible with the species, preservative treatment, environment, and adjoining materials. Board ends and joints should land on the supports required by the design. Finish preparation and application should follow the coating manufacturer’s instructions rather than a universal calendar.
Composite
Composite boards may stack in post channels, use tongue-and-groove or other interlocking profiles, attach within a metal frame, or function as individual slats. These formats are not interchangeable.
Expansion space, supported span, post spacing, cutting methods, reinforcement, and approved fasteners must come from the current instructions for the selected product. A channel-mounted system may conceal face fasteners and simplify course alignment, but it makes exact post and channel placement more important.
Aluminum and other metals
“Aluminum” or “metal” does not by itself establish rigidity.
The same caution applies to galvanized steel. Coatings, cut edges, connectors, and post construction all affect the assembly. A wind rating, deflection statement, or test result for one proprietary system cannot be extended to unrelated products merely because they use the same broad material.
PVC or vinyl
PVC and vinyl are available as horizontal infill in some framed or proprietary systems. Installation must follow the selected product’s requirements for movement allowance, reinforcement, span, fastening, and replacement. Broad claims about heat behavior, service life, or maintenance are not substitutes for product-specific instructions.
Mixed systems
Mixed systems combine one material’s appearance with another material’s support method—for example, wood in steel channels, composite between metal posts, or infill inside a bolted frame.
One proprietary frame, for example, uses metal posts and U-shaped channels with wood, composite, PVC, aluminum, or other rigid infill; those details apply only to that system. FenceTrac describes its own channel-and-frame configuration.
| Material | Typical assembly method | Main movement concern | Finishing needs | Face-fastener visibility | Replaceability | Questions for the supplier |
|---|---|---|---|---|---|---|
| Cedar | Face-fastened boards, overlap, rails, or framed infill | Drying, swelling, cupping, warping | Stain, sealer, or paint as selected | Usually visible unless hidden by trim or channels | Individual boards may be replaceable | Grade? Moisture condition? Approved fasteners? Supported span? |
| Treated lumber | Face-fastened boards with posts, rails, or braces | Drying shrinkage, checking, distortion | Timing depends on wood and coating | Usually visible | Often individually replaceable | Treatment type? Drying allowance? Fastener compatibility? |
| Composite | Channels, interlocking boards, clips, or frames | Product-specific dimensional movement | Follow manufacturer care instructions | May be concealed | Depends on cap and channel access | Current span chart? Expansion gaps? Reinforcement? Warranty exclusions? |
| Aluminum | Interlocking extrusions, framed slats, or mechanical connections | Profile- and connection-dependent deflection | Factory finish may require approved touch-up | Often concealed or integrated | System-dependent | Profile drawing? Post schedule? Test configuration? Repair parts? |
| PVC or vinyl | Channel-held boards or proprietary panels | Product-specific movement and reinforcement | Follow manufacturer instructions | Often concealed | System-dependent | Reinforcement? Movement allowance? Approved span? |
| Mixed system | Wood or composite within metal posts and channels | Different materials moving at different rates | Depends on infill and frame | Often reduced | Potentially good if boards remain accessible | Drainage? Material compatibility? Tolerances? Replacement procedure? |
Treat seller claims cautiously. Scratch resistance, wind capacity, durability, and other performance statements apply only as far as the documented product, test configuration, installation method, and limitations allow.
Posts, Spans, Supports, and the Real Causes of Sagging
Sagging risk is controlled by the complete structure: material, board thickness and profile, unsupported span, fence height, post rigidity, center supports, rails or channels, fasteners, moisture movement, and exposure. Horizontal orientation creates a span, but it does not guarantee failure.
Long unsupported boards can flex, crown, bow, or loosen at their connections. Wet wood may change shape as it dries. A tall, solid panel may also place different demands on posts and footings than a lower or more open assembly.
Support can take several forms:
- End attachment transfers board loads into posts or frames.
- Center vertical supports provide an intermediate fastening point without necessarily extending into the ground.
- Rear braces or rails restrain boards and help keep courses in plane.
- Side channels capture board ends and may conceal fasteners.
- Top and bottom rails tie a framed panel together.
- Supported joints prevent two board ends from meeting in open space.
In the cedar board-on-board project, posts were spaced approximately 6 feet apart, with horizontal 2-by-4 framing and center vertical attachment points. The treated-lumber project used a rear 2-by-4 at the center of each panel. These details show the builders’ structural intent, not independently tested or universal specifications. The two project-specific support arrangements are documented in the cedar guide and the treated-lumber tutorial.
Spacing of about 6 feet or less recurs in several commercial guides and proprietary systems. That makes it a reasonable question to ask a supplier or contractor, not a universal engineering rule. One aluminum manufacturer specifies 6-foot-on-center posts for its own interlocking, mechanically fastened system and attributes rigidity to the complete profile and connection design. SLEEKFENCE explains that system-specific configuration.
The correct spacing may be shorter or otherwise different when the boards are thinner, the fence is taller, the site is exposed, posts are surface-mounted, gates are heavy, or the selected profile differs from the cited examples. Use current product documentation or obtain qualified design help where the proposed conditions fall outside published details.
Board joints deserve equal attention. Each joint should land on a post, frame member, or other support approved for the assembly so both board ends have reliable attachment. Staggering suitable joints can avoid a continuous line of discontinuities and distribute field-cut tolerances, but the pattern must remain compatible with the framing and movement requirements.
Structural-risk checklist
Refer the support and mounting design to the selected manufacturer, an experienced contractor, the relevant building authority, or a qualified engineer when the project includes:
- A tall, solid privacy fence
- An exposed, coastal, hillside, or high-wind location
- Long unsupported spans
- Heavy, wide, or double gates
- Existing posts that lean, flex, or show deterioration
- Posts attached to a retaining wall
- Fencing on an elevated deck or roof
- Surface-mounted posts and base plates
- Uncertain soil, drainage, or footing conditions
- Unusually heavy infill
- Major grade changes
- Screens, planters, lights, or other added loads
It does not establish the capacity of the anchors, slab, wall, deck framing, or supporting structure. Likewise, a dimension from one DIY project does not establish a suitable post depth, footing diameter, board thickness, or maximum span elsewhere.
Plan the Site Before Selecting the Panel Layout
The site should determine the layout—not the other way around. Before buying boards or fixing post centers:
- Confirm ownership and the property boundary.
- Review recorded easements, setbacks, and access requirements.
- Arrange for underground utilities to be located through the applicable local process.
- Check permits, allowable height, and other local fence rules.
- Obtain HOA or architectural approval where required.
- Identify any applicable barrier, gate, latch, opening, containment, or climb-resistance requirements.
- Assess soil, drainage, frost conditions, wind exposure, terrain, and mounting surfaces.
- Lay out corners, gates, grade transitions, panel widths, and board joints.
Boundary uncertainty should be resolved by a surveyor or other locally appropriate professional rather than by relying on an old fence, landscaping edge, or online parcel map. Permit, excavation, and barrier requirements vary by jurisdiction and project, so obtain them directly from the responsible local authority or service before work begins.
Soil, frost conditions, drainage, fence height, and exposure can affect the support design. The 24-inch holes described in individual DIY projects record only what those builders used; they do not establish adequacy or compliance for another site.
On level ground, establish a straight fence line, consistent post plane, and planned course elevations before excavation. A string line can help control alignment, but it does not determine property ownership or footing capacity. Account for paving and grade changes so the bottom course does not collide with high spots or leave unintended openings at low points.
For a slope, compare the consequences of each option:
- Stepped sections: Level panels descend in increments, changing the top line and potentially increasing bottom openings.
- Racked system: The panel follows the slope, but only if the selected system is designed to rack.
- Custom infill: Boards or lower trim are fitted to the grade, improving control at the cost of additional labor.
- Grading: Earthwork simplifies the fence geometry but may affect drainage, landscaping, and retaining conditions.
Do not assume a surface-mount kit is suitable merely because it includes a base plate or anchors.
Existing-post retrofits need a similar assessment. Confirm ownership, then inspect each post for rot or corrosion, movement, plumb, alignment, spacing, and apparent footing condition. A string line can identify posts that need a corrected mounting plane, but packing out slats cannot repair an unstable foundation. One retrofit tutorial documents those preliminary ownership and condition checks.
Finally, work from actual installed dimensions. Nominal panel names may not equal usable width. Corners consume space, channels have thickness, gates require clearances, and board joints must land on supports. Resolve those facts before setting the first post.
A Practical Installation Sequence for Wood and Panel Systems
The following sequence is planning guidance, not a universal construction specification. Current manufacturer instructions, approved plans, and applicable local requirements control dimensions, anchoring, and fastening.
1. Establish the layout
Confirm boundary and utility information. Mark the fence line, corners, gate openings, post positions, and intentional changes in direction. Measure grade changes across each bay rather than judging the yard by eye.
Prepare a layout drawing with actual post centers, panel widths, board-joint locations, gate clearances, and slope transitions. For kits, use installed dimensions from current drawings rather than the nominal product name.
2. Prepare footings or mounting points
Use the footing or mounting detail approved for the site and selected system. Set posts plumb, aligned, and in the correct rotational position. Where concrete is part of the design, brace posts and follow the concrete product’s instructions before loading them.
Do not plan to correct inaccurate post spacing later by forcing boards into misaligned channels. Horizontal courses make cumulative errors visible.
3. Install the supporting assembly
Add the rails, side channels, center supports, rear braces, or complete panel frames required by the design. Verify that fasteners and connectors are compatible with both the infill and supporting material. Resolve corners, drainage paths, and gate terminations before installing all the boards.
4. Establish the reference course
Choose a deliberate reference elevation. Depending on the assembly, installation may begin at the bottom, top, or another control line. Maintain that reference rather than following every small ground variation.
Install boards using the specified spacer, overlap, or interlocking engagement. A spacer improves consistency but does not determine the correct gap. In an open design, regular spacing supports the intended appearance and airflow; it does not create complete privacy.
5. Support joints and use suitable fasteners
Center every board joint on a post or other approved support. Stagger joints where appropriate for the frame, movement requirements, and appearance. Avoid short offcuts unless the design provides sufficient attachment and clearance.
Use exterior-rated fasteners approved for the material, treatment, coating, and environment. Follow required pilot-hole instructions, edge distances, and fastening patterns rather than copying an unrelated project.
6. Preserve movement and protect vulnerable areas
Maintain the product-specific allowances required at board ends, channels, joints, and perimeter conditions. Protect cuts or penetrations where the material instructions require it. For wood, address exposed cuts, board tops, finish coverage, and details likely to retain debris or moisture.
7. Complete trim, gates, and inspection
Install caps and trim without obstructing movement or drainage required by the system. Hang and adjust gates only after confirming that the hinge post is stable and the frame is square.
Check latch operation, course alignment, clearances, sharp edges, loose connections, and perimeter gaps. Apply a wood finish only when the wood condition and coating instructions permit it; newly treated lumber should not automatically be assumed ready for immediate coating.
A field-built wood fence typically requires sorting, cutting, spacing, fastening, and finishing individual boards. A channel-mounted composite kit may instead use boards dropped into post channels, potentially concealing face screws. That can simplify infill installation while making post position, channel alignment, movement allowance, and component completeness more critical.
Tools and materials checklist
Layout
- Site or survey information
- Tape measure and marking tools
- String line
- Suitable level or layout instrument
- Stakes
- Dimensioned layout drawing
Excavation or anchoring
- Equipment suited to the soil or approved mounting detail
- Spoil-removal containers
- Concrete equipment where required
- Temporary post braces
- Specified anchors and installation tools
Framing and infill
- Posts
- Rails, braces, channels, or frames
- Approved brackets and fasteners
- Clamps and squares
- Cutting and drilling equipment
- Infill boards or panels
- Specified spacers or overlap gauges
- Caps and trim
Finishing
- Approved cleaning or preparation materials
- Selected wood coating, if applicable
- Application tools
- Manufacturer-required cut-end or touch-up products
Work-area protection
- Personal protective equipment appropriate to the tools and materials
- Stable work supports and equipment guards
- Dust-control measures required for the selected cutting or drilling process
- Barriers to keep other people away from active work
Any gap, footing size, fastener count, or attachment pattern taken from a personal project remains an example only. Use the selected system’s current instructions and project-specific requirements for construction.
Gates, Corners, and Kits: Details That Change the Layout
A gate is a moving framed assembly, not an ordinary fence panel with hinges added.
One cedar project used a 2-by-4 gate frame, anti-sag hardware, substantial hinges, exterior fasteners, and a latch. Those are useful component categories, but their dimensions and capacities remain specific to the gate and supporting posts.
Resolve these details during layout:
- Finished opening and gate width
- Gate height and bottom clearance
- Frame and infill weight
- Hinge-post and latch-post requirements
- Hinge type, quantity, position, and adjustment
- Latch direction and accessibility
- Swing direction and conflicts with slopes or paths
- Diagonal brace or anti-sag arrangement
- Alignment with adjacent horizontal courses
- Stops, drop rods, or center hardware for double gates
A gate crossing sloped ground may clear at one point and strike the grade elsewhere in its swing. Raising it can create a bottom opening that undermines privacy or containment, so the conflict should be solved during layout.
Corners also require advance planning. In a channel system, confirm whether the same post can serve as a line, end, or corner post and whether inserts or additional channels are required. Verify finished dimensions rather than assuming a nominal right-angle connection produces the required layout.
Kit-audit checklist
Before setting posts, verify the kit’s:
- Actual installed panel width and height
- Post material, cross-section, and length
- Board count and individual board dimensions
- In-ground or surface-mount configuration
- Bases and anchors
- Side channels
- Top and bottom rails or caps
- Post caps
- Fasteners and brackets
- Line-, end-, and corner-post compatibility
- Gate posts, frame, hinges, latch, and anti-sag parts
- Future-extension method
- Removable end components
- Whether expansion requires replacing an end post or disturbing installed panels
- Delivery and unloading needs
- Required tools
- Concrete, grading, excavation, and preparation exclusions
One listed composite kit described a nominal 6-by-6-foot system with 12 composite boards, two posts, two bases, caps, hardware, and concrete anchors; its boards dropped into channels. The page also used inconsistent descriptions of the post material, so current drawings and specifications should be confirmed in writing. The retailer page shows the listed kit contents and channel arrangement.
Other listings show why nominal and actual dimensions must be distinguished. A panel sold in the six-foot class was listed at an actual width of 69 inches, while matching gates identified hanging posts as separate purchases. The collection also contained inconsistent height descriptions for one gate, reinforcing the need to verify current component schedules. Natures Composites lists the panel dimensions and separate-post qualification.
A phrase such as “everything you need” should not be read literally. It may exclude excavation, in-ground footing materials, tools, permits, delivery access, grading, disposal, finishes, or gate components. Confirm inclusions and exclusions in writing.
Build a Complete Budget Instead of Trusting One Per-Foot Price
The supplied evidence does not support one definitive national price for a horizontal privacy fence. Published figures differ by location, date, material, height, labor scope, terrain, demolition, and included components. A panel-only retail price cannot be compared directly with an installed contractor price.
Use a complete project worksheet:
| Budget line | Quantity basis | Include |
|---|---|---|
| Demolition and disposal | Existing length, posts, concrete, gates | Labor, hauling, recycling or disposal charges |
| Boards or panels | Actual coverage | Waste, cuts, damaged pieces, batch or color matching |
| Posts | Layout count plus gate and corner posts | Different line, end, corner, and gate types |
| Concrete or anchors | Project-specific detail | Mix, bases, anchors, and drilling |
| Rails and reinforcement | Bays and gate frames | Channels, center supports, braces, and brackets |
| Fasteners | Connection schedule | Exterior screws, nails, bolts, clips, and touch-up |
| Gates and hardware | Each opening | Frames, posts, hinges, latches, and anti-sag parts |
| Caps and trim | Posts, panels, and total length | Top caps, end trim, and channel covers |
| Finishes | Surface area and application rate | Preparation, coating, and applicators |
| Tools | Owned, rented, or purchased | Digging, cutting, layout, and finishing equipment |
| Delivery | Supplier quote | Freight, unloading, and long-item charges |
| Permits and approvals | Local requirements | Application and review charges |
| Survey work | Boundary uncertainty | Survey and marking |
| Grading and access | Site conditions | Earthwork, vegetation, rock, and temporary access |
| Labor | Defined scope | Layout, excavation, installation, and cleanup |
Calculate quantities from actual dimensions. Divide the usable run by the installed panel width or post-center dimension, then adjust for corners, gates, terminal posts, and partial bays. A repeatedly installed 69-inch panel produces a different post count from a true 72-inch bay.
Commercial per-foot estimates are useful only as scoped illustrations. A Colorado lumber seller reports cedar material ranges of $15–$35 per linear foot for standard material and $45–$90 per linear foot for premium cedar, plus $10–$30 per linear foot for professional installation. Its methodology is not fully documented, and its geography and commercial role limit transferability. Rocky Mountain Forest Products publishes those estimates.
An Akron contractor reports an installed horizontal wood range of $50–$91 per linear foot. That is a localized commercial estimate rather than a national average and may not reflect another height, grade, footing scope, gate count, or terrain. Stand Strong Fencing of Akron provides the local range.
Seller snapshots also show how components can change the total. In the supplied pages—whose capture dates were not provided—a 6-foot-high by 69-inch-wide semi-private composite panel was listed at $397.95, and a matching gate was listed at $699, with hanging posts sold separately. The Natures Composites collection contains those snapshot prices.
In another supplied seller snapshot with no stated capture date, a composite kit page displayed a range of $698–$846. That is not a current-market benchmark; it simply illustrates why posts, bases, channels, anchors, and other included components must be identified before comparing products. The My Private Patio listing shows that kit price range.
Contractor-quote checklist
Require each quote to identify:
- Exact material, grade, profile, color, and manufacturer
- Actual board, panel, and finished-fence dimensions
- Post material, dimensions, spacing, and finish
- Footing or surface-anchor scope
- Rails, channels, supports, and reinforcement
- Fastener type and visibility
- Number, size, frame, hardware, and swing of gates
- Demolition, concrete removal, hauling, and disposal
- Wood preparation and finish
- Delivery, unloading, and storage
- Grading, vegetation, access, and rock exclusions
- Permit and approval responsibility
- Utility-location responsibility
- Cleanup and restoration
- Warranty scope and exclusions
- Change-order rates for concealed conditions
Date every quote and compare identical scopes. The lowest headline rate may exclude a gate, finish, demolition, delivery, or substantial post work. A higher quote may represent better value when it includes the full assembly and clearly assigns responsibility.
Maintenance and Troubleshooting by Symptom
Maintenance should follow the material and observed condition rather than a promised universal service life.
Wood
Inspect wood for deteriorated finish, exposed cuts, checking, splitting, cupping, ground contact, and debris that remains against the assembly. Look for fastener staining, corrosion, raised heads, loose boards, and movement at joints.
Refinish according to the coating manufacturer’s instructions, local exposure, and observed condition. A fixed interval can be misleading because shaded, damp, sunny, and sheltered elevations weather differently.
Composite, PVC, and aluminum
Follow the selected manufacturer’s instructions for cleaning, movement clearances, touch-up, disassembly, and replacement parts. A cleaner or repair method acceptable for one product may damage another formulation or finish.
Keep product records, color names, batch information, and spare components where practical.
Visible sight lines
Identify the cause before altering the fence:
- Intentional spacing: The fence is functioning as designed; add only a compatible backing or offset layer.
- Wood shrinkage: Assess whether overlap, replacement, or another compatible layer is appropriate.
- Displaced boards: Check supports and fasteners before repositioning them.
- Unsupported joints: Add a suitable support rather than joining loose ends in open space.
- Perimeter gaps: Check channel engagement, grade clearance, corners, and trim.
- Warped boards: Determine whether replacement will restore the intended overlap.
Do not close every gap by forcing boards together. The selected material may require movement clearance.
Bowed or sagging boards
Check the unsupported span, center support, board condition, moisture movement, fastener holding, and suitability of the profile.
If multiple courses bow in the same area, inspect the support plane. A shifted post, displaced brace, or misaligned channel may be the underlying cause.
Uneven courses
Check for:
- Post movement
- Incorrect original reference lines
- Inconsistent spacers
- Channel movement or installation error
- Boards forced into engagement
- Grade changes followed unintentionally
- Uneven board widths or damaged profiles
Trim may conceal a small cosmetic variation, but it should not disguise moving posts or disengaged panels.
Sagging gate
Inspect the frame, diagonal brace or anti-sag system, hinge fasteners, hinge-post movement, ground clearance, latch alignment, and gate weight. Determine whether the frame is out of square or the supporting post has moved.
A gate that repeatedly loses alignment may have a support problem. Adjusting the latch alone does not correct movement in the frame, post, or footing.
When to seek qualified assessment
Stop treating the issue as cosmetic when posts lean, footings appear to move, fasteners repeatedly pull out, panels move substantially, or a surface-mounted base or supporting structure is displaced. Refer the condition to an appropriate contractor, manufacturer, building authority, or engineer based on the assembly and location.
Personal DIY reports remain useful for showing possible behavior—such as treated boards developing drying gaps—but they do not establish long-term performance for every climate, material, or fence.
Frequently Asked Questions
Can a horizontal fence provide complete privacy?
Yes. Complete visual screening is possible with overlapping board-on-board courses, properly fitted interlocking profiles, tightly fitted stable panels, or spaced slats combined with an opaque backing. Corners, gates, bottom clearances, and end conditions must also avoid unintended sight lines.
A fence with visible openings is semi-private even if it obscures most views from one angle. Wood butted tightly while wet may later reveal gaps, so overlap can be more dependable when preserving screening is the main objective. Complete visual privacy still does not establish acoustic performance, security, wind capacity, containment, or barrier compliance.
How far apart should horizontal-fence posts be?
There is no universal spacing. Approximately 6 feet or less appears repeatedly in project guides and proprietary systems, but it is not automatically suitable for every board, height, soil, footing, mounting method, or exposure.
Determine spacing from the current instructions for the selected system or from a project-specific design. Consider board thickness and profile, unsupported span, fence height, intermediate supports, post rigidity, site exposure, footing conditions, and gate loads.
Will horizontal fence boards sag?
They can, but sagging is not inevitable. Risk increases when boards are unsuitable for the span, posts move, joints lack support, fasteners loosen, or moisture changes the material. Shorter supported spans, rigid framing, intermediate supports, supported joints, and suitable connections can reduce movement risk.
Before adding screws to a bowed board, determine whether the problem is the board, span, support plane, post, or fastening method. Replacement or correction of the supporting assembly may be more appropriate.
Can a horizontal privacy fence be installed on a slope?
Often, yes. Options include stepped bays, a system specifically designed to rack, custom-cut infill, or grading. Each changes the top line, bottom openings, privacy, labor, and cost.
Draw the slope treatment before setting posts. Check gate swing, low-point clearance, transitions, and openings beneath panels. A vertical layout may be simpler on some sites, but horizontal fencing is not categorically unsuitable for sloping property.
Can horizontal slats be attached to existing fence posts?
Potentially, but only after confirming that the posts can serve the new assembly. Check ownership, rot or corrosion, movement, plumb, alignment, spacing, and apparent footing condition. Consider the added infill weight and exposure rather than evaluating appearance alone.
Packing can create a straighter mounting plane for sound but slightly misaligned posts. It cannot make decayed, loose, or inadequately supported posts suitable for new work.
Plan the Fence as One System
Begin with the required level of visual screening. Select a material-specific assembly, verify the property and site constraints, and use current product and local guidance to determine its supports. Design slopes, corners, board joints, and gates before setting posts, then compare complete installed scopes rather than headline prices.
A horizontal privacy fence can remain private and visually aligned when its boards, spans, posts, joints, footings, and gates are planned as one system.