
Choose the Right Wood-to-Steel Connection for Your Fence
Measure the post, select approved hardware, dry-fit the full run, use exterior fasteners and check the posts and footings, not only the brackets.
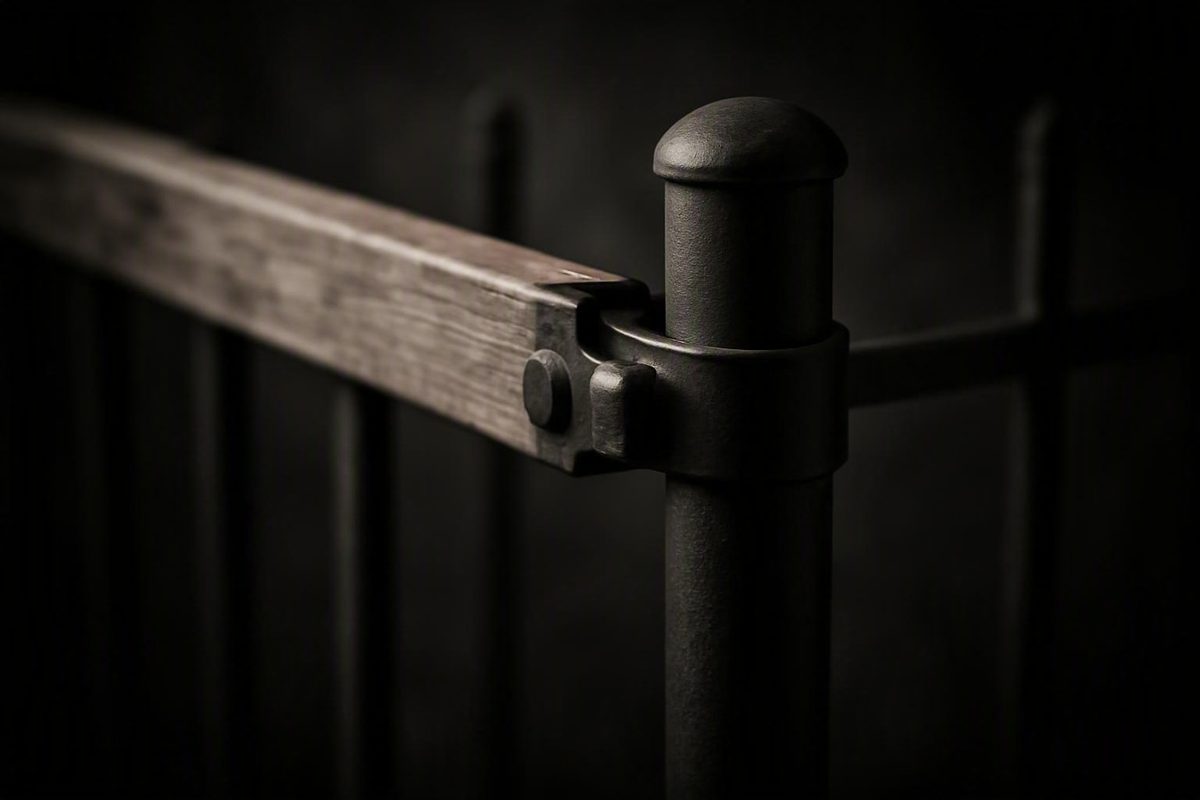
The correct connection depends first on the post profile. Use diameter-matched clamp-on pipe-grip ties or adapter brackets on ordinary round posts. On square hollow-section posts, use an appropriately designed self-drilling screw, through-bolt, bracket, or fabricated cleat. If the posts have integrated rail pockets, treat them as a proprietary system and follow the manufacturer’s current instructions.
Physical fit is only the first test. A bracket can fit around a post without proving that the bracket, fasteners, rail, post, footing, and surrounding soil can carry the completed fence.
Start Here: Match the Attachment Method to the Post
Before buying hardware, expose and inspect a representative post. Identify its shape and connection features:
- Round pipe: Usually paired with a clamp-on tie or adapter matched to the measured outside diameter.
- Square hollow section: May accept suitable metal screws, through-bolts, a purpose-made bracket, or welded tabs or angle cleats.
- Post with formed pockets, slots, or a repeating hole pattern: Likely part of a proprietary wood-fence system. Identify the manufacturer and model before modifying it.
- Channel-shaped or concealed steel post: Use the connection specified for that post rather than treating it as generic square tubing.
Use this decision sequence:
- What is the post profile? Round, square, channel-shaped, or proprietary?
- What are its actual dimensions? Measure the outside diameter or width and, where relevant, establish wall thickness.
- What rail is being attached? Nominal 2x4 lumber has the clearest documented bracket support. A 2x6, hardwood rail, or premade panel may require a different connection.
- Where is the post? Line posts, terminations, corners, slope transitions, and gate openings can require different hardware.
- Does the fence step or follow the grade? Adjustable connections and individually fitted rails offer more flexibility than rigid panels.
- Can you reach the back of the post? Through-bolting generally requires rear access.
- Will the connection support a gate? If so, use a complete gate-rated design rather than an ordinary rail connection.
The following table is a screening tool, not a load specification:
| Connection method | Suitable post profile | Drilling or welding | Rear access | Adjustability | Drainage potential | Principal limitation |
|---|---|---|---|---|---|---|
| Clamp-on bracket or pipe-grip tie | Round pipe of a documented diameter | Usually neither, although the rail may require pre-drilling | No | Good before tightening | Depends on bracket shape | Must match the actual pipe diameter and intended rail |
| Direct self-drilling screws | Usually square or flat-faced steel | Drilling action required | No | Limited after holes are made | Poor unless a designed spacer creates a gap | Depends on steel thickness, fastener engagement, rail, and load |
| Through-bolts with washers | Square or other accessible profiles | Drilling required | Yes | Limited after drilling | Can be improved by the approved connection detail | Thin steel may deform if the joint is not designed correctly |
| Welded tabs or angle cleats | Square, rectangular, or fabricated steel posts | Welding and finish repair required | No | Set during fabrication | Potentially good | Requires competent fabrication and affects the existing coating |
| Integrated rail pockets | Proprietary pocket posts | Normally uses system holes | Usually no | Limited by pocket geometry and hole pattern | Defined by the system | Rail dimensions, screws, spacing, and slope details are brand-specific |
A chain-link conversion requires more than compatible clamps. Inspect the existing posts for corrosion, dents, leaning, and damaged walls. Establish their spacing, embedment, and footing condition where possible. Ordinary line brackets also must not be substituted for the gate-specific posts, hinges, adapters, and framing required at an opening (wood-to-metal bracket and gate guidance).
Obtain product-specific or professional confirmation before proceeding with tall privacy fences, exposed high-wind sites, heavy premade panels, damaged or thin-wall steel, uncertain footings, or gates. If the post or hardware manufacturer cannot establish suitability for the proposed geometry and loading, consult a qualified fence contractor or engineer.
Measure the Post and Select Compatible Hardware
Do not order a “2-inch post bracket” until you know whether that label means nominal pipe size or actual outside diameter. Clean enough of the post to measure the metal rather than dirt, thick paint runs, or attached mesh. Use calipers if available. Otherwise, measure the circumference accurately and divide it by pi. Check more than one point because damaged pipe may be oval.
For a square post, record the outside width and depth. Wall thickness may not be evident from the exterior, so look for a label, purchase record, exposed end, or manufacturer documentation. Do not drill exploratory holes solely to guess at thickness if the post appears damaged or structurally questionable.
For a pocket post, identify the brand through labels, hole spacing, pocket shape, caps, receipts, or photographs. Similar-looking systems may use different rail dimensions and screw schedules.
Common documented round-post options
| Measured outside diameter | Documented adapter availability | Historical Simpson example | Buying note |
|---|---|---|---|
| 1-7/8 in. | Diameter-specific adapters are available | PGT1.5 | Verify current model, rail support, and instructions (archived Simpson guide) |
| 2-3/8 in. | Diameter-specific line, end, and corner options are commonly listed | PGT2-series | Do not substitute a nominal “2-inch” label for the measured diameter |
| 2-7/8 in. | Some adapter ranges include this diameter | No Simpson model established by the cited guide | Verify the exact model, fasteners, and intended rail (current adapter size listing) |
The commercial adapter range cited above is designed principally around nominal 2x4 rails and states that mounting fasteners are not included. That means the installer must obtain hardware suitable for the actual bracket holes, post material, rail thickness, and exterior exposure.
The older Simpson guide identified PGT1.5 for 1-7/8-inch outside-diameter pipe and PGT2-series connectors for 2-3/8-inch outside-diameter pipe. It specified four 1/4-inch by 1-1/2-inch Strong-Drive SDS Heavy-Duty Connector screws per tie, used two to three ties per post, and showed PGT configurations field-bent for 45-degree or 90-degree outside corners. The guide is dated February 2015 and marked as expiring in December 2016, so these details are historical examples rather than current purchasing authority. Verify current models, availability, fasteners, and permitted modifications before use (Simpson’s archived Pipe-Grip project guide).
Nominal 2x4 rails have the clearest support in the available connector literature. Do not assume that a nominal 2x6, nonstandard sawn timber, hardwood rail, or heavy panel can use the same bracket, hole arrangement, or fastener quantity.
Shopping checklist
Assemble the installation package only after confirming compatibility:
- The correct line, end, inside-corner, outside-corner, or adjustable connector
- Matching clamp bolts, U-bolts, washers, anchors, or set screws specified or permitted by the connector maker
- The connector manufacturer’s specified rail fasteners
- Exterior-rated fasteners compatible with the connector coating, post finish, wood treatment, and site exposure
- Tape measure, calipers where practical, level, square, stringline, clamps, and marking tools
- Drill, approved bits or drivers, and any required pre-drilling equipment
- Correctly sized post caps where the system calls for them
- A suitable end-cut treatment for the lumber
- A compatible repair product for drilled, cut, scratched, or welded steel
- Replacement rails or blocking needed to support joints correctly
Keep product specifications separate. A screw schedule for a Pipe-Grip tie does not apply to an integrated pocket post, and a pocket-post schedule does not apply to a generic square post or clamp-on adapter.
Method 1: Attach 2x4 Rails to Round Metal Posts With Clamp-On Brackets
Begin only after the posts are correctly positioned and plumb and the concrete has hardened sufficiently under the selected concrete product’s instructions and site conditions. Installation sequences for steel-post wood fences consistently place rail attachment after the posts have been set and the concrete has cured; they do not establish one universal waiting period (steel-post installation sequence).
1. Establish the rail elevations
Determine how many rails the fence design needs and where they belong. Mark the top-rail elevation at the end posts, then stretch a taut stringline between them. Measure from that reference to establish any middle and bottom rails.
Do not assume that every fence needs the same top, middle, and bottom arrangement. Fence height, board orientation, panel construction, rail size, grade, and system instructions all affect the layout. Keep the bottom rail clear of soil and locations where wet debris is likely to accumulate.
2. Dry-fit the brackets
Place every clamp or adapter at its intended height without attaching the rails. Confirm that:
- The bracket matches the measured outside diameter.
- Its mounting flange faces the correct direction.
- Line brackets are used only on straight runs.
- End, corner, or adjustable fittings are present where required.
- Clamp components seat evenly without rocking or large gaps.
- Rail flanges align with the stringline.
Dry-fitting the complete run exposes mismatched post diameters, reversed brackets, awkward joints, and accumulated elevation errors before holes are drilled in the wood.
3. Cut and position the rails
Cut each rail to fit the actual bay and connection detail. Do not assume all post bays are equal. The rail end should be fully supported by the bracket plate or pocket rather than hanging from a screw near the edge of the wood.
Treat field-cut end grain with a product suitable for the lumber and its exposure. Position the rail against the bracket, clamp it temporarily, and pre-drill where required by the connector instructions or selected fastener. Follow any specified end and edge distances rather than placing holes by appearance alone.
4. Secure the adapter to the post
Clamp, bolt, or otherwise secure the adapter exactly as its current documentation directs. If the adapter is sold without mounting fasteners, obtain hardware approved for the actual post, bracket holes, rail thickness, and exposure rather than improvising from available stock.
Bring the clamp components into even contact. The objective is a seated connection that does not slide—not maximum possible force. A loose clamp can move, while excessive tightening can strip threads or visibly distort a bracket.
5. Attach and align the rail
Install the connector manufacturer’s specified exterior fasteners. Before final tightening, confirm that the rail is:
- Level or set to the intended grade
- Fully seated against its supporting surface
- In line with adjacent rails
- Installed in the orientation required by the rail or fence system
- Not forcing the bracket to twist
- Clear of soil and persistent standing-water locations
Check the run from both sides. A rail may look level at close range while drifting away from the overall fence line.
The historical Simpson sequence described earlier used two to three PGT ties per post, a supplied clamp bolt, and four specified connector screws per tie. Do not transfer that bracket count or fastener schedule to another product.
Method 2: Attach Rails to Square Steel Posts
A square post provides a flat face, but that does not make every attachment method equivalent. The four practical options are direct self-drilling screws, through-bolts with washers, purpose-made brackets, and welded tabs or angle cleats. Selection depends on post-wall thickness, access, rail material, appearance, drainage, replaceability, and project loads.
Direct self-drilling metal screws
This is the simplest-looking connection, but the fastener must be designed to drill and engage the actual steel while securing the wood adequately.
Use a bounded workflow:
- Identify the post material, finish, and wall thickness.
- Select an exterior fastener whose manufacturer permits the intended wood-to-steel assembly.
- Hold or clamp the rail on the stringline.
- Mark the connection points according to the approved detail.
- Drill pilot holes or use the approved self-drilling point as directed.
- Drive the fasteners square to the steel.
- Stop when the connection is seated; do not continue until the threads strip.
- Inspect the finish around the connection and follow the coating manufacturer’s repair requirements.
A retailer-hosted response discusses self-drilling screws passing through approximately 1.6–2.0 mm square hollow steel, but it supplies no tested screw count, spacing, penetration requirement, or connection capacity. Treat that dimension only as the example addressed in the response—not as universal approval for direct fastening (square-post attachment discussion).
Through-bolts and washers
Through-bolting can provide a positive mechanical connection, but it requires access to the rear of the post. The rail and steel must be drilled accurately enough for the bolt to pass through without pulling the pieces out of alignment.
Use bolts, nuts, and washers selected for the post, rail, exterior exposure, and design load. Do not invent a bolt diameter, washer arrangement, or tightening requirement without knowing the post wall and connection demands.
Purpose-made brackets
A bracket can hold the wood away from the post and may simplify rail replacement. Select a bracket designed for a square post or flat steel face rather than reshaping a round-post clamp.
Check whether the bracket supports the side or underside of the rail, how water leaves the connection, and which fasteners are approved for the steel and wood sides. Brackets add visible hardware, and fixed holes may provide less adjustment after installation. Their supporting surfaces can nevertheless make alignment easier than a direct connection.
Welded tabs or angle cleats
A competent fabricator can weld flat tabs or angle cleats to square or rectangular posts, creating a defined mounting face. A properly designed cleat may also hold the timber away from the steel and leave a drainage gap.
Welding is not an incidental fastening step. It requires suitable equipment, competent fabrication, and control of heat and distortion. The practical guidance identifying welded cleats as an option does not provide a welding specification or coating-repair procedure, so obtain those details from the post, coating, and repair-product manufacturers or the project designer (square-post cleat guidance).
| Square-post method | Rear access | Height adjustment | Rail replacement | Appearance | Fabrication needed | Moisture-management potential |
|---|---|---|---|---|---|---|
| Direct self-drilling screws | No | Low after drilling | Straightforward if the steel threads remain sound | Minimal visible hardware | No | Low without a designed gap |
| Through-bolts | Yes | Low after drilling | Usually possible | Nuts may remain visible | No, but accurate drilling is needed | Moderate if the approved detail creates separation |
| Purpose-made brackets | Usually no | Varies by bracket | Often convenient | Bracket may remain visible | No | Moderate to good if the shape drains |
| Welded tabs or cleats | No | Set during fabrication | Usually convenient | Can be compact | Yes | Good when designed with a drainage gap |
Obtain screw diameter, bolt size, pilot-hole size, fastener count, spacing, and connection capacity from the hardware manufacturer or project designer.
Method 3: Use Metal Posts With Integrated Rail Pockets
Its post spacing, pocket orientation, rail dimensions, screw pattern, and slope treatment work together.
Align adjacent pockets while positioning the posts and before the concrete sets. Use a stringline and level to confirm that corresponding pockets face one another at the required elevation.
Wait until the concrete has hardened as required before loading the posts with rails. Cut each rail to the system’s specified length and place the end fully into the pocket.
In one documented example, YardGard specifies three #8 by 1-1/4-inch exterior wood screws at each rail end. Its instructions also require adjacent pockets to be aligned during post setting and call for diagonal cuts at both rail ends where the fence follows sloping ground (YardGard steel-post installation guide).
That screw size and quantity apply only to the documented YardGard assembly. They are not a specification for unrelated pockets, brackets, square posts, or clamp-on adapters.
For another pocket-post brand, use its current requirements for:
- Rail dimensions and grade
- Post spacing
- Pocket and hole locations
- Screw type, size, coating, and quantity
- End, corner, and gate posts
- Rail-end cuts on slopes
- Concrete hardening before loading
- Caps, trim, and finish repair
Do not enlarge holes, flatten pockets, or substitute a thicker rail unless the system manufacturer permits the modification.
Handle Ends, Corners, Slopes, and Gates Separately
Line posts, terminations, corners, grade changes, and gates create different connection geometry and loads. Do not repeat one bracket arrangement blindly throughout the fence.
Straight runs
Place line adapters at consistent elevations. Dry-fit the brackets and rails along the complete run, then sight down the fence and check the stringline before final tightening. Clamp-on adjustability is useful only until the clamps are secured.
Terminations
At the end of a fence, use an end adapter or another approved framing detail that fully supports the rail end. A line bracket intended for a continuing straight run may leave the end poorly seated or put the fasteners in an unsuitable orientation.
Plan short bays near buildings, corners, or openings rather than leaving an unsupported sliver of rail. Do not attach the rail to a building unless the building connection and its moisture detailing have been approved for that purpose.
Inside and outside corners
Use a connector designed for the actual corner geometry. The archived Simpson guide identified PGTIC as its inside-corner example and showed certain PGT configurations field-bent for 45-degree or 90-degree outside corners. Because that guide expired, confirm whether current products still permit those configurations before modifying a connector.
Inside and outside corners are not interchangeable. Rail faces, fastener access, and force directions differ. Lay out both sides of the corner before tightening either run.
Sloping ground
First decide whether the fence will:
- Step: Each bay remains level, with the top changing at the posts.
- Follow the grade: Rails and boards run at an angle along the slope.
Adjustable brackets or individually fitted rails are generally more adaptable than rigid premade panels. Set and verify the posts first, then measure each bay separately. Do not assume a premade panel can rack or fit the available bracket adjustment.
For integrated-pocket systems, follow the manufacturer’s slope detail. The documented YardGard method calls for diagonal cuts at both rail ends so they sit flush in the pockets.
Gates
Ordinary line-rail brackets are not substitutes for gate-rated posts, hinges, adapters, latches, and reinforced framing.
Do not hang a gate from an existing line post merely because a bracket or hinge can be made to fit. Confirm the post section, footing, hinge attachment, gate dimensions, and surrounding framing as a complete system.
Prevent Corrosion, Wood Decay, and Water Traps
Select exterior-rated galvanized or stainless-steel fasteners for compatibility with the connector coating, post finish, preservative-treated lumber, and local exposure.
Do not use drywall screws or uncoated indoor fasteners in exposed fence connections. Practical bracket guidance specifically calls for galvanized or stainless exterior hardware rather than indoor fasteners and also recommends checking the connections periodically for looseness and external loads (exterior fastening and inspection guidance).
Keep wood away from soil
Maintain clearance between the bottom rail and soil, mulch, vegetation, and persistent debris. The required clearance depends on the fence design and site, but the rail should not rest where irrigation or trapped leaves keep it wet.
Treat every field-cut wood end with a product suitable for the wood and exposure. Pay particular attention to end grain inside brackets and pockets, where drying may be slow.
Detail the connection to drain
Depending on the approved connection, drainage may be improved with:
- A shaped bracket that supports the rail without enclosing it
- A fabricated angle cleat
- An approved spacer or standoff
- Open lower edges through which water and debris can leave
- Rail cuts that do not form upward-facing water pockets
Do not add soft, absorbent, or compressible material that can retain water or loosen the joint.
Repair damaged post protection
Inspect drilled holes, cut edges, scratches, and welded areas. Follow the original post-finish and repair-product manufacturers’ instructions for surface preparation, application, drying, and exposure.
Some connector lines offer enhanced galvanized coatings for exterior use and contact with preservative-treated lumber. The archived Simpson guide recommended its enhanced galvanized option for additional outdoor corrosion resistance, but current coating designations and compatibility still need to be confirmed.
Moisture-and-corrosion checklist
Before covering connections with pickets or trim, verify that:
- The bottom rail remains clear of soil and debris.
- Field-cut end grain has been treated.
- Water can leave every bracket, pocket, cleat, and spacer.
- Fasteners are compatible with the connector, post finish, wood treatment, and exposure.
- No drywall screws or uncoated indoor fasteners were used.
- Drilled, scratched, cut, and welded areas were addressed under the applicable finish instructions.
- Post tops are capped where the system requires caps.
- Trim boards do not block drainage or conceal untreated steel edges.
Final Checks, Common Mistakes, and When to Get Help
Before installation:
- Confirm the property boundaries.
- Contact the applicable utility-marking service before digging.
- Ask the relevant local authority which permits, height limits, setbacks, frost-depth rules, and other requirements apply to the site.
- Establish the soil conditions, post embedment, footing design, and expected wind exposure.
- Confirm when the selected concrete product permits the posts to be loaded.
- Identify gate openings and any other site condition requiring a separate design.
YardGard’s instructions expressly direct installers to locate property boundaries and contact the local agency responsible for marking underground utilities before digging. They also state that post-hole dimensions depend on site and soil conditions rather than providing a universal answer (YardGard planning and safety instructions).
Final inspection sequence
Inspect the rail framework before installing all boards or panels:
- Check every post for plumb and visible movement.
- Confirm that each bracket fits its intended post profile and dimension.
- Verify that rail ends are fully seated and supported.
- Compare rail elevations along the stringline.
- Examine terminations, corners, and slope transitions for the correct connector geometry.
- Confirm that every fastener is the specified exterior type.
- Look for stripped threads, missing washers, loose clamps, bent brackets, or deformed post walls.
- Inspect the finish around holes, scratches, cuts, and welds.
- Verify drainage paths and ground clearance.
- Inspect gate openings independently rather than treating them as ordinary line bays.
Common mistakes
Avoid:
- Buying by nominal pipe label instead of measured outside diameter
- Mixing a connector from one system with an unapproved screw from another
- Using a line adapter at a termination, corner, or gate
- Tightening individual brackets before aligning the complete run
- Using indoor or drywall screws outside
- Trapping untreated end grain against wet steel
- Blocking the bottom of a pocket or bracket with sealant
- Ignoring drilled, scratched, cut, or welded finishes
- Assuming a nominal 2x6 can use a connection documented for a 2x4
- Assuming existing chain-link posts can automatically support solid panels
- Hanging a gate from an ordinary line post because the hardware can be made to fit
No universal post spacing, footing depth, cure time, bracket count, or fastener schedule applies to every fence. Those details depend on fence geometry, post section, rail and panel weight, soil, weather, product instructions, and applicable loading conditions.
Inspect the fence periodically and after severe weather. Look for loose clamps, stripped or missing fasteners, corrosion, finish damage, cracked or decayed rails, sagging sections, post movement, and loads from fallen or overhanging branches. Correct the cause rather than repeatedly tightening a connection that continues to move.
Stop and obtain product-specific or professional help if posts are badly corroded, leaning, severely dented, or supported by uncertain footings. Review is also appropriate for tall or heavy privacy panels, exposed high-wind sites, nonstandard 2x6 rails, damaged thin-wall steel, undocumented hardware, and gate loads.
Can I screw a wooden rail directly to a metal fence post?
Confirm the post wall and fastener requirements, clamp the rail in alignment, drill or use the approved self-drilling point as directed, and stop before stripping the steel.
Available practical guidance identifies direct screws as an option but does not establish a universal screw diameter, quantity, spacing, penetration, or capacity. Round posts generally lack a suitable flat bearing face and are more commonly paired with diameter-matched clamps.
What size bracket fits a 2-3/8-inch round fence post?
Choose a bracket explicitly documented for a 2-3/8-inch actual outside diameter, not merely one labeled for “2-inch pipe.” Historical Simpson documentation used PGT2-series connectors for that outside diameter, while current commercial adapter ranges also list diameter-specific 2-3/8-inch options (round-post adapter specifications).
Measure the post before ordering and verify the current bracket model, rail size, fasteners, and instructions. Paint buildup, damage, or confusion between nominal and actual pipe dimensions can otherwise produce a poor fit.
How many brackets or screws do I need for each wooden rail?
There is no universal number. The required quantity depends on the connector system, rail arrangement, fence geometry, post spacing, panel weight, exposure, and manufacturer’s instructions.
Use only the schedule published for the selected assembly. The historical Pipe-Grip and current integrated-pocket examples described above use different fasteners and quantities, and neither should be transferred to unrelated hardware.
Can existing chain-link posts support a solid wood privacy fence?
Possibly, but bracket fit does not establish structural adequacy.
Do not proceed automatically if the posts are leaning, corroded, dented, thin-walled, loosely set, or supported by unknown footings. Heavy panels, tall fences, windy sites, and gate openings warrant confirmation from the post or connector manufacturer, a qualified fence contractor, or an engineer.
How do I attach wooden rails to metal posts on sloping ground?
First decide whether the fence will step in level bays or follow the grade. Set and verify the posts, establish the intended line with string, and measure each bay individually. Adjustable brackets and individually fitted rails are generally easier to adapt than rigid premade panels.
For pocket-post systems, follow the brand’s slope instructions. Some require diagonal cuts at both rail ends so each end sits flush in its pocket. Do not force a square-cut rail into an angled connection or assume a standard bracket can accommodate every slope.
The compact installation rule is simple: identify the post profile, measure it accurately, select hardware approved for that post and rail, align and dry-fit the complete run, use compatible exterior fasteners, protect the joint from trapped water and finish damage, and verify that the posts and footings—not just the brackets—are adequate. Obtain product-specific or professional confirmation before loading questionable existing posts, privacy panels, nonstandard rails, high-wind installations, or gates.