
How to Match a Sliding Gate System to Your Opening, Site, and Budget
Some packages contain only track and wheels, while others combine the gate and automation. Match opening length and finished weight, then check omitted parts.
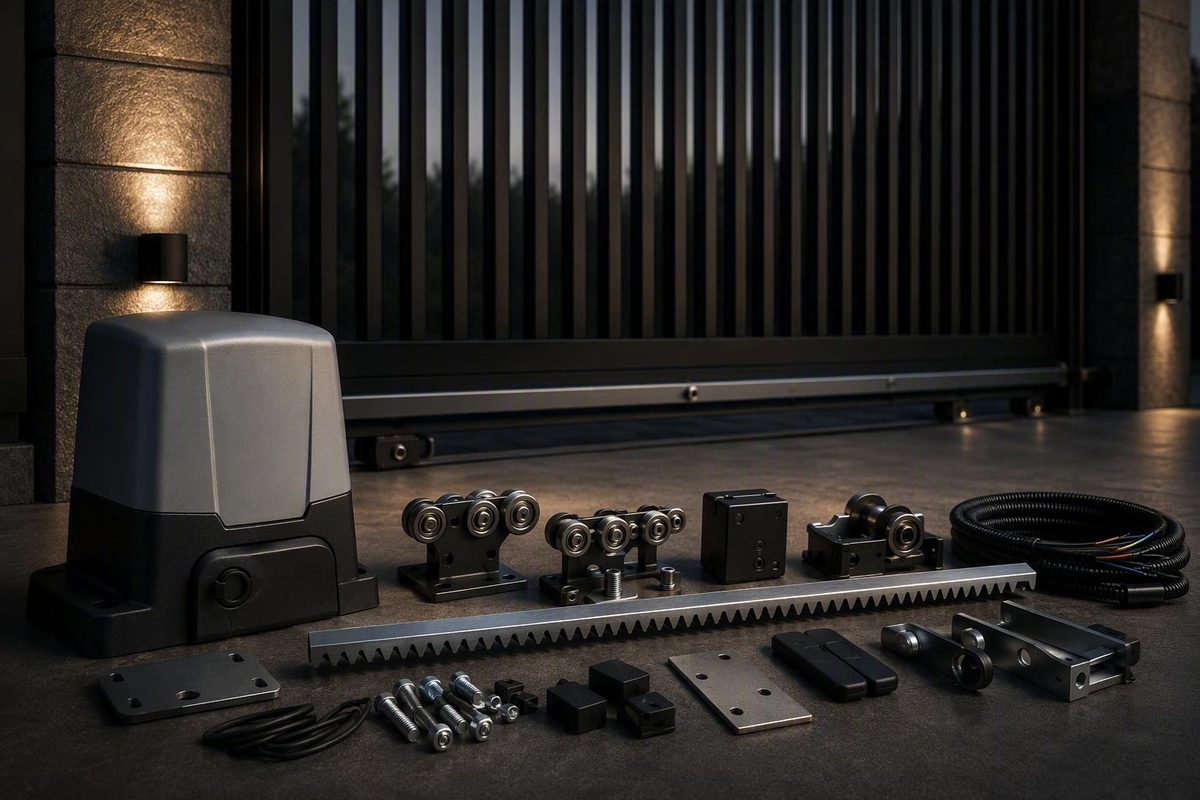
A sliding gate kit should be selected as a complete system, not as a box of loosely related parts. Price and headline weight capacity matter only after you establish the gate configuration, clear opening, physical panel length, finished weight, available runback, surface conditions, and automation plan.
The central buying rule is straightforward: determine exactly what the listing includes, then confirm that those components work together at your opening length and finished gate weight. Before ordering, also account for freight, unloading, field assembly, foundations, drainage, electrical work, safety equipment, access controls, permits, taxes, and installation labor.
The prices below are seller-listed figures preserved in the supplied research. The research did not include retrieval dates, so these figures should be treated only as historical comparison points—not current quotes or market averages. Products were not independently tested for this guide.
Start by Identifying What the Seller Means by a Kit
The word “kit” is used for several fundamentally different products:
- Hardware-only kit: Track, wheels, rollers, carriages, brackets, or related travel hardware. It may exclude the gate panel, posts, guides, stops, latch, and operator.
- Complete manual gate package: Gate panel plus the primary support and travel hardware needed for manual operation. Automation is not included.
- Automation-ready gate: A manual gate whose geometry or construction may accommodate an operator later. “Automation-ready” does not mean that every opener will fit.
- Opener kit: Operator, mounting hardware, drive chain or rack, controls, and possibly safety devices. It usually assumes that a compatible gate already exists.
- Complete powered gate package: Gate, structural hardware, operator, controls, and at least some safety equipment. Foundations, wiring, unloading, and installation may still be excluded.
These categories are not interchangeable. A low-cost hardware kit may be appropriate if a fabricator is building the panel and posts, but it cannot be compared directly with a delivered steel gate or an automated driveway package.
The SLID’UP 1600 is floor-track hardware rather than a complete gate. Its captured listing showed a price of $237.38 and identified three galvanized-steel track sections, two external support wheels, and two connectors as included. Top guides, an end stop, a lock, and handles appeared as optional accessories. The same listing restricts the intended gate by weight, width, and thickness, so price alone is not enough to determine compatibility. Review the SLID’UP 1600 package and specifications.
A Hoover Fence product illustrates a different category: a complete manual chain-link cantilever gate package. The listed package includes the fabricated gate, three capped posts, four roller assemblies with covers, and a latch, but no automatic operator. Its captured price range was $2,038.87–$3,759.93, depending on configuration. See the Hoover manual cantilever gate package.
Gate Depot represents the broader powered-package category. Its page describes selected bundles containing a steel gate, operator, battery backup, posts, track, receiver, transmitters, and a photoelectric sensor. Captured starting prices included $2,224.60 for a 10-by-4-foot package, $2,389.60 for a 12-by-4-foot package, and $3,498.60 for a 14-by-4-foot package. Decorative pieces, additional controls, loops, safety edges, solar equipment, freight, and site work were not necessarily part of the base configuration. Examine the Gate Depot slide-gate and operator bundles.
A custom manual gate can sit between those categories. One StandardGates configuration described a 20-by-6-foot steel tracked gate supplied with V-wheels, V-track, rollers, 4-inch posts, and stops. Its displayed price was $5,301. Panels at least 10 feet wide were described as shipping in two bolt-connectable sections. See the configured StandardGates manual tracked gate.
Even closely related cantilever products can have different scopes. One retailer category displayed complete-track versions alongside similarly named accessory boxes that expressly excluded track. A category introduction claiming that a kit contains everything needed should therefore be treated as sales language, not as the final bill of materials.
Quick identification rule: If a listing does not itemize the gate panel, support hardware, travel hardware, stops, posts, drive equipment, controls, and safety devices, treat the package scope as unconfirmed. Request a line-item bill of materials rather than relying on the title, photographs, or category name.
Choose Between Tracked, Cantilever, and Space-Saving Layouts
The site usually determines the correct configuration before brand, finish, or automation features enter the decision.
A floor-track gate, also called a tracked or rolling gate, travels on wheels over a track mounted along the ground. The track must be straight, level, firmly anchored, and long enough for the panel’s complete movement.
The tradeoff is that the ground becomes part of the operating mechanism. Leaves, gravel, stones, mud, snow, and ice can obstruct the wheels or track. Poor drainage can leave sediment or standing water, while pavement movement can disturb alignment. A tracked layout is most practical where the travel surface is stable and the entire track can be kept clear.
A cantilever gate has no track running across the driveway. The panel is carried by stationary carriage assemblies engaging a structural rail attached to or incorporated into the gate. Because the panel projects across the opening without a leading wheel on the driveway, it requires a counterbalanced tail behind the clear opening.
That arrangement avoids a track in the vehicle path, but it generally requires:
- A longer physical gate panel
- More unobstructed runback on the slide side
- Substantial carriage and post foundations
- Accurate rail and carriage alignment
- Structural capacity for the panel, tail, infill, and attachments
Georgia Gate & Fence’s general planning guide describes cantilever panels as commonly 30%–50% longer than the clear opening. The same guide suggests that a conventional tracked gate may need lateral room equal to the opening plus approximately 1–2 feet, including roughly 16 feet of clear run for a 14-foot opening. These are general planning estimates, not fabrication dimensions; the selected system’s drawing must control. Compare the tracked and cantilever clearance guidance.
One Ranger system is described for as many as three leaves and openings up to 40 feet with 15 feet of slide-in space. That is a seller specification for that product family, not a universal telescoping ratio. Review the listed cantilever and Ranger telescoping systems.
A double-slide gate divides the opening between panels that retract in opposite directions. For example, a 12-foot opening could use two 6-foot panels if adequate runback exists on both sides. See the illustrated double-slide and tandem discussion.
Do not confuse limited driveway depth with limited overall space. A sliding gate eliminates the opening arc of a swing gate, but it still needs lateral clearance along the fence. Walls, trees, meters, utility equipment, grade changes, parked vehicles, and fence corners can make apparent runback unusable.
Use this decision tree:
-
Is the complete ground travel path straight, stable, drainable, and practical to keep clear? If yes, a tracked gate may be suitable.
-
Would a driveway track be impractical because of gravel, drainage, snow, debris, traffic, or pavement conditions? Compare cantilever systems, including their longer panels and foundation requirements.
-
Is there enough unobstructed runback on one side for the complete panel and hardware clearances? If not, investigate telescoping, double-slide, or tandem layouts.
-
Can the site accommodate the additional posts, foundations, guides, and synchronization equipment? If not, reconsider the layout before choosing a kit.
Measure the Opening, Runback, Gate, and Slide Direction
A supplier cannot reliably select hardware from a description such as “about a 12-foot driveway.” Measure the gate as a complete moving assembly and document every fixed object that constrains it.
Use this pre-order worksheet:
| Measurement | What to record | Why it matters |
|---|---|---|
| Clear opening width | Usable distance between posts, columns, or obstructions | Determines the passage the closed gate must cover |
| Proposed gate height | Fence-line height and desired clearance | Affects panel dimensions, guides, posts, weight, and wind exposure |
| Physical panel length | Full end-to-end panel, including any cantilever tail | Determines runback and handling requirements |
| Panel thickness | Maximum frame and infill thickness | Must fit guides, catches, wheels, and operator clearances |
| Finished gate weight | Frame, rail, infill, fittings, latch, and drive attachments | Used to select hardware and an operator |
| Track or rail length | Supplied length and complete required travel length | Confirms that the gate can open fully |
| Available runback | Unobstructed lateral distance on the slide side | Determines whether the configuration fits |
| Post locations | Centerlines, dimensions, and possible foundation zones | Controls guide, receiver, carriage, and operator positions |
| Surface slope | Along and across the opening and runback | Affects track installation, ground clearance, and foundations |
| Nearby objects | Walls, fences, landscaping, meters, vehicles, and corners | Reveals possible collisions and inaccessible equipment |
| Slide direction | Left or right, with the viewing position marked | Prevents a reversed or unusable order |
| Delivery access | Road width, turns, overhead clearance, and staging area | Determines whether freight can reach and be unloaded |
Clear opening width is not physical gate length. The clear opening is the usable passage between fixed points. A cantilever gate includes a counterbalanced section, so its full panel is longer than the opening. A tracked panel may not need the same tail, but it must still travel far enough for its leading edge to clear the passage completely.
As a preliminary tracked-gate estimate, the contractor guidance cited above suggests roughly 16 feet of lateral room for a 14-foot opening. Do not use that allowance to fabricate the panel or place foundations. Stops, wheel positions, receiver geometry, overlap, and operator brackets can all change the final dimension.
For the Hoover cantilever package, the seller says the counterbalance can be about half the opening and estimates total slide-side space at approximately 1.5 times the opening. It defines left or right slide as viewed from outside the fence. The listing also says the physical gate is shorter than nominal fence height to allow for roller hardware and ground clearance. These product-specific details illustrate why opening width, physical panel size, installed height, and handing must be recorded separately.
Confirm the seller’s directional convention in writing. “Slides left” could mean left when viewed from the road, from inside the property, or while facing the opening from the receiving side. Mark the viewpoint and movement direction on the drawing instead of relying on words alone.
Nominal height can also be misleading. A “6-foot gate” might describe the fence line, an ordering category, or the panel itself. Ask for:
- Physical frame height
- Finished installed height
- Ground clearance
- Height to the top of decorative elements
- Guide or roller elevations
- Required post height
Delivery dimensions belong on the same worksheet. Measure the access-road width, turning room, overhead obstructions, unloading area, and route from the truck to the installation point. If the panel ships in sections, reserve a flat assembly area where the completed gate can be aligned without obstructing traffic.
The most useful pre-order document is a dimensioned sketch showing the opening, full panel, runback, posts, track or cantilever rail, operator position, fences, walls, slopes, and slide direction. Submit it to the supplier and obtain written confirmation of the exact model, panel length, track or rail length, post arrangement, and handing before paying.
Match Capacity to Both Opening Length and Finished Gate Weight
The largest weight printed on a product page is not necessarily the capacity available at your opening.
Compare allowable gate weight at the intended opening length. As the opening and panel length increase, the loads applied to the carriages, rail, posts, and foundations can also increase. Product tables commonly show lower permissible weights at longer spans.
The DuraGates CGS-KIT150 demonstrates the pattern: the seller lists 660 pounds at an 8-foot opening but 330 pounds at a 13-foot opening. The CGS-250.8P is listed at 1,300 pounds for an 8-foot opening and 800 pounds at 19 feet. The CGS-350.8G is listed at 4,000 pounds for a 16-foot opening and 1,800 pounds at 60 feet. These are seller-published specifications rather than independent test results. Compare DuraGates capacities by opening length.
That page also contains an unresolved conflict. Its introductory copy says the CGS-250.8M can handle a 1,000-pound gate, while the detailed listing gives 900 pounds at 8 feet and 500 pounds at 14 feet. Do not select the model from the higher figure. Until the manufacturer or supplier confirms the controlling specification in writing, the available information is not decision-ready for that application.
Not every product publishes capacity in the same format. The SLID’UP 1600 listing defines an application envelope of up to 880 pounds, 118 inches wide, and 1-9/16 to 2-3/8 inches thick. A panel outside any one of those limits is outside the captured specification, even if it meets the other two.
Use finished gate weight, not bare-frame weight. Include:
- Structural frame and bracing
- Cantilever rail or attached track
- Chain-link, pickets, wood, vinyl, or sheet infill
- Decorative elements
- Locks, latches, handles, and cane bolts
- Connection plates and fasteners for sectional panels
- Operator rack, chain brackets, or related attachments
- Other permanently installed accessories
Solid wood, vinyl, and sheet-style infill can increase both weight and wind exposure. Hoover specifically warns that adding wood or vinyl to its chain-link cantilever gate may require larger or additional posts. A lightweight open panel and a solid privacy panel with the same outside dimensions should not be assumed to create equivalent structural demands.
If you are comparing chain-link infill choices, wire and coating specifications are separate from the gate hardware itself; Fence Report’s overview of galvanized chain-link gauges and coatings provides additional context.
Do not invent a load adjustment or wind formula from a nominal gate rating. Obtain a documented finished weight from the fabricator and written confirmation from the hardware supplier or a qualified designer that the selected panel, supports, and hardware are suitable for the site.
For an automated system, add expected traffic frequency and duty cycle to the selection checklist. A residential entrance moving a few times a day and a repeatedly operated light-commercial gate are different applications. The supplied evidence does not establish which operator is suitable for every duty cycle, so model-specific confirmation is essential.
Audit the Box: Included, Required Separately, and Optional Parts
Build a component matrix for the exact product and configuration. Complete it before ordering and repeat the audit when the shipment arrives.
| Included | Required Separately | Optional or Upgrade |
|---|---|---|
| Every component expressly included in the quote | Everything necessary for installation but omitted | Convenience, appearance, access, resilience, or performance upgrades |
| Gate panel or frame | Missing infill or fabrication materials | Decorative infill or ornament |
| Supplied track, rail, wheels, or carriages | Additional track or rail sections | Heavier-duty wheels or carriages |
| Included posts and brackets | Omitted posts, anchors, plates, and concrete | Upgraded finish or corrosion protection |
| Listed guides, stops, catch, or latch | Required guides, stops, receiver, or latch not supplied | Locks, handles, or pedestrian controls |
| Listed operator and drive components | Power, conduit, wiring, and electrical work | Batteries, solar, keypad, intercom, or loops |
| Included controls and sensors | Other devices required for the selected operator and layout | Additional transmitters, sensors, or edges |
For the gate structure, verify the panel or frame, infill, cantilever counterbalance where applicable, connection hardware for split panels, finish, physical height, thickness, and total length. Determine whether the quoted width means clear opening, nominal gate width, or fabricated panel length.
For a tracked system, verify:
- Complete track length
- Track connectors
- Wheels and wheel brackets
- Upper guides or guide rollers
- Support and receiver posts
- Track and post anchors
- Opening and closing end stops
- Receiver or catch
- Latch or lock
- Installation fasteners
The SLID’UP example shows why optional parts matter: the captured package includes three tracks, two wheels, and two connectors, but identifies top guides and an end stop as optional.
For a cantilever system, verify:
- Cantilever rail
- Carriage assemblies
- Carriage mounting plates
- Guide rollers and brackets
- Support posts
- Receiver post
- Closed-position catch, latch, or support
- End rollers or end caps
- Carriage or roller covers
- Anchors and specified foundation hardware
Similar product names do not establish similar contents. One cantilever category displayed CGS-KIT150 versions with either three 6-foot-6-inch track sections or a listed 19-foot-8-inch track. The same page displayed accessory boxes at $432.52 and $379.43, with track expressly excluded. Compare the cantilever kits and track-excluded accessory boxes.
For automation, verify:
- Operator and mounting base
- Drive rack or chain
- Rack fasteners or chain brackets
- Power requirements
- Conduit and wiring
- Backup batteries, if specified
- Radio receiver and transmitters
- Manual release
- Limit hardware
- Keypads, intercoms, card readers, loops, or other access controls
- Protective devices required by the exact operator instructions and completed layout
Do not infer that one included photoelectric sensor is sufficient for every installation. The required devices, locations, wiring, setup, and tests are model- and layout-dependent. Obtain the current operator manual and have the completed system evaluated and commissioned by a qualified installer where the work exceeds your competence or local authorization.
A broad powered bundle may still omit decorative upgrades, extra access controls, safety edges, vehicle loops, solar equipment, trenching, concrete, freight, and electrical work. Conversely, hardware-only packages can offer good value when a contractor is fabricating the gate and already has compatible posts and controls.
Before the return period begins, obtain:
- A line-item bill of materials
- Manufacturer and part number for each critical component
- Current gate and operator manuals
- Written compatibility confirmation for the panel dimensions and weight
- A list of required but excluded components
- A list of optional upgrades
- The procedure and deadline for reporting shortages or damage
Compare Prices by Package Scope, Not by Sticker Price
The figures below are captured seller listings without supplied retrieval dates. They may no longer reflect current prices, promotions, availability, freight, or configuration. Their purpose is to show why unlike packages should not be compared by headline price.
| Product tier | Captured example | What the price represented |
|---|---|---|
| Basic floor-track hardware | $237.38 | SLID’UP 1600 tracks, two support wheels, and connectors; panel, guides, and stop not all included |
| Lightweight cantilever hardware | $688.38 | CGS-KIT150 versions shown with three 6-foot-6-inch track sections or a listed 19-foot-8-inch track |
| Cantilever accessory boxes | $432.52 and $379.43 | Selected component boxes with track expressly excluded |
| Complete manual cantilever gate | $2,038.87–$3,759.93 | Hoover chain-link gate, posts, roller assemblies with covers, and latch; no operator |
| Custom manual tracked gate | $5,301 | Captured 20-by-6-foot StandardGates configuration with gate and listed slide hardware |
| Complete powered packages | $2,224.60–$3,498.60 for selected examples | Gate Depot packages combining a gate, operator, and listed automation components |
The powered-package examples were seller-listed starting prices dependent on gate size and configuration. Gate design, height, controls, decorative choices, freight, foundations, wiring, and site conditions can change the final amount.
Likewise, the captured StandardGates figure applied to a particular manual tracked configuration. Although its listing described V-wheels, V-track, rollers, posts, and stops as included, buyers would still need to determine which unloading, field assembly, foundations, site materials, and installation work remained outside the order.
Use a total-project worksheet instead of applying a generic installation percentage:
| Cost category | Questions to answer |
|---|---|
| Gate or hardware | Does the quote include the panel, infill, track or rail, supports, posts, guides, stops, and latch? |
| Missing components | Which required parts must be sourced separately, and has compatibility been confirmed? |
| Freight | Is shipping included? Could oversize, residential, or remote-area charges apply? |
| Delivery services | Is lift-gate service available? Is delivery curbside only? |
| Unloading | How many people or what machinery will be required? |
| Field assembly | Will the panel arrive in sections? Are connection hardware and instructions included? |
| Excavation | What digging, demolition, spoil removal, or utility coordination is needed? |
| Concrete and anchors | What foundations, reinforcing, pads, sleeves, and anchors are specified? |
| Surface work | Does a tracked route need leveling, paving, drainage, or repair? |
| Electrical work | What trenching, conduit, wire, circuits, grounding, or disconnects are needed? |
| Automation | Are the operator, drive hardware, mounting base, and batteries included? |
| Protective equipment | Which devices, guards, covers, and signs are required for the selected system? |
| Access controls | Are remotes, keypads, intercoms, loops, card access, or emergency access included? |
| Approvals | Which permits or inspections apply at the property? |
| Taxes and fees | Are taxes, permit fees, freight, and disposal included? |
| Labor | Who installs, aligns, welds, wires, commissions, and documents the system? |
The cheapest hardware listing can produce the most expensive completed project if it excludes the panel, posts, guides, stops, operator, or difficult site work. It can also be the best value when those items already exist or are being fabricated locally. Compare delivered-and-installed scope, not isolated prices.
Plan Foundations, Delivery, Installation, and Future Automation
Treat installation as a sequence of design and verification tasks rather than as one universal set of dimensions:
- Survey the opening and complete travel path.
- Arrange underground-utility locating before excavation.
- Review grading, runoff, drainage, snow storage, and debris exposure.
- Obtain the selected manufacturer’s drawings and manuals.
- Establish site-specific foundation requirements.
- Set post, carriage, track, receiver, and operator positions.
- Install and align the structural supports.
- Mount the gate, guides, catches, and positive stops.
- Test the gate manually through its complete travel.
- Install and commission automation only after the manual gate moves correctly.
Straight and level alignment, stable support points, and positive end stops recur across tracked-gate installation guidance. A track that changes elevation, curves, or moves at pavement joints can prevent a correctly sized gate from operating properly. Review the general tracked-gate installation sequence.
Commonly listed tools include a tape measure, level, drill and bits, wrenches, screwdrivers, hammer, and protective equipment. Depending on the gate and site, the work may also require concrete tools, specialized anchors, cutting or welding equipment, electrical tools, and lifting machinery. A generic tool list is only a starting point; the gate and operator manuals determine the actual requirements.
Generic footing dimensions are not universal specifications. Soil, frost depth, drainage, gate geometry, wind exposure, manufacturer instructions, and local requirements all affect foundation design. Hoover’s seller guidance, for example, recommends 18-inch-diameter by 42-inch-deep footers for certain 3- to 4-inch posts and 24-inch-diameter by 42-inch-deep footers for 6-5/8-inch posts, with larger footers suggested for poor soil. Those figures belong only to the seller’s stated product context and should not be transferred to another gate without approval.
Delivery can be as demanding as installation. Gate Depot says long shipments may arrive on a 32- to 40-foot tractor-trailer, require personnel at the site to help unload, and include a gate weighing as much as 320 pounds. Hoover says its cantilever gates may arrive in two sections, while StandardGates describes panels at least 10 feet wide as shipping in two bolt-connectable sections.
Use a delivery checklist:
- Confirm road width, turning space, overhead clearance, and delivery restrictions.
- Ask whether an appointment is required.
- Confirm lift-gate availability and charges.
- Determine whether delivery is curbside or to a designated unloading point.
- Obtain packaged dimensions and weights.
- Arrange suitable staffing or lifting machinery.
- Prepare a stable staging and assembly area.
- Inspect packaging and components before accepting delivery.
- Photograph damage and record it on the delivery paperwork.
- Confirm field-assembly instructions and supplied connection hardware.
- Protect stored components from weather and vehicle traffic.
A manual sliding gate may sometimes be automated later, but conversion is not guaranteed. It depends on gate geometry, counterbalance length, finished weight, structural stiffness, operator capacity, drive method, mounting space, power, conduit, manual release, controls, and provisions for the protective devices required by the selected operator.
If future automation is likely, reserve practical conduit routes and equipment space while foundations and paving are open. Do not guess operator-pad dimensions, conduit terminations, or mounting clearances. Choose the intended operator family and use its current manual before placing concrete or underground services.
Qualified assistance becomes especially important where a project involves difficult excavation, heavy lifting, welding, structural modification, mains electrical work, complex controls, or powered-gate commissioning. A listing’s use of “DIY” does not establish that every property or automated installation is suitable for unsupervised homeowner work.
Commission and Maintain the System Without Relying on Marketing Claims
Commission the gate in two stages: first as a manual mechanical system, then as an automated system if an operator is installed. Automation should not be used to overcome binding, misalignment, poor balance, or missing stops.
For a manual tracked gate, check:
- Complete opening and closing travel
- Smooth movement without binding
- Straight, stable track alignment
- Continuous wheel engagement
- Correct upper-guide engagement
- Secure wheel brackets and fasteners
- Latch and receiver alignment
- Positive stops at both ends
- Clearance from posts, fences, vehicles, and fixed objects
For a cantilever gate, check:
- Carriage and rail alignment
- Smooth movement throughout the opening
- Unobstructed counterbalance travel
- Correct guide engagement
- Receiver and latch alignment
- Installed carriage or roller covers
- End caps or rollers where specified
- Closed-position support required by the manual
- Secure foundations, plates, anchors, and fasteners
For an automated gate, follow the exact operator manufacturer’s instructions for limits, control settings, manual release, access controls, protective devices, wiring, and testing. Keep the final manual and wiring diagram at the property. Because the supplied evidence does not include authoritative standards or the manual for a selected operator, this guide cannot determine the devices, placements, or tests required for a particular installation.
A retailer’s chain-driven opener guide illustrates why model-specific instructions matter. Its example calls for two devices before energizing the operator, describes a primary photoeye for closing travel, and identifies a safety edge or second photoeye for the opening path. Its stated test sequence checks that interrupting the closing sensor reverses movement and that activating the opening-path device stops movement. These procedures apply only to the arrangement described in that guide and must not be generalized to other operators. Review the model-dependent opener example.
One included photoelectric sensor does not, by itself, establish that a completed installation satisfies all applicable requirements. The selected operator, current manual, site geometry, equipment placement, setup, and commissioning must be considered together by the responsible installer.
A practical maintenance checklist includes:
- Remove leaves, stones, mud, snow, and ice from ground track.
- Inspect tracked wheels, cantilever carriages, guides, and brackets.
- Check track or rail alignment.
- Examine opening and closing stops.
- Check fasteners according to manufacturer instructions.
- Lubricate only the components and points identified by the manufacturer.
- Inspect the drive rack, chain, brackets, and tension.
- Clean, align, and test installed sensors as directed.
- Inspect visible wiring, conduit, and enclosures.
- Test the manual release and documented emergency-access procedure.
- Monitor battery condition and backup operation.
- Record changes in speed, sound, vibration, or operator behavior.
- Remove the automated system from service and obtain appropriate assistance if it binds, leaves its guides, or fails a prescribed test.
Georgia Gate & Fence recommends inspecting sliding-gate rollers and racks every 6–12 months. Treat that only as a general reminder; the manufacturer’s schedule and site conditions should determine the actual interval.
Before buying, also evaluate support after installation:
- Written warranty terms
- Residential versus commercial-use limits
- Corrosion and finish exclusions
- Coverage or exclusion of labor, travel, and removal
- Return authorization and return-freight obligations
- Technical-support availability
- Availability of proprietary track and rail
- Replacement rollers and carriages
- Compatible sensors and batteries
- Operator control boards and radio equipment
- The process if a component is discontinued
Warranty length alone does not establish quality or service life. Most available capacity, durability, and performance statements in this market are seller or manufacturer specifications rather than independent comparative test results.
Before placing an order:
- Classify the package as hardware-only, complete manual, automation-ready, opener-only, or complete powered.
- Select the tracked, cantilever, telescoping, double-slide, or tandem configuration that fits the site.
- Measure the clear opening, full runback, panel dimensions, post locations, slope, and slide direction.
- Obtain the documented finished gate weight and address wind exposure.
- Compare allowable capacity at the actual opening length.
- Audit the line-item bill of materials.
- Calculate the delivered and installed project cost.
- Secure written confirmation of model compatibility, dimensions, handing, and package scope.
Manufacturer manuals and applicable local requirements should control foundation, electrical, automation, and safety decisions. The right sliding gate kit is not simply the package with the highest advertised capacity or lowest price; it is the system whose geometry, components, installation demands, support, and complete cost have been confirmed for the property.
Frequently Asked Questions
How much side clearance does a sliding gate need?
It depends on the configuration. A conventional tracked gate generally needs lateral room at least sufficient for the panel’s full travel, plus whatever overlap, stops, receiver geometry, and hardware clearance the selected design requires. One contractor’s general example gives approximately 16 feet of clear lateral run for a 14-foot opening, but that is not a guaranteed design dimension.
A cantilever gate needs additional room because its physical panel includes a counterbalanced tail. General guidance places that extra panel length at roughly 30%–50% of the clear opening, while one complete-gate seller estimates slide-side space at approximately 1.5 times the opening for its product. Telescoping, double-slide, and tandem arrangements may reduce the required space on one side but add panels and hardware. Final dimensions must come from the selected system’s drawing.
Does a sliding gate kit usually include the gate and automatic opener?
No consistent package definition exists. A sliding gate kit may contain only track and wheels, cantilever carriages and rail, a complete manual gate, an operator without a gate, or a combined gate-and-automation package.
Check individually for the panel, infill, track or cantilever rail, wheels or carriages, guides, posts, stops, latch, operator, drive components, controls, power equipment, and protective devices. If the seller does not itemize them, treat the scope as unconfirmed.
Is a tracked or cantilever sliding gate better for snow and debris?
A cantilever gate avoids a track across the driveway, removing the ground rail or channel where stones, leaves, snow, and ice can obstruct travel. That can make it more practical where keeping a driveway track clear would be difficult.
The tradeoff is a longer counterbalanced panel, more runback, larger support demands, and substantial carriage foundations. A tracked gate can remain practical where the travel surface is straight and stable, drainage is suitable, and regular debris removal is manageable.
Can a manual sliding gate kit be automated later?
Sometimes, but not automatically. The existing gate must have suitable geometry, structural capacity, finished weight, travel, stops, and mounting space for the intended operator and drive arrangement. A cantilever gate’s counterbalance or other structural details may need to change.
Before relying on future conversion, confirm the intended operator, duty cycle, mounting position, rack or chain arrangement, electrical supply, conduit, manual release, controls, and required protective-device provisions. Reserving practical conduit and equipment space during initial construction can reduce later disruption, but model-specific dimensions must come from the selected operator manual.
Can I install a sliding gate myself?
A capable DIY installer may be able to assemble some manual tracked systems where the foundations, panel weight, alignment, and site conditions are straightforward. The work can require accurate measurement, leveling, drilling, anchoring, concrete placement, and controlled handling of a large panel.
Consider qualified assistance when the project involves difficult excavation, drainage correction, heavy freight, lifting machinery, welding, structural design, complex cantilever foundations, mains electrical work, or automated-gate commissioning. Regardless of who performs the work, the gate should move correctly by hand before an operator is connected, and automated equipment should be installed and tested according to its current manufacturer instructions.