
How to Match Gate Hardware to the Gate, Post, and Job
Measure the gate's width, height and weight, plus frame and post dimensions, the available gap, hinge spacing, swing direction and full-swing clearance.
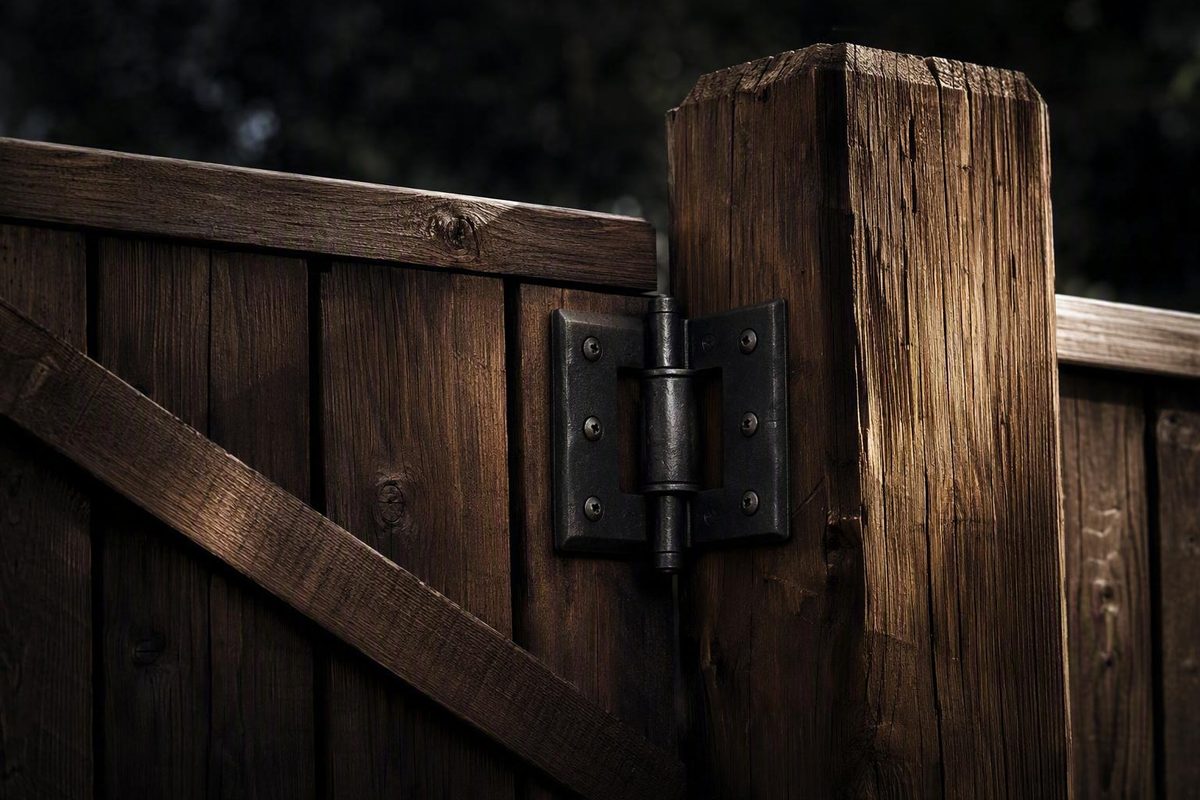
How to match gate hardware to the gate, post, and job
Fence gate hinges cannot be selected reliably by choosing the largest product labeled “heavy duty.” The hinge must match the gate, supporting post, attachment surfaces, available clearance, operating conditions, and required features.
Treat this as a pre-purchase and comparison guide—not a structural design method. The available evidence consists mainly of retailer catalogs and commercial guides rather than engineering calculations, code documents, or complete manufacturer technical sheets. Final model selection therefore requires the chosen manufacturer’s current rating, dimensional limits, installation instructions, and, where relevant, certification records.
Use this decision path:
- Measure the gate, frame, post, gaps, and clearances.
- Inspect the post, footing, frame, bracing, and attachment surfaces.
- Identify compatible mounting methods and hinge families.
- Verify rating scope, gate-size limits, hinge count, spacing, and fasteners.
- Confirm swing direction, opening angle, adjustment range, and closing behavior.
- Compare the complete installed cost for one gate leaf.
- Stop and seek model-specific professional guidance if the gate is unusually heavy, automated, highly wind-exposed, structurally compromised, or part of a regulated barrier.
Non-negotiables
- Gate width matters alongside weight.
- “Heavy duty” is not a usable rating by itself.
- Capacity must be identified as per hinge, pair, set, or complete gate.
- Strong hinges cannot repair a leaning post, failed footing, split substrate, or distorted frame.
- Attachment method does not prove capacity.
- Seller rules of thumb cannot override product-specific limits.
- A self-closing label does not establish compliance for a completed safety barrier.
Start With the Gate: The Measurements and Conditions That Control the Choice
Document the whole assembly before comparing products.
Build a pre-purchase worksheet
| Item | What to record | Why it matters |
|---|---|---|
| Gate material | Wood, vinyl, chain-link, steel, aluminum, composite, or mixed construction | Controls compatible attachment and reinforcement options |
| Gate width | Hinge-side edge to latch-side edge for each leaf | Wider gates place the latch-side load farther from the pivot |
| Gate height | Overall height, including relevant projections | Affects spacing, clearance, and possible hinge count |
| Gate weight | Actual weight if known; otherwise a reliable estimate including cladding and hardware | Needed to compare published capacity |
| Frame dimensions | Rail, stile, tube, or profile dimensions; wall thickness where known | Determines whether hinges and fasteners can attach correctly |
| Post dimensions and shape | Width and depth for rectangular posts; outside diameter for round posts | Controls bracket, clamp, plate, and pintle compatibility |
| Post material | Wood, steel, reinforced vinyl, or another construction | Determines viable attachment methods |
| Desired hinge spacing | Approximate distance between pivot locations | Must fit the frame and product instructions |
| Gate-to-post gap | Available space between the gate and hinge post | Adjustable and self-closing models may require a defined gap |
| Ground and overhead clearance | Clearance throughout the full movement arc | Helps prevent dragging or interference |
| Swing direction | Inward, outward, or both directions | Affects orientation and site clearance |
| Required opening angle | The usable angle the job requires | Some hinges have a limited movement range |
| Attachment surfaces | Sound framing, reinforced profile, tubular frame, plate, or another substrate | Determines whether screw-on, bolt-on, clamp-on, or weld-on mounting is viable |
Weight and width must be considered together. As a gate becomes wider, its latch side is farther from the hinge axis, increasing leverage on the hinges and the supporting connections. Retail selection guidance accordingly identifies gate width and weight as primary variables rather than treating weight alone as a complete sizing method (HardwareSource’s gate-hinge guide).
Record the operating conditions as well:
- Is this a single gate or one leaf of a double gate?
- How often will it open?
- Is it likely to be slammed or subjected to impact?
- Does solid cladding increase its exposure to wind?
- Must it return toward closed automatically?
- Does it need to swing in both directions?
- Is resistance to lifting the gate off its pivots important?
- Would post-installation adjustment be useful?
- Will a latch, closer, operator, drop rod, or access-control component affect movement?
- Is the gate part of a regulated barrier?
For a double gate, assess each leaf separately. Do not divide the opening width by two and assume the leaves impose identical demands. One leaf may be wider, heavier, used more frequently, or supported by a weaker post. After selecting each leaf’s hardware, account for the center latch, stop, drop rods, ground clearance, and the effect that movement in either post could have on center alignment.
Inspect the structure before buying hardware
Check the hinge post for plumb, movement, decay, corrosion, splitting, or deformation. Look for evidence that the footing is rotating or settling. Inspect the gate for racking, failed welds, loose joints, inadequate bracing, twist, and damaged profiles.
Then inspect the exact locations where the hardware will attach. A substantial-looking wood post may be unusable if it is split or decayed where the screws must land.
Stronger hardware cannot straighten a leaning post, restore a failed footing, repair split wood, or make a distorted frame square. Those defects must be addressed before hinge replacement.
For chain-link and other tubular gates, measure two distinct dimensions:
- The outside diameter of the hinge post.
- The outside diameter of the gate frame.
Do not assume they are equal. Specialist catalogs expose post size and frame size as separate filters, which shows that a fitting can match one member without matching the other (Hoover Fence’s gate-hinge catalog).
When assessing an existing chain-link system, also identify the wire and coating rather than treating all chain-link construction as interchangeable. The related guide to galvanized chain-link gauges and coatings explains those fence-fabric variables.
These measurements are screening tools, not a structural calculation. They do not determine wind pressure, dynamic impact, center-of-gravity effects, post strength, footing capacity, fastener capacity, or operator loads. Unusually heavy, wide, automated, wind-exposed, or structurally uncertain gates require model-specific guidance from the hinge manufacturer and, where appropriate, a qualified installer or engineer.
Fence Gate Hinge Types and Their Practical Differences
A fence gate hinge creates the pivot between the moving gate and its supporting post. Style names are not perfectly standardized, so compare the physical geometry, drawings, and instructions rather than relying on the listing title.
Tee and strap hinges
A tee hinge is generally visible and surface-mounted. It has an elongated leaf extending across the gate and a shorter post-side section, creating a T-like form. The long leaf distributes attachment over part of the gate and can also be a decorative feature.
A strap hinge has one or more long, narrow leaves. Some sellers distinguish strap and tee hinges; others use the terms more broadly or treat them as closely related. This inconsistency makes product photographs, dimensions, leaf arrangement, and mounting instructions more dependable than the name alone.
Strap-and-pintle, band-and-gudgeon, and reversible hinges
A strap-and-pintle or band-and-gudgeon system uses a vertical pin on the post and a band or strap on the gate. The gate-mounted component rides on the pin. These systems are common on traditional wood, agricultural, and field gates.
Some arrangements allow the gate to be lifted off the pins. That can simplify removal but may be undesirable where tampering is a concern. Reversible hinges instead use a pin-and-cup arrangement that resists straightforward lift-off. The geometry and security behavior vary, so verify the configuration in the product drawings. Commercial hinge guidance illustrates these distinctions among band-and-gudgeon, reversible, adjustable, and field-gate hardware (Woodworkers UK’s hinge guide).
Butt hinges
Butt hinges are comparatively discreet because much of each leaf sits between or beside the mounting members, although the barrel remains visible. Depending on the model and gate geometry, installation may be surface-mounted, partially recessed, or mortised.
A butt hinge that fits one gate may not fit another if the mounting planes, leaf orientation, clearances, or required recess differ.
Barrel hinges
Barrel hinges use a cylindrical pivot and are common in fabricated-metal gate catalogs. They may be weld-on, bolt-on, face-mounted, fixed, or adjustable.
Some models incorporate ball bearings or grease fittings, but the term “barrel hinge” does not establish lubrication requirements. Use the model’s technical and maintenance instructions.
Adjustable and reversible hinges
Adjustable hinges allow the gate position to be changed after installation. Depending on the design, adjustment may move the gate horizontally, vertically, in depth, or in several directions. Retail catalogs include three-way and four-way adjustable models and products offering broad opening angles (Fenceweb’s adjustable hinge listings).
Adjustment can help with initial leveling, latch-gap setting, and modest later movement. It cannot restore a failed post or straighten a severely warped gate.
Self-closing hinges
Spring hinges store energy as the gate opens and use it to return the gate toward closed. Some models allow spring-force adjustment.
Hydraulic hinge-closers combine pivot and closing functions in certain products and may provide model-specific control over closing or final latching speed. That added control also introduces more compatibility, adjustment, service, and cost considerations. The exact behavior must come from the selected product’s documentation.
Attachment methods are not capacity ratings
Weld-on, bolt-on, screw-on, clamp-style, and face-mount describe how a hinge attaches. They do not prove how much gate it can support.
| Hinge family | Visibility | Common applications | Typical attachment | Adjustability | Maintenance considerations | Principal cautions |
|---|---|---|---|---|---|---|
| Tee | High | Wood and garden gates; compatible metal or vinyl systems | Surface screws or bolts | Usually limited | Inspect fasteners, pin, and finish | Terminology and rating scope vary |
| Strap | High | Wood and decorative gates; some bifold arrangements | Surface screws, bolts, or pivot connection | Usually limited | Inspect long-leaf attachment and corrosion | Length alone does not establish capacity |
| Strap-and-pintle or band-and-gudgeon | High | Wood, agricultural, field, and traditional gates | Post pin with gate-mounted band | Fixed or adjustable by model | Inspect pin, wear surfaces, and fasteners | Some configurations permit lift-off |
| Reversible | High | Gates needing band-style hardware with lift-off resistance | Cups and pin with screws or bolts | Product-dependent | Inspect cups, pin, and attachment | Requires compatible post space |
| Butt | Low to moderate | Smaller or framed gates with suitable mounting planes | Screws, bolts, or fabrication-specific mounting | Usually limited | Inspect barrel and fasteners | May require precise gaps or mortising |
| Barrel | Moderate | Fabricated and ornamental-metal gates | Weld-on, bolt-on, or face-mount | Fixed or adjustable by model | Follow model-specific lubrication instructions | Welding and alignment requirements vary |
| Adjustable | Varies | Gates needing easier setup or later correction | Bolt-on, screw-on, weld-on, or bracket-mounted | One or more directions | Keep adjustment hardware secure | Cannot compensate for structural failure |
| Spring self-closing | Varies | Pedestrian and garden gates requiring return-to-close action | Model-specific | Closing force may be adjustable | Check spring setting and operation | Closing movement does not guarantee latching |
| Hydraulic hinge-closer | Varies | Applications requiring more controlled closing | Model-specific brackets or sets | Product-dependent | Follow service and adjustment instructions | Compatibility, gap, and documentation matter |
There is no universally superior hinge family. The correct choice combines compatible geometry, documented limits, suitable attachment, acceptable maintenance, and the operating features the gate needs.
Match the Hinge Family to the Gate Material and Use
Gate material is a starting category, not a complete specification. A lightweight open ornamental gate and a solid-clad steel driveway gate may both be called “metal gates” while imposing very different demands.
| Gate application | Hinge families commonly considered | Mounting possibilities | What to verify |
|---|---|---|---|
| Wood | Tee, strap, strap-and-pintle, compatible butt, adjustable band-style | Screws or through-bolts into sound framing; post-mounted pintles | Wood condition, bracing, fasteners, rating scope, gap |
| Vinyl | System-compatible adjustable, self-closing, aluminum, polymer, or steel hardware | Brackets or fasteners engaging specified reinforcement | Exact gate-system compatibility, reinforcement, profiles, gaps |
| Chain-link | Clamp-on, bolt-on, pintle-style, barrel-type systems | Clamps and fittings around tubes; model-specific bolts | Post diameter, frame diameter, orientation, included fittings |
| Fabricated or ornamental metal | Barrel, butt, adjustable, weld-on, bolt-on, face-mount | Welding, bolting, or proprietary brackets | Tube or plate dimensions, wall thickness, connection requirements |
| Agricultural or field | Pintle, band-and-gudgeon, field-gate sets | Bands, post pins, hooks, or wraparound components | Gate profile, pin compatibility, swing direction, lift-off behavior |
| Garden or pedestrian | Tee, strap, butt, adjustable, spring or hydraulic self-closing | Screw-on, bolt-on, or bracket-mounted | Usage, latch alignment, containment needs |
| Driveway | Rated adjustable, pintle, barrel, bolt-on, or weld-on systems | Structural brackets, bolts, or welding | Weight, width, posts, footing, stops, operator compatibility |
Wood gates
Tee and strap hinges are common because they mount visibly across the gate face. Strap-and-pintle hardware is another option where a post-mounted pin is appropriate. Butt hinges may work where the post and frame provide compatible mounting planes and clearances.
Attach the hinge to sound structural framing, not merely to thin cladding or weakened boards. Check that the rails, stiles, joints, and diagonal bracing can keep the gate square. Use fasteners specified for the selected hinge, substrate, and exposure.
Vinyl gates
Catalogs include aluminum, polymer, steel, and other hardware intended for vinyl systems. That does not mean every such hinge can be fastened directly to an unsupported vinyl wall.
Confirm compatibility with the exact gate system, profile dimensions, required reinforcement, gate-to-post gap, brackets, and permitted fasteners. Review the gate manufacturer’s installation and warranty terms before substituting hardware.
Chain-link gates
Begin with the hinge-post diameter and gate-frame diameter. Then determine whether the fitting is intended for round or square members and whether it clamps, bolts, or rides on a pintle.
Check orientation, gate-to-post spacing, and package contents. Nuts, bolts, clamps, pins, and bushings may or may not be included. Specialist catalogs list bolt-on, barrel, strap, industrial, and self-closing products, demonstrating that “chain-link hinge” is a broad category rather than one standardized fitting (Fence Supply Co.’s chain-link hinge collection).
Fabricated and ornamental-metal gates
They require suitable material, access, alignment, welding competence, and coating repair.
Bolt-on and face-mounted alternatives also exist. Metal construction does not automatically require welding.
Agricultural and field gates
Field gates commonly use pintles, bands, hooks, or wraparound components. Some arrangements permit two-way movement, while others are installed for one swing direction.
Do not convert one seller’s pin diameter, gate thickness, or band length into a universal specification. Match the complete set to the actual timber or tube profile, available post space, swing direction, and lift-off requirements.
Wide, heavy, and high-use gates
Prioritize:
- A rating whose scope is clearly stated.
- Maximum permitted gate width, height, and weight.
- Compatible gate-frame and post construction.
- A specified screw, bolt, clamp, bracket, or weld connection.
- Adjustment where useful, without using it to mask structural weakness.
- Suitable stops or controls for the intended movement.
- Model-specific inspection and maintenance instructions.
- Compatibility with any operator, closer, latch, or access-control component.
For every gate type, verify material, profile dimensions, required gap, swing angle, package contents, fasteners, and rating scope on the specific product sheet.
Capacity, Hinge Length, and Hinge Count: How to Read the Numbers Safely
A capacity number is useful only when its basis is clear. It may apply to one hinge, a matched pair, a complete set, or a gate installed within specific width, height, spacing, material, and attachment limits.
Never assume two individual ratings can simply be added. A manufacturer may have evaluated a complete set at prescribed spacing and with specified mounting materials. The gate’s width and mass distribution may also fall outside the conditions behind the published number.
Before relying on a rating, ask:
- Is it per hinge, pair, set, or complete gate?
- How many hinges does the rating assume?
- What maximum gate width and height apply?
- What gate and post materials are permitted?
- Which fasteners, brackets, clamps, or welds are required?
- Is the rating limited to static gate weight?
- Is a test basis or technical document identified?
- Are wind, impact, slamming, or automation excluded?
- Does adjustment position affect the permitted load?
The phrase “heavy duty” has no useful precision without these details. Retail collections display capacity filters alongside products labeled heavy duty while not necessarily stating whether each figure applies per hinge, pair, set, or gate (HingeOutlet’s T-hinge collection). Treat the label as a reason to open the technical sheet, not as proof of suitability.
Seller rules of thumb—not engineering standards
Commercial guides conflict on hinge length. Some recommend tee-hinge straps at approximately one-half of gate width. Other seller guidance suggests approximately one-third of gate width for normal-duty band-style hardware and one-half for heavier-duty use. Some also advise a third hinge for gates above approximately 2,100 mm in height (Woodworkers UK’s commercial hinge guide).
These are seller recommendations, not a shared engineering standard. They cannot override model-specific load, geometry, attachment, hinge-count, or installation limits.
Two hinges or three?
Two hinges are common, but that does not make two correct for every gate. A third may be required by the selected hardware system or recommended for a tall gate, but the evidence does not establish one universal height or weight threshold.
Hinge count depends on:
- Gate height, width, and weight.
- Frame stiffness and bracing.
- Mounting substrate.
- Hinge type and set rating.
- Required vertical spacing.
- Frequency and severity of use.
- Wind and impact exposure.
- Manufacturer instructions.
Conversely, a manufacturer may require three hinges because the set has been designed and rated in that configuration.
What an adequate technical sheet should tell you
Look for these decisive fields:
| Specification field | What you need to find |
|---|---|
| Rating scope | Per hinge, pair, set, or gate |
| Gate limits | Maximum weight, width, and height |
| Hinge configuration | Required quantity and vertical spacing |
| Compatible construction | Approved gate and post materials and profiles |
| Attachment | Specified brackets, fasteners, clamps, or weld procedure |
| Installation geometry | Gate-to-post gap, mounting planes, offsets, and pivot location |
| Movement | Swing direction and maximum opening angle |
| Adjustment | Direction, range, and any limits at extreme settings |
| Operating conditions | Exclusions involving wind, impact, automation, or other loads |
| Maintenance | Inspection, lubrication, tightening, or service requirements |
| Documentation | Test basis, warranty terms, and relevant certifications |
If a listing gives only a product name, finish, and promotional capacity without these details, it is not enough for final model selection.
Use this verification checklist before ordering:
- [ ] Rating scope is stated clearly.
- [ ] Maximum gate width, height, and weight are acceptable.
- [ ] Required hinge quantity is known.
- [ ] Required vertical spacing is feasible.
- [ ] Gate and post materials are approved.
- [ ] Fasteners, brackets, clamps, or weld requirements are specified.
- [ ] The attachment substrate can accept the prescribed connection.
- [ ] Adjustment range covers the intended gap.
- [ ] Opening angle and swing direction suit the site.
- [ ] Maintenance, warranty, and test documents are available where needed.
For unusually heavy, automated, high-wind, or structurally uncertain gates, obtain written model-specific guidance and consult a qualified installer or engineer. A retailer category page is not a structural design.
Materials, Finishes, and Outdoor Exposure
Fence gate hinges are cataloged in steel, zinc- or galvanized-finished steel, coated steel, stainless steel, aluminum, bronze, and polymer configurations. Selection depends on exposure, compatible gate materials, required capacity, maintenance, and the construction of the entire hinge assembly.
Steel and coated steel
Steel hardware is widely available and often economical. Its corrosion performance depends on more than the base metal. Examine the coating specification, pin, bearing surfaces, edges, drilled holes, fasteners, and any coating damage caused by installation.
“Zinc,” “galvanized,” “powder-coated,” and “black” are not interchangeable technical specifications. A finish name alone does not establish coating thickness, corrosion-test performance, service life, or treatment of cut edges and welds.
Stainless steel and bronze
Commercial guidance commonly points buyers toward stainless steel or bronze for coastal or industrial-air exposure (360 Yardware’s outdoor gate-hinge guide). That is a shopping direction, not evidence that every product made from either material will perform equally.
For severe exposure, request the exact base material or alloy where available. Confirm the materials used for the pin, bearings, bushings, adjustment nuts, springs, and supplied fasteners. Review cleaning, maintenance, and warranty exclusions before accepting terms such as “rustproof” or “marine-grade.”
Aluminum and polymer
Aluminum and polymer products appear in ornamental and vinyl-gate catalogs. Their suitability depends on the complete design, rating, reinforcement, and attachment method.
Treat corrosion resistance as a system
Evaluate:
- Hinge leaves, body, or barrel.
- Pivot pin.
- Bearings and bushings.
- Springs or hydraulic components.
- Screws, bolts, washers, and nuts.
- Welded areas and repaired coatings.
- Adjustment threads.
- Contact between dissimilar metals.
- Drainage and water traps.
- Abrasion at moving surfaces.
- Lubrication requirements.
- Gate and post materials.
Compare model documentation for base material, finish specification, pin and bearing materials, approved fasteners, lubrication, cleaning, and warranty exclusions. Do not assign a universal service life to a material or rank finishes by years without standardized comparative evidence.
Installation Readiness: Mounting Method, Alignment, and Clearances
The mounting method must suit both the hinge and the structure.
- Screw-on surface mounting is common for tee and strap hinges on sound wood. Fasteners must engage structural framing rather than weak facing boards.
- Bolt-on mounting can work on compatible wood or metal members and may simplify adjustment or replacement.
- Clamp-style mounting is common on tubular systems because it can connect frames and posts without welding.
- Weld-on mounting integrates the hinge into a suitably fabricated metal assembly.
Compare it with compatible bolt-on options rather than assuming that every metal gate must be welded.
Installation-readiness checklist
Before drilling, cutting, or welding, confirm:
- [ ] The hinge post is sound and plumb.
- [ ] The footing does not permit visible post movement.
- [ ] The gate is square or within the adjustment permitted by its design.
- [ ] The frame is adequately braced.
- [ ] Suitable temporary supports can hold the gate at its finished height.
- [ ] Hinge-side and latch-side gaps meet the product requirements.
- [ ] The gate clears the ground throughout its full movement.
- [ ] It clears fence panels, walls, caps, trim, latches, and stops.
- [ ] All pivot points can be aligned on one common axis.
- [ ] The attachment substrate is sound.
- [ ] Manufacturer-specified fasteners and suitable tools are available.
- [ ] Required reinforcement, brackets, or backing plates are installed.
- [ ] The complete product instructions have been reviewed.
Supporting and aligning the gate before final tightening is important because locking in a small installation error can produce visible misalignment at the latch side. Commercial installation guidance recommends initially locating fasteners loosely, checking level and plumb, and only then completing the connection (Waterson’s gate-alignment guidance).
General alignment sequence
- Support the gate at its intended finished height.
- Establish the required hinge-side and latch-side gaps.
- Position the hinge components and mark their locations.
- Locate initial fasteners or clamps without fully locking the assembly.
- Check the gate for level and the post for plumb.
- Align the hinge pivot axes.
- Move the supported gate carefully through its intended arc.
- Check latch alignment and clearance at the ground, post, and adjacent structures.
- Make only the adjustments permitted by the product.
- Tighten, secure, or finish the connection as instructed.
- Remove temporary supports and recheck movement and gaps.
One commercial guide says hinges are generally installed on the side toward which the gate swings, but this is not a universal installation rule. Product geometry, tamper resistance, adjacent structures, clearances, and the manufacturer’s instructions control the final orientation.
Top, middle, and bottom placement is likewise product-dependent. Do not copy a generic spacing rule without checking the required hinge count, gate-frame locations, spacing, and set rating.
Generic screw sizes, bolt grades, embedment depths, weld details, post sizes, and footing dimensions are intentionally omitted. Those requirements depend on the selected hardware, structure, loading, soil, and site.
Stop a general DIY installation when you encounter a compromised post or footing, severely split wood, uncertain structural capacity, a gate that cannot be supported safely, welding beyond your competence, automation, or a regulated barrier. These conditions require model-specific instructions and appropriately qualified assistance.
Diagnose Sag and Binding Before Replacing the Hinges
A sagging gate may have worn or damaged hinges, but it may also have loose fasteners, shifted clamps, inadequate bracing, post movement, frame twist, or moisture- and temperature-related deformation. The available evidence does not establish one cause as the most common across all gate types.
| Symptom | Possible causes | Inspect first |
|---|---|---|
| Latch-side gap is larger at the top | Gate racking, upper attachment movement, frame deformation | Fasteners, gate square, upper hinge, bracing |
| Latch-side bottom corner drags | Sag, post lean, inadequate clearance, gate twist | Gate level, post plumb, frame diagonals |
| Hinge leaf moves against wood | Loose fasteners, split wood, enlarged holes | Substrate and fasteners |
| Clamp-on hinge has rotated or slipped | Loose clamp, wrong tube size, impact | Clamp fit, bolts, tube dimensions |
| Gate binds during movement | Misaligned pivot axes, bent hardware, inadequate gap | Alignment and full-swing clearance |
| Gate will not latch | Sag, post movement, latch movement, unsuitable closing force | Latch gap, both posts, gate level |
| Hinge post leans | Footing or post failure, soil movement, overload | Plumb and movement at ground level |
| Gate frame is twisted | Failed joints, warp, impact, inadequate bracing | Diagonals, welds, and joints |
| Wood is split at a hinge | Concentrated connection load, decay, loose fasteners | Structural wood condition |
| Rust appears around the pivot | Coating failure, trapped water, incompatible parts | Pin, leaves, fasteners, drainage |
| Hinge or bracket is bent | Impact, overload, misalignment | Whole connection and gate stops |
Use a consistent diagnostic order:
- Check screws, bolts, nuts, clamps, and visible hinge movement.
- Check whether the hinge post is plumb and stable.
- Check the gate for level and square.
- Inspect bracing, joints, welds, and deformation.
- Check clearances and latch alignment.
- Inspect the hinges for wear, corrosion, bending, or lost adjustment.
- Decide whether the repair involves alignment, reinforcement, structural reconstruction, or replacement.
Adjustment and shimming
If the post, footing, frame, and attachment surfaces are sound and the misalignment is modest, an adjustable hinge may restore level or improve the latch gap.
A suitable shim behind the gate side of the upper hinge may also help in some installations:
- Support the gate.
- Loosen the upper fasteners without removing them.
- Insert an appropriate shim or use the hinge’s intended adjustment.
- Check the latch-side gap and full movement.
- Change the shim thickness or adjustment gradually.
- Retighten according to the product instructions.
- Recheck clearances and latch operation.
Do not use shims to conceal a moving post, failed footing, severely split mounting surface, or badly twisted gate.
Anti-sag cable for a racking wood gate
A cable-and-turnbuckle system can help a structurally sound wood gate that is racking diagonally. The cable runs from the bottom hinge-side corner to the top latch-side corner. With the gate supported, tension is increased gradually while the frame is checked for square.
This arrangement can pull upward on the sagging corner, but it cannot straighten a leaning post or restore failed joints.
Chain-link and metal gates
For a chain-link gate, first determine whether clamp-on hinges have shifted. Check the post, gate frame, mesh, tension components, and fittings before realignment. Commercial repair guidance distinguishes chain-link hinge realignment from wood-gate cable correction and structural reinforcement for heavy metal gates (Square Fence Fittings’ sag-repair guide).
Bent frames, failed welds, severely corroded tubes, and unstable posts require reinforcement, frame repair, welding, post resetting, or replacement—not repeated hinge adjustment.
A support wheel or center support can supplement an appropriate hinge system in some installations, but it is not a substitute for sound hinges, framing, posts, and footings.
Compare Complete Hinge-Set Cost, Not Just the Listing Price
Listings may be priced per hinge, pair, multipack, set, or complete kit. Normalize every option to the complete hardware needed for one gate leaf.
Include:
- Required hinge quantity.
- Post brackets, pintles, or mounting plates.
- Fasteners and backing plates.
- Adjustment components.
- Closer parts.
- Stops where required.
- Replacement bushings or service parts.
- Welding, fabrication, or coating repair.
- Shipping and taxes.
- Tools or lifting equipment not already available.
Worked comparison using dated retailer examples
Prices, package contents, availability, tax, and shipping are volatile and must be rechecked before purchase.
| Illustrative option | Displayed package | Normalized arithmetic | Important unknowns |
|---|---|---|---|
| Barrel-hinge listing | Pair displayed from $27.72 | One pair × $27.72 = $27.72 before extras | Rating scope, fasteners, brackets, fabrication |
| Individual weld-on barrel hinge | One hinge displayed from $28.37 | Two hinges × $28.37 = $56.74 before extras | Required quantity, welding, finish repair |
| Self-closing kit | Kit displayed at $251.13 | One kit × $251.13 = $251.13 before extras | Gate compatibility, gap, installation labor |
These figures illustrate packaging and category spread, not equivalent performance. The pair and kit examples appeared in one specialist catalog, while another catalog explicitly described a weld-on barrel hinge as sold individually (Fence Supply Co. catalog snapshot; Hoover Fence catalog snapshot).
The arithmetic does not make the products interchangeable. The lower-priced pair may omit required mounting components or fabrication. The higher-priced kit may include closing and adjustment functions absent from a basic hinge.
Use this comparison template:
| Comparison field | Option A | Option B | Option C |
|---|---|---|---|
| Listing unit: piece, pair, pack, or kit | |||
| Hinges required per leaf | |||
| Brackets or pintles included | |||
| Fasteners included and approved | |||
| Closer components included | |||
| Complete hardware price per leaf | |||
| Shipping and tax | |||
| Required tools or welding | |||
| Installation or fabrication cost | |||
| Replacement parts available | |||
| Adjustment directions and range | |||
| Technical documentation | |||
| Warranty and exclusions | |||
| Total comparable installed cost |
Do not use retailer rankings, review counts, sponsored placement, or purchase price as proof of suitability. The available catalogs demonstrate market variety, not independent comparative testing.
Self-Closing and Safety-Critical Gates
A self-closing hinge returns a gate toward the closed position.
Spring hinges use spring force for return movement. Certain hydraulic hinge-closers provide manufacturer-specified control over closing or final latching speed. Neither description proves that the completed gate satisfies a safety or legal requirement.
Before selecting self-closing hardware, verify:
- Approved gate material, dimensions, and weight.
- Required gate-to-post gap.
- Hinge quantity and spacing.
- Adjustment range.
- Permitted swing direction and opening angle.
- Specified closing and latching behavior.
- Compatibility with the latch and stop.
- Corrosion exposure and maintenance requirements.
- Any temperature or operating limitations.
- Whether certification applies to the hinge, a hardware set, or a complete gate system.
The supplied retailer evidence does not establish jurisdiction-specific pool-barrier requirements. Local rules can vary, and commercial guidance itself directs buyers to applicable local regulations rather than presenting one universal standard (HardwareSource’s pool-gate selection discussion). Do not infer compliance from a product title, self-closing label, or unsupported seller reference to a standard.
For any regulated barrier:
- Obtain the currently applicable requirements from the local authority.
- Obtain the selected product’s certification and installation records.
- Install and adjust the complete system according to those documents.
- Test the completed gate through every opening position required by the governing rules and product instructions.
- Recheck operation after hinge, latch, or gate adjustments.
When the source pack does not contain the governing rule or certification record, this guide does not supply a legal specification. Contact the local code authority or a qualified barrier installer.
Frequently Asked Questions
How do I know what size fence gate hinges to buy?
Measure the gate’s width, height, and weight; frame and post dimensions; available gap; intended hinge spacing; swing direction; and full-swing clearance. Record the gate and post materials, attachment surfaces, usage, exposure, and required features.
Then choose a geometrically compatible hinge family and mounting method. Check the manufacturer’s maximum gate dimensions and weight, required hinge quantity, spacing, fasteners, and rating scope. A seller’s hinge-length fraction is not a substitute for those model-specific limits.
Are two hinges enough, or does my gate need three?
Two may be sufficient if the manufacturer rates that arrangement for the gate’s dimensions, weight, materials, attachment, and use. A third may be required for a tall gate, a particular frame, or a product designed and rated as a three-hinge system.
More hinges do not automatically produce a stronger installation. Every pivot must be aligned, and the gate must follow the selected product’s quantity and spacing requirements.
Can adjustable hinges fix a sagging fence gate?
They can correct modest alignment problems when the post, footing, attachment surfaces, and gate frame remain sound. Adjustment may restore level or improve the latch gap.
They cannot repair a leaning post, moving footing, split wood, failed weld, inadequate bracing, or severely warped frame. Diagnose the structure before using the adjustment range.
Should a metal gate use bolt-on or weld-on hinges?
Either may be appropriate. Weld-on hinges can integrate neatly into a properly fabricated assembly but require suitable welding skill and make later repositioning less convenient. Bolt-on designs can simplify field installation, adjustment, replacement, and servicing where compatible mounting surfaces exist.
Compare the documented rating, frame and post dimensions, attachment requirements, clearances, adjustment, and maintenance rather than choosing solely by attachment method.
Do self-closing hinges make a pool gate code compliant?
No. Self-closing hardware supplies one function; it does not by itself establish that the completed barrier complies with the rules applicable in a particular jurisdiction.
Use documented hardware intended for the application, follow its installation and testing instructions, obtain any required certification records, and confirm the governing requirements with the local authority or a qualified pool-barrier installer.
Buy before you drill: document the gate material, weight, width, height, frame and post dimensions, swing, gaps, exposure, and operating needs. Inspect the post, footing, frame, bracing, and attachment surfaces. Choose a compatible hinge family and mounting method, then confirm whether ratings and prices apply per piece, pair, set, or complete gate. Verify fasteners, package contents, clearances, adjustment range, and current installation instructions.
For an unusually heavy, automated, high-wind, pool-barrier, or structurally compromised gate, stop at general guidance. Obtain model-specific documentation and qualified professional or code-authority input before installation.