
Choose Fence Wood by Component, Not by Name Alone
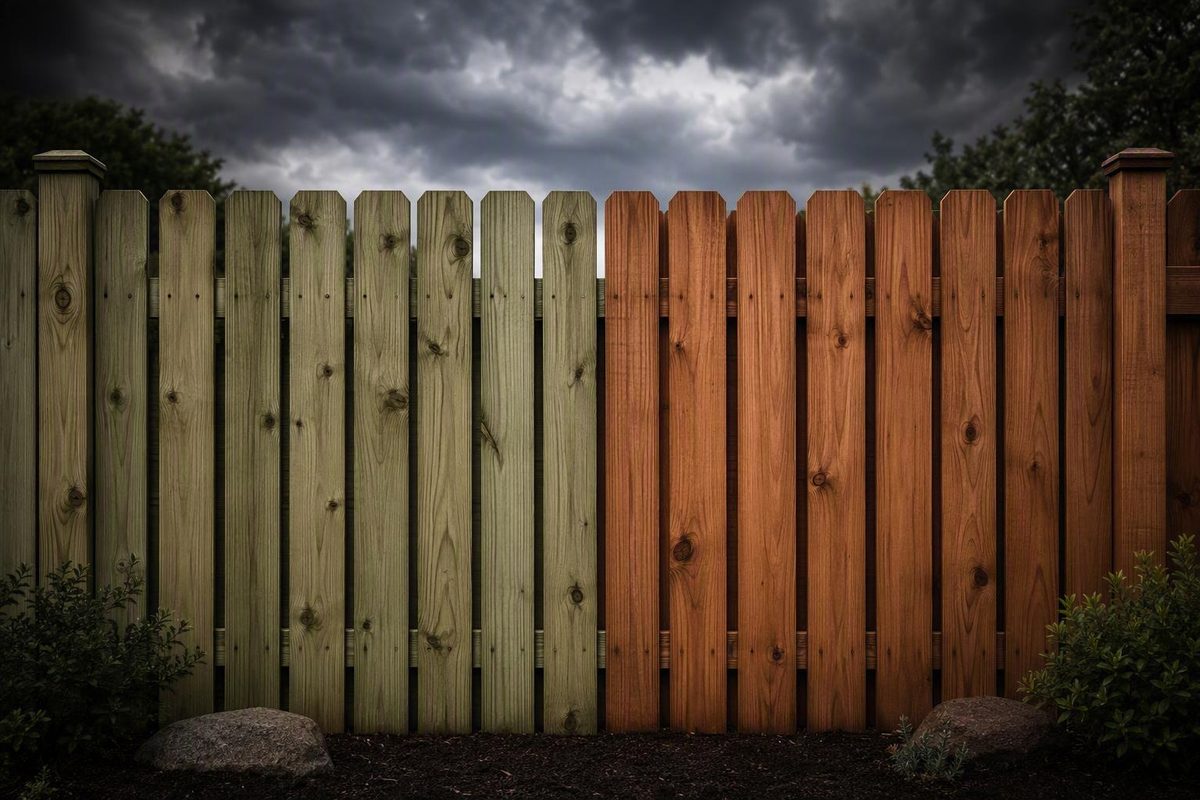
The short answer: match the wood to the fence component
In a pressure-treated lumber vs cedar comparison, neither material wins every part of a fence.
Pressure-treated lumber generally wins on upfront affordability and demanding moisture exposure, especially for buried posts when the product is specifically rated for ground contact. Cedar generally wins for visible, above-ground rails and pickets when appearance, lighter weight, and dimensional stability justify the higher price.
A mixed-material fence can therefore be practical: properly rated pressure-treated posts support cedar rails or pickets. It is not automatically the best configuration. An all-treated fence may better suit a tight budget, while an all-cedar fence may work where the cedar species, grade, post design, drainage, and local conditions are appropriate.
| Fence decision | Pressure-treated lumber | Cedar |
|---|---|---|
| Buried posts | Usually the stronger choice when rated for the required ground-contact exposure | Consider only when the exact cedar product, post design, drainage, and local conditions support it |
| Above-ground rails | Affordable and functional, but wet stock may move as it dries | Often preferred for appearance, lighter weight, and stability |
| Pickets or privacy boards | Lower initial material cost; inspect carefully for straightness and moisture | Premium appearance and generally less drying-related movement |
| Direct soil exposure | Use only a product specifically rated for that exposure | Do not assume every cedar board is suitable |
| Wet or poorly drained site | Proper treatment specification may favor treated posts, but drainage still matters | Keep above-ground boards clear of soil and persistent moisture |
| Appearance | May begin greenish or brown and weather toward gray | Commonly warm reddish or brown, weathering toward silver-gray |
| Initial budget | Usually lower | Usually higher |
| Tolerance for movement | Wet boards may shrink, check, twist, crack, or warp as they dry | Generally more stable, but can still split, cup, dent, or twist |
The qualification properly rated matters. Pressure treatment is not one uniform specification. Wood species, grade, preservative system, intended exposure, dimensions, and moisture condition can vary. Likewise, “cedar” does not identify one species, grade, or proportion of naturally durable heartwood.
Use this starting framework:
- Choose properly rated pressure-treated lumber when low initial cost, burial, or persistent dampness dominates the decision.
- Choose cedar for premium visible rails and pickets when color, grain, lower weight, and dimensional stability matter most.
- Consider combining them when the posts and visible boards face meaningfully different exposures. General outdoor-project guidance likewise treats the materials as complementary, assigning appropriately rated treated wood to demanding structural or ground-contact roles and cedar to visible locations (HGTV’s treated wood versus cedar guide).
These conclusions are fence-specific. A picket does not carry the same loads or face the same use conditions as deck framing, furniture, play equipment, planters, or a structural beam. Do not transfer a fence recommendation to another project without reviewing that project’s specifications.
What pressure treatment and cedar’s natural resistance actually mean
Pressure-treated lumber begins as a wood species—commonly pine or fir in consumer comparisons—and undergoes a process intended to move preservative into the wood. The preservative improves resistance to organisms associated with decay and insect damage. Treatment changes the wood’s exposure capabilities, but it does not make every treated board interchangeable.
The key distinction is between a generic material name and a product intended for a particular exposure. A board intended for an above-ground location is not automatically suitable as a buried post.
Before buying treated fence lumber:
- Read the treatment tag or label and confirm the intended exposure.
- Verify that direct ground contact is permitted when the wood will be buried.
- Check the separate grade stamp or seller documentation for species and lumber grade where applicable.
- Obtain the producer’s literature for preservative information, restrictions, installation instructions, and any directions that apply to cuts or drilled holes.
- Keep the documentation with the project records.
Do not rely on a bin sign that says only “treated lumber.” If the label is missing or illegible, ask the seller for the relevant product documentation before using the board in soil, concrete, or a persistently damp location.
Cedar relies on naturally occurring compounds for some resistance to decay and insects rather than pressure-applied preservative. That does not mean every cedar board performs equally. Durability varies by species, grade, growing characteristics, and heartwood content; retailer guidance specifically notes stronger natural resistance in heartwood grades and substantial variation in product quality (Niehaus Lumber’s cedar comparison).
That variation is visible at the lumber rack. Treated boards can likewise differ in species, grade, treatment category, dimensions, and moisture condition.
Neither resistance mechanism compensates for poor detailing. Pressure treatment does not make an above-ground-rated board appropriate for burial. Cedar’s natural resistance does not make every cedar post suitable for wet soil. Both materials can perform poorly when an installation traps water or prevents drying.
This comparison also does not establish universal conclusions about gardens, food contact, children, pets, toxicity, or environmental superiority. Those questions depend on the exact product, preservative, intended use, current label, and applicable guidance. Neither “cedar” nor “pressure treated” is a complete safety specification.
The useful distinction is narrower:
- Pressure treatment is selected for an intended exposure, so the product specification must match the installed location.
- Cedar provides natural resistance, but performance still depends on species, grade, heartwood content, and exposure.
- Neither material eliminates the need for drainage, airflow, compatible hardware, and inspection.
Posts, rails, and pickets face different exposure
A wood fence is a system of components with different jobs. Rails span between posts and support the boards. Pickets or privacy boards form the visible surface. Specifying all three by one generic wood name ignores their different exposures.
Posts normally face the most demanding moisture conditions.
For direct ground contact, pressure-treated lumber specifically labeled for the intended exposure is generally the stronger fit in the supplied fence comparisons. Confirm that rating rather than assuming any treated post can be buried.
Rails serve a structural role within the fence, but they can normally drain and dry when installed correctly. Treated rails can reduce initial cost. Cedar rails can provide lower weight, a coordinated appearance, and greater dimensional stability, but the word “cedar” alone does not establish structural capacity.
Pickets and privacy boards are selected partly for appearance. Because they repeat across the entire fence, color, grain, knot pattern, thickness, and straightness strongly affect the finished result. Cedar often earns its premium here. Treated pickets remain a valid budget choice, although wet boards may develop wider gaps or more visible checking and movement as they dry.
Three configurations are defensible:
-
All properly specified pressure-treated lumber This suits a budget-focused fence when the posts carry the required exposure rating and the rails and boards meet the necessary grade and dimensions. Careful stock selection is especially important when lumber is wet.
-
Properly rated pressure-treated posts with cedar rails or pickets This separates buried exposure from the visible surface. It can put treated wood where ground moisture matters and cedar where appearance and stability matter.
-
An all-cedar fence This may be appropriate when the exact cedar species and grade, post design, soil, drainage, climate, and local building practice support it. Do not choose it on the assumption that natural resistance makes any cedar post ideal for burial.
A Canadian contractor’s component-based comparison also favors appropriately rated treated material for soil-contact posts and cedar for visible above-ground boards, while emphasizing the importance of drainage and climate. Its conclusions are contractor-reported and region-specific rather than universal standards (Lean On Me’s fence-post comparison).
Material selection cannot correct bad water management. A sound fence design should:
- Maintain clearance between above-ground boards and soil, mulch, or dense vegetation.
- Prevent leaves and debris from accumulating against rails and pickets.
- Avoid ledges and joints that collect water.
- Permit airflow around boards and post bases.
- Direct irrigation and roof runoff away from the fence where practical.
- Account for splashback near pavement and garden beds.
- Keep end grain and cut surfaces out of persistent moisture.
- Use a post-setting method appropriate to the soil, loading, climate, product instructions, and local requirements.
The relevant question is whether the complete assembly supports the post, manages water, and complies with the selected product’s instructions and project requirements.
Avoid copying treatment use-category codes from a regional retailer or contractor page and treating them as universal. Terminology, products, exposure severity, and project requirements vary. The treatment label, producer documentation, applicable building requirements, and project design should control.
Cost: compare equivalent fence specifications, not generic wood labels
Pressure-treated lumber generally costs less upfront than comparable cedar. That directional finding is consistent across the supplied retailer and contractor comparisons, including guidance that positions treated lumber as the budget choice and cedar as the premium visible material (Friel Lumber’s pressure-treated lumber and cedar comparison).
A universal percentage premium or national cost per linear foot is not defensible from the available evidence. Published examples come from different regions and dates and compare different cedar species, treated-wood species, grades, board thicknesses, fence heights, post systems, hardware packages, and finishes. Some report lumber prices; others report installed fences.
Require contractors and suppliers to quote the same basic specification:
| Quote item | What to request |
|---|---|
| Fence layout | Total length, height, corners, ends, slopes, and stepped or racked sections |
| Posts | Material, dimensions, grade, length, spacing, exposure rating, treatment information, and setting method |
| Rails | Species, grade, dimensions, quantity per bay, span, and attachment method |
| Pickets or boards | Species, grade, thickness, width, length, profile, and spacing |
| Gates | Width, frame material, bracing, hinges, latch, stop, drop rod, and supporting-post specification |
| Hardware | Fastener and connector material, coating, compatibility, and applicable warranty conditions |
| Finish | Product type, color, preparation, number of coats, and included labor |
| Site work | Demolition, disposal, clearing, grading, rock, roots, access restrictions, and utility coordination |
| Labor | Installation scope, cleanup, restoration of disturbed ground, and exclusions |
| Commercial terms | Taxes, delivery, deposit, change orders, warranty, and quote-expiration date |
A lower bid may use thinner pickets, wider post spacing, fewer rails, smaller posts, a lower grade, an unsuitable treatment category, basic gate hardware, or no finish. That is not a like-for-like saving if the higher quote specifies a materially different fence.
Cedar pricing also needs precision. Ask which cedar species is being supplied and require a recognized grade or clear written quality description. Confirm whether visible and concealed components use the same material. Terms such as “premium cedar” are not complete specifications by themselves.
For lifecycle cost, do not declare either material the automatic long-term winner. Build a calculation around the actual project:
Estimated lifecycle cost = initial materials + installation + finishing + cleaning + repairs + hardware and gate work + replacement of failed components + eventual removal and replacement
Use the same comparison period for every option. Include aesthetic value explicitly rather than trying to justify it only through hypothetical repair savings.
| Assumption | Treated fence | Cedar fence | Hybrid fence |
|---|---|---|---|
| Initial installed price | Enter quote | Enter quote | Enter quote |
| Initial finish | Enter amount | Enter amount | Enter amount |
| Planned cleaning | Enter frequency and cost | Enter frequency and cost | Enter frequency and cost |
| Color-preserving recoats | Include only if planned | Include only if planned | Include where planned |
| Board repairs | Enter allowance | Enter allowance | Enter allowance |
| Post, gate, or hardware work | Enter allowance | Enter allowance | Enter allowance |
| End-of-period condition | Describe | Describe | Describe |
Regional contractor reports can suggest questions to ask, but they are not national benchmarks. One North Georgia contractor reports observations from its own installations, for example, but does not publish raw data or an independently controlled comparison. Its findings should remain contractor-reported and climate-specific (Precision Fenceworks’ North Georgia comparison).
The most reliable comparison is based on current local bids for the same written fence specification.
Appearance, movement, and workability over time
Cedar is commonly selected for its warm reddish, reddish-brown, or brown color and visible grain. Without a color-preserving UV finish, it commonly loses that original color and weathers toward silver-gray. Some owners value the patina; others prefer to preserve the original tone. That is an aesthetic preference, not a measure of structural condition.
Pressure-treated lumber may begin with a greenish, yellow-brown, or brown cast depending on the product. The color generally becomes less pronounced as the wood dries and weathers, and the fence can eventually turn gray. It may also be stained once the wood meets the coating manufacturer’s readiness requirements.
Dimensional movement is a practical difference. Treated lumber can arrive with substantial moisture from processing and storage. As it dries, boards may shrink, check, cup, twist, crack, or warp. These are risks, not certainties. Species, grade, grain, dimensions, storage, fastening, moisture distribution, and exposure all affect the outcome.
Drying can also alter spacing. Installation should account for the condition of the actual lumber rather than assuming its dimensions will remain unchanged.
Cedar is generally lighter and more dimensionally stable. That can make visible runs more consistent and reduce the amount of drying-related movement that must be managed. Cedar remains a softwood, however, and can dent, scratch, split, cup, or twist—particularly in lower grades or poorly selected stock. Fence-contractor guidance similarly recognizes both cedar’s relative stability and its susceptibility to dents and movement (Stand Strong Fencing’s wood-species comparison).
Workability involves tradeoffs:
- Cedar’s lower weight can make it easier to carry, position, and cut.
- Its softness makes damaged edges and overdriven fasteners more likely.
- Wet treated lumber can be heavy and harder to handle.
- Treated boards may change dimensions as they dry.
- Either material can split when fasteners are poorly positioned.
- Knots, grain direction, grade, and thickness affect cutting and fastening.
Inspect the actual stock rather than buying by species name alone. Sight along each face and edge for bow, crook, cup, and twist. Check for:
- Loose or damaged knots
- Deep checks and end splits
- Crushed edges or handling damage
- Inconsistent dimensions
- Excessively wet or unusually heavy boards
- Evidence of prolonged wet storage
- Grain patterns likely to encourage cupping
- Inconsistent color where appearance must match
- Legible treatment labels where exposure verification is required
Sort the delivery before construction. Reserve the straightest pieces for gates, long rails, ends, corners, and prominent sight lines. Use less visually consistent but otherwise suitable boards in inconspicuous sections, and reject boards that cannot perform their intended role.
Cedar’s color and grain are common reasons to pay more, but beauty is subjective. A homeowner planning an opaque finish may place less value on cedar’s original appearance than someone seeking a natural-looking fence beside a patio.
Maintenance and finishing without misleading timelines
Neither cedar nor pressure-treated lumber is maintenance-free. Both benefit from routine inspection, appropriate cleaning, drainage, vegetation control, sound hardware, and timely repair.
For cedar, separate color maintenance from structural condition. A UV-resistant finish can slow the loss of its original warm color. Leaving cedar unfinished commonly allows it to develop a silver-gray patina.
Pressure-treated lumber should be coated only when its moisture condition satisfies the selected coating manufacturer’s instructions. Published commercial recommendations conflict on waiting time, showing why elapsed time alone is unreliable. Treatment process, storage, board dimensions, weather, season, shade, and humidity all affect drying.
Before applying a finish:
- Identify the wood and assess its condition.
- Read the coating label and technical instructions.
- Confirm that the coating is intended for the lumber involved.
- Follow the manufacturer’s moisture, cleaning, preparation, temperature, and weather requirements.
- Test a representative area when instructed.
- Do not apply the coating when rain, dew, temperature, or direct sun would violate the product directions.
There is no single moisture number established here for every paint, stain, sealer, wood species, or testing method.
Maintenance intervals also vary. Irrigation, vegetation, coastal conditions, freeze-thaw cycles, and roof runoff can change the inspection and recoating schedule. Follow the selected product’s instructions rather than a fixed calendar rule.
Use a repeatable inspection workflow:
- Post bases: Look for softness, cracks, movement, trapped soil, or standing water.
- Ground clearance: Remove mulch, leaves, vines, and soil touching components intended for above-ground use.
- Rails and boards: Check for loose pieces, open joints, severe checking, splitting, cupping, and fastener pull-through.
- End grain: Inspect exposed ends and cuts for damage or coating failure.
- Fasteners and connectors: Look for corrosion, dark staining, loose heads, and elongated holes.
- Gates: Check alignment, sag, latch engagement, hinge movement, and post lean.
- Finish: Look for peeling, flaking, bare areas, or uneven wear.
- Persistent dampness: Investigate irrigation, drainage, dense vegetation, soil buildup, and water-trapping details.
Use a cleaning method permitted by the wood and finish manufacturers. Avoid damaging soft fibers or leaving an uneven surface, and allow the fence to dry as required before recoating.
A finish is not a substitute for repair. Correct drainage, replace failed hardware, stabilize loose posts, and repair detached or badly split boards before covering the surface.
Fasteners, cutting, and installation details that protect the fence
Hardware is part of the fence specification. Fasteners and connectors must be compatible with cedar, the particular preservative used in treated lumber, the expected exposure, and one another.
Ordinary steel may react with cedar and create dark staining. Copper-based preservatives can also accelerate corrosion of incompatible metal hardware. Commercial fence guidance commonly recommends stainless steel or appropriately galvanized fasteners for cedar, but the final selection should follow the lumber-treatment information and the hardware manufacturer’s compatibility requirements (Monkey Fence’s material and fastener comparison).
Do not prescribe one fastener for every fence. Instead:
- Identify the preservative used in the treated lumber.
- Read the treatment documentation for hardware requirements.
- Review the fastener or connector manufacturer’s compatibility information.
- Ensure nails, screws, bolts, brackets, hinges, and other connectors are suitable for the same exposure.
- Avoid mixed-metal combinations where the hardware manufacturer warns against them.
- Check whether a warranty requires a particular material or coating.
- Size connectors for the lumber and expected loads, not merely for appearance.
When cutting pressure-treated lumber, follow the product label and use the precautions it specifies. The supplied HGTV guidance advises eye protection and a dust mask when cutting treated wood and gloves when handling it (HGTV’s treated-wood handling guidance). Use tools and protective equipment as directed by their manufacturers and keep the work area orderly.
Do not burn pressure-treated scraps. Follow the product instructions and applicable local waste guidance for disposal; contractor guidance in the evidence pack also specifically warns against burning treated offcuts (Precision Fenceworks’ treated-lumber discussion).
Do not improvise a field-applied chemical or assume every preservative system has the same requirement. Follow the treatment producer’s documentation and the project specification.
Focus on:
- Accurate post spacing
- A post-setting design suited to soil and loads
- Straight layout and consistent elevations
- Rail spans matched to grade and dimensions
- Picket spacing that accounts for current moisture condition
- Clearance from soil and mulch
- Drainage around post bases
- Airflow behind and between boards
- Fastener placement that limits splitting risk
- Gate framing and bracing appropriate to gate width and weight
- Joints and surfaces that do not hold water
A premium cedar board attached with incompatible hardware or installed against damp soil is not a premium fence system. A correctly rated treated board installed crooked or without drainage is not protected from workmanship problems. Material and installation must be specified together.
A decision checklist for choosing the right fence wood
Before buying lumber or approving a contract, settle the conditions each component will face.
Map the exposure
- Which components will be buried?
- Will any wood touch concrete?
- Where will irrigation, runoff, or pavement splashback wet the fence?
- Which areas remain shaded?
- Does the soil drain quickly or stay damp?
- Could future mulch, planting, or grading reduce clearance?
- Where might debris or standing water collect?
Specify pressure-treated lumber
Ask for:
- Wood species
- Lumber grade
- Nominal and actual dimensions
- Intended exposure rating
- Preservative or treatment information
- Confirmation that buried posts are suitable for their installed exposure
- Moisture condition at delivery
- Product instructions relevant to fastening, cutting, finishing, and disposal
Specify cedar
Ask for:
- Cedar species
- Grade
- Board dimensions
- Surface texture or milling
- Knot expectations
- Appearance matching for visible sections
- Moisture condition
- Structural or installation limitations relevant to the component
“Cedar fence” is not a complete specification. Neither is “treated pine fence.”
Choose the intended appearance
Decide what the fence should look like:
- Immediately after installation
- After initial drying and weathering
- After cedar turns silver-gray
- After treated lumber loses its initial cast
- With a transparent, semi-transparent, solid-color, or no finish
If natural graying is acceptable, do not budget for color-preserving work you do not intend to perform. If cedar’s original color is central to the purchase, include preparation and future recoating in the cost comparison.
Assess ownership and maintenance priorities
Consider:
- Available initial budget
- Willingness to clean and inspect the fence
- Willingness to refinish for color retention
- Tolerance for checking, knots, and movement
- Importance of a uniform appearance
- Expected length of ownership
- Ability to replace individual components
- Consequences of gate or post failure
A short ownership horizon does not automatically make the cheapest option correct, and a long horizon does not automatically make cedar cheaper. Either conclusion requires actual bids and explicit maintenance assumptions.
Check external requirements
Before construction, consult the relevant local authorities, utility-marking service, property records, and homeowners association where applicable. Rules involving permits, height, setbacks, visibility, utilities, property lines, and approved materials vary by jurisdiction; regional contractor guidance likewise advises checking local building and association rules before construction (Earthscapes’ Colorado fence-material guide).
Make quotes comparable
Require enough separation to identify:
- Posts
- Rails
- Pickets or panels
- Gates
- Fasteners and connectors
- Post-setting materials
- Finish
- Demolition
- Hauling and disposal
- Site preparation
- Labor
- Taxes and delivery
- Allowances and exclusions
If a bidder will not identify the treatment rating, cedar species, grade, dimensions, or hardware package, the quote is not ready for meaningful comparison.
The scenario verdicts are straightforward:
- Choose properly specified pressure-treated lumber when the lowest initial cost is the priority or wood must handle demanding ground exposure.
- Choose cedar for premium visible, above-ground rails and pickets when appearance, lower weight, and greater dimensional stability justify the price.
- Consider a hybrid fence when posts and visible boards have different priorities.
- Choose neither by name alone. The exact specification and installation determine the fence you are buying.
Frequently asked questions
Is cedar or pressure-treated lumber better for fence posts?
For a buried wood post or one exposed to persistent ground moisture, pressure-treated lumber specifically rated for the intended ground-contact exposure is generally the stronger choice. Do not assume every treated board is suitable for burial.
Cedar posts may be appropriate in some designs, but suitability depends on cedar species and grade, drainage, soil, post-setting method, climate, and local practice. Natural resistance alone does not make every cedar post suitable for wet soil or concrete contact.
If cedar’s appearance is the main objective, using properly rated treated posts with cedar above-ground components is one practical option.
Can I use pressure-treated posts with cedar rails and pickets?
Yes. Properly rated pressure-treated posts with cedar rails or pickets form a practical fence configuration. It assigns treated lumber to the demanding soil-contact role and cedar to the visible surface.
The combination still requires compatible hardware, appropriate dimensions, drainage, airflow, and spacing that accounts for the moisture condition of the actual stock. It is an option, not a universal rule; an all-treated or suitably designed all-cedar fence may better fit other priorities.
How can I tell when pressure-treated lumber is ready for stain or sealer?
Use the selected coating manufacturer’s moisture and preparation requirements rather than a fixed waiting period. Published schedules conflict because treated lumber does not dry at one universal rate.
Read the coating’s technical instructions and assess representative boards. A moisture meter may help when used correctly, but the acceptable reading must come from the coating manufacturer. Recent rain, shade, humidity, temperature, and the forecast also affect application conditions.
Does cedar need to be sealed, or can it weather naturally?
Cedar can be left unfinished if its natural weathering is acceptable and the fence continues to receive inspection and maintenance. It will commonly change from warm reddish or brown tones toward silver-gray.
Use a compatible UV-resistant finish if retaining the original color is important. That is primarily an appearance decision and does not correct poor drainage, failed hardware, or damaged wood.
Which costs less over the life of a fence?
There is no universal winner. Pressure-treated lumber generally costs less initially, but lifecycle cost depends on the complete specification, local labor, finish plan, repair needs, hardware, post performance, and comparison period.
Calculate:
Initial installed cost + planned finishing and cleaning + repairs + gate and hardware work + component replacement + eventual removal
Use the same height, dimensions, post spacing, grade, treatment rating, gates, hardware, and time period for every option. Cedar’s premium may be worthwhile for appearance and stability, but that does not automatically make it cheaper over time. Treated lumber’s lower purchase price likewise does not guarantee the lowest lifecycle cost if the quote relies on thinner boards, weaker hardware, or an unsuitable treatment specification.
Choose the fence as a system. Properly rated pressure-treated lumber is usually the practical choice for buried posts and tighter initial budgets; cedar is usually the premium choice for visible, above-ground rails and pickets. Where both priorities apply, a correctly detailed hybrid can be sensible—but the exact lumber, drainage, hardware, and workmanship matter more than a universal material verdict.