
How to Choose a Bolt That Fits Your Gate and Keeps Working
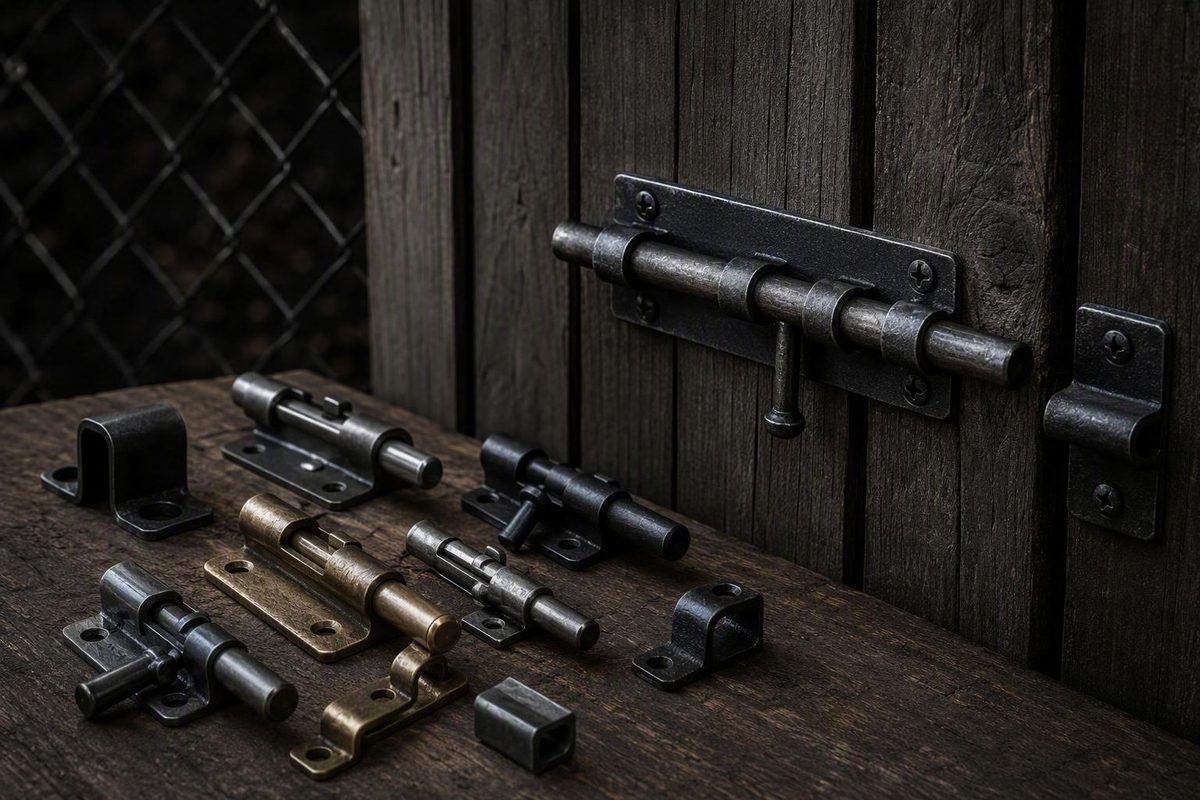
A gate bolt looks simple: slide a rod into a receiver and the gate stays put. Yet many poor installations begin with choosing by name, length, color, or a label such as “heavy duty” without checking how the gate and receiver actually meet.
The right choice depends on five things:
- The job: holding a single gate, anchoring one leaf of a double gate, or controlling routine access.
- The movement: inward swing, outward swing, double swing, or sliding travel.
- The geometry: bolt throw, gate-to-post gap, receiver position, and operating clearance.
- The structure: whether the gate frame and receiving post, leaf, or ground surface can support the hardware.
- The conditions: weather exposure, access side, user reach, maintenance, and any applicable safety rules.
Select the mechanism first and the product second. Gate-hardware names overlap, and duty labels alone do not establish suitability.
What a gate bolt is—and what it is not
A gate bolt holds a gate closed or stationary by sliding a metal rod into a receiver. That receiver may be:
- A keeper mounted on a post
- A catch plate on another gate leaf
- An opening in a post or frame
- A socket in concrete or masonry
- A dedicated ground catch
A typical assembly has four functional parts:
- Sliding rod: moves into and out of the receiver
- Mounting plate or guides: attach to the gate and support the rod
- Handle: extends or retracts the rod
- Receiver or keeper: captures the extended rod
Some designs combine the rod and guides on one backplate. Others use separate brackets. The receiver may be included, sold separately, or fabricated for a particular installation.
Why the terminology overlaps
Suppliers may call related horizontal mechanisms a gate bolt, slide bolt, barrel bolt, tower bolt, padbolt, or Brenton padbolt. These terms describe broad patterns rather than standardized dimensions or performance. One supplier groups gate bolts, padbolts, slide bolts, and barrel bolts around the same basic idea—a sliding bar engaging a post opening, catch plate, or keeper—but individual products still differ in travel, locking arrangement, mounting orientation, and receiver design (Abbey Hardware’s gate-latch guide).
Treat the product name as a starting point. Verify:
- The rod’s direction of travel
- Its usable throw
- The receiver location and dimensions
- Whether the rod is retained when open or closed
- Whether it accepts a padlock
- The mounting-plate footprint
- The permitted installation orientation
- Whether the item is actually closing hardware
Retail categories often combine gate, door, garage-door, window, hinge, and general-purpose hardware. A product called a “gate bolt” may even be a J-bolt or hanger bolt used in the hinge system rather than to close the gate.
What should not be confused with a closing bolt
A sliding gate bolt is not automatically equivalent to a:
- Gravity latch: an arm or striker enters a catch as the gate closes.
- Spring latch: a spring moves or retains the latching component.
- Magnetic latch: magnetic force helps secure the latch.
- Gate lock: a keyed, combination, mechanical, or electronic access-control device.
- J-bolt or hanger bolt: hinge hardware that supports or adjusts a gate.
- Gate stop: a component that limits travel or establishes a closing position.
- Hinge pin: part of the pivot system.
These parts may be used together. A double gate, for example, may need a vertical bolt to anchor one leaf, a stop to establish its closed position, and separate hardware to latch the two leaves together.
One-sided versus two-sided operation
Simple bolt latches are commonly operated from the side carrying the handle. Manufacturer guidance describes them as typically one-way and usually padlockable, rather than making either feature universal (Nationwide Industries’ gate-latch overview).
Do not assume every gate bolt is inside-only. Reach through the gate, linkage, double-sided hardware, installation height, and keyed designs can alter operation. If users need routine access from both sides, specify that requirement before buying.
Gate bolt types and the job each one performs
The clearest way to compare gate bolts is by the rod’s direction of travel and the receiver’s location.
Horizontal closing bolts
A horizontal bolt generally travels from the moving gate toward a:
- Fixed post
- Fence frame
- Second gate leaf
- Keeper beside the gate
This family includes many slide bolts, barrel bolts, tower bolts, and padbolts.
A slide bolt broadly describes a rod sliding through guides into a receiver. A barrel bolt often uses a compact guided body, although listings apply the name inconsistently. A tower bolt is best understood as a surface-mounted guided sliding rod; its permitted orientation depends on the product. A padbolt commonly incorporates or aligns with a loop or staple for a padlock.
Padlockable bolts
A padlockable bolt has an integrated loop or aligned components that accept a padlock shackle when the rod is engaged. Compatibility is common but not universal.
Check:
- Locking-hole or loop diameter
- Clearance around the loop
- Shackle diameter and reach
- Alignment at full engagement
- Access from the intended side
- Interference from the frame, pickets, or handle
A locking loop can help control routine access. It does not prove resistance to cutting, prying, fastener removal, bracket bending, or keeper pull-out.
Vertical ground-engaging bolts
A vertical bolt travels downward into a ground receiver or catch. Common names include:
- Cane bolt: usually a long hand-operated rod with a raised or bent handle.
- Foot bolt: mounted low on the leaf; the actual operating method varies.
- Drop bolt or drop rod: a broad category in which the rod drops into a fixed receiver.
- Ground bolt: another descriptive name for a similar function.
These mechanisms are particularly useful on double gates. The vertical bolt anchors the inactive leaf—the leaf normally opened second—so the active leaf can latch against it. To open the full entrance, release the closing hardware and then lift the vertical bolt.
Accessibility and ease of use
A long cane-bolt handle can reduce bending. Low-mounted hardware may be difficult for users with limited balance, reach, leg control, or dexterity. A design that requires leaning across the gate, reaching through a narrow gap, or manipulating a separate padlock can also be inconvenient.
Do not infer “hands-free” operation from the name foot bolt. Inspect the actual handle and operating sequence, including whether the user must hold a heavy gate in position while operating it.
Specialized vertical products
Key-lockable and electric drop bolts are separate product categories, not automatic upgrades to a manual cane bolt. They may involve cylinders, wiring, control systems, and specialized installation requirements. Retail catalogs list manual stainless and galvanized drop bolts alongside key-lockable and electric versions, illustrating category breadth rather than interchangeability (Outlaw Industries’ drop-bolt catalog).
| Bolt type | Operating direction | Receiver location | Typical gate configuration | Manual access | Potential locking feature |
|---|---|---|---|---|---|
| Slide or barrel bolt | Horizontal | Post, frame, or adjacent leaf | Single pedestrian or garden gate | Usually from handle side | Some accept a padlock |
| Tower bolt | Product-dependent | Post, frame, or adjacent leaf | Single gate or paired leaves | Usually from handle side | Available on some models |
| Padbolt | Horizontal | Keeper, staple, or adjacent structure | Single gate or paired leaves | Usually from bolt side | Commonly arranged for a padlock |
| Cane bolt | Vertical | Ground socket or catch | Inactive leaf of a double gate | Raised handle may reduce bending | Some provide lockable retention |
| Foot bolt | Vertical | Ground opening or catch | Double gate or door-like leaf | Low operating position | Product-dependent |
| Drop bolt | Vertical | Ground catch or fixed socket | Double driveway or commercial gate | Handle height varies | Manual, key-lockable, and electric versions exist |
These are common patterns, not universal definitions. The product drawing and instructions take priority over the label.
Match the bolt to the gate configuration
Start with the gate system rather than the hardware aisle. A bolt that works well on one gate may be unreliable on another because the movement, frame, receiver, or access conditions differ.
Single pedestrian or garden gate
A horizontal slide or barrel bolt may be suitable when:
- The gate closes consistently against a stable post or stop
- The keeper can attach to sound material
- The throw is sufficient to cross the gap
- The handle remains reachable
- Access from the bolt side is acceptable
- Automatic latching is not required
A manual bolt does not become self-latching merely because the gate closes against its keeper. If the gate needs to latch whenever it is pushed shut, consider a mechanism designed for that action.
Double driveway gate
A common arrangement uses two functions:
- A cane, foot, or drop bolt anchors the inactive leaf into a fixed ground receiver.
- Separate hardware secures the active leaf to the inactive one.
The receiver must be positioned where the inactive leaf naturally rests. A stop may also be needed to establish a repeatable closed position. The receiver should remain accessible for cleaning if dirt, gravel, vegetation, or water can accumulate around it.
Large, heavy, agricultural, or frequently used gate
Do not select solely by “heavy duty,” “farm,” “industrial,” or “extra heavy duty.” The supplied evidence does not establish shared weight thresholds for these labels.
Instead, verify the manufacturer’s information for:
- Rod diameter and material
- Bracket or backplate construction
- Keeper construction
- Fastener requirements
- Mounting-hole arrangement
- Required supporting frame
- Permitted orientation
- Application or load information
- Expected use and environmental limits
- Warranty and technical documentation
A bolt is not a substitute for sound hinges, posts, bracing, or framing.
Sliding gate
Many familiar bolts assume that a swinging gate arrives beside a fixed post and that the rod crosses a predictable side gap. A sliding gate travels along the fence line and may require different keeper geometry or purpose-designed locking hardware.
Confirm that the product is intended for the gate’s actual movement. The presence of “gate,” “door,” or “slide” in a listing title is not enough.
Wood, metal, vinyl, and composite gates
The visible surface does not always reveal the structural mounting point.
- Wood: Mount to a sound rail, stile, or reinforced frame member, not a loose picket or decayed board.
- Metal: Identify the frame construction and use a mounting method approved for both the gate and hardware.
- Vinyl: Determine whether the profile contains suitable reinforcement and follow the gate manufacturer’s restrictions.
- Composite: Identify the substrate and structural support rather than relying on a decorative board.
- Chain link: Use fittings intended for the frame instead of attaching loaded hardware to mesh fabric.
The receiver needs sound support as well.
Questions that narrow the choice
Before comparing products, answer:
- Is the gate single- or double-leaf?
- Does it swing or slide?
- Should the rod engage horizontally or vertically?
- Where can the receiver be installed?
- Does the gate swing inward, outward, or both ways?
- Is operation needed from one side or both?
- Can intended users reach the handle comfortably?
- Must the bolt accept a particular padlock?
- Is the objective basic holding, routine access control, or something more demanding?
- Is the site wet, salty, muddy, dusty, icy, or chemically exposed?
| Decision factor | If this describes the gate | Favor | Verify before choosing |
|---|---|---|---|
| Single leaf | Closes beside a stable post | Horizontal slide, barrel, tower, or padbolt | Throw, keeper alignment, access side |
| Double leaf | One leaf normally stays fixed | Vertical cane, foot, or drop bolt | Ground catch, stop, opening sequence |
| Horizontal engagement | Receiver can mount beside the gate | Guided sliding bolt | Gap, guide support, handle travel |
| Vertical engagement | A fixed receiver can be placed below | Cane or drop bolt | Ground clearance, travel, debris |
| Wood frame | Sound rail or stile is available | Product-approved screw or through-bolt mounting | Fasteners, edge distance, wood condition |
| Hollow metal frame | Tube or thin-wall construction | Product-approved bolt-on or weld-on arrangement | Frame support and installation instructions |
| Vinyl or composite | Structural insert may be concealed | Manufacturer-approved mounting system | Internal support and fastener limits |
| One-side access | Handle side is always reachable | Conventional manual bolt | Reach and padlock position |
| Two-side access | Entry occurs from either side | Purpose-designed two-sided latch or lock | Actual operating method |
| Severe exposure | Wet, salty, muddy, or chemically aggressive | Documented material and coating specification | Grade, coating, fasteners, maintenance |
| Basic holding | Prevent ordinary movement of an aligned gate | Manual bolt may be enough | Receiver stability and retention |
| Routine access control | Deter casual opening | Lockable bolt may help | Padlock fit and exposed fasteners |
| Regulated or higher-security use | Compliance or forced-entry concerns apply | Purpose-designed documented hardware | Tests, approvals, and local requirements |
Measure before buying: bolt, throw, keeper, and clearance
Measure the gate in its normal closed position. If it sags, twists, or moves at the post, stabilize it before treating the current position as reliable.
Gate-bolt measurement worksheet
| Measurement | What to record | Why it matters |
|---|---|---|
| Overall bolt length | End-to-end assembly or rod dimension, as defined by seller | Shows space consumed but may not reveal travel |
| Usable throw | Distance from fully retracted to fully extended | Determines whether the rod can reach the receiver |
| Rod diameter | Diameter or cross-section of the moving rod | Must fit guides and receiver |
| Mounting-plate footprint | Overall plate or bracket width and height | Must fit a structural frame member |
| Guide or bracket spacing | Distance between separate guides | Affects rod support and mounting positions |
| Mounting-hole pattern | Hole locations and diameters | Determines where fasteners can land |
| Gate-to-post or leaf gap | Clear distance the rod must cross | Uses part of the available throw |
| Receiver opening | Internal width, height, or diameter | Must admit the rod without binding |
| Receiver depth | Usable internal depth | Limits engagement |
| Handle clearance | Space needed through the full movement | Prevents interference |
| Ground clearance | Vertical distance from rod tip to receiver surface | Determines travel and mounting height |
| Closed-position variation | Movement caused by hinge play or environmental change | Shows how much variation the system must tolerate |
Throw is not overall length
Throw is the distance the rod travels. It is not necessarily the:
- Total rod length
- Backplate length
- Distance from handle to rod tip
- Depth of final engagement
- Seller’s headline “size”
Listings use dimensions inconsistently. Use the manufacturer’s drawing whenever possible.
The rod must cross the gap, enter the receiver, and remain adequately supported by its guides. The evidence does not establish a universal minimum engagement or guide-support dimension, so follow the product-specific drawing and instructions.
Measure the surrounding geometry
Account for anything that may interfere:
- Decorative trim
- Gate stops
- Frame welds
- Hinges and hinge straps
- Adjacent latches or locks
- Pickets or mesh
- Handles
- Automation equipment
- Uneven ground
- A second leaf
- The padlock body and shackle
Check the proposed location with the gate fully open as well as closed.
Extra measurements for vertical bolts
For a cane, foot, or drop bolt, record:
- Rod-tip height above grade
- Usable vertical travel
- Distance to the receiver
- Ground slope
- Clearance during the swing
- Handle height and reach
- Space for any hold-open catch
- Receiver type and location
Choose an arrangement supported by the product instructions and consider whether the receiver can be cleaned and realigned.
Seller-listed sizes illustrate range, not application rules
TS Distributors lists example slide-bolt diameters from 3/8 inch to 3/4 inch. Its category also includes an adjustable J-bolt used as hinge hardware, showing why the mechanism must be checked rather than inferred from the category name (TS Distributors’ bolts-and-latches catalog).
Kencove lists one locking model as 5/8 inch in diameter and 12 inches long, with a hot-dip-galvanized finish. These are seller-provided dimensions for one item, not a rule connecting rod size with gate weight (Kencove’s locking gate-bolt listing).
Ambiguous or conflicting dimensions are a reason to obtain the current drawing before ordering. Also confirm:
- Handedness or reversibility
- Permitted mounting orientation
- Compatible keeper or ground catch
- Whether the receiver is included
- Supplied fasteners and intended substrate
- Adjustment range
- Open- and closed-position retention
- Padlock dimensions
- Required installation tolerances
Choose the material, finish, mounting method, and lock feature
A gate bolt is a system of rod, guides, plate, receiver, fasteners, and supporting structure. Material and finish matter, but neither compensates for weak mounting or poor alignment.
Common materials and finishes
Listings commonly use terms such as:
- Galvanized steel: zinc-coated steel, sometimes without a stated process or coating amount.
- Hot-dip galvanized: a specifically identified galvanizing process.
- Zinc-plated: steel carrying a zinc finish.
- Powder-coated: a polymeric coating, often used to provide color.
- Painted or black finish: ambiguous unless the coating system is stated.
- Mill finish: supplied without a decorative final coating; the base material still matters.
- Stainless steel: a family of alloys rather than one grade.
- Aluminum: used for some bolts or associated components.
- Brass or bronze: found in some traditional or decorative hardware.
Retail catalogs include black and zinc-finished products, hot-dip-galvanized tower bolts, and items identified as 304 stainless steel, illustrating the available range rather than proving comparative performance (HardwareHut’s gate-latches-and-bolts catalog).
A finish label alone does not establish:
- Coating thickness
- Surface preparation
- Stainless grade
- Fastener material
- Compatibility between different metals
- Salt or chemical resistance
- Abrasion resistance
- Expected service life
- Protection of cut or welded areas
Color is especially uninformative. A black product may be painted, powder-coated, chemically finished, or coated over another protective layer.
Wet, coastal, agricultural, and corrosive settings
For persistent moisture, salt, fertilizer, manure, deicing salt, treated-lumber contact, or chemical exposure, request product-specific information:
- Base material and grade
- Coating process or specification
- Fastener and keeper material
- Instructions for field-cut or fabricated areas
- Maintenance requirements
- Environmental warranty exclusions
Do not assume stainless steel is always superior to galvanized steel.
Screw-on mounting
A screw-on bolt may suit sound timber and some reinforced gate systems.
Do not mount substantial hardware only to a thin picket, hollow skin, deteriorated rail, or decorative board. If the supplied fasteners are intended for a different substrate, obtain the manufacturer’s approved alternative.
Through-bolted or bolt-on mounting
Confirm:
- Rear access
- Washer or backing requirements
- Whether tightening could damage a hollow section
- Interference with moving parts
- Exposure of removable nuts or bolt heads
- Compatibility with the gate material
“Bolt-on” may also describe a clamp-style bracket. Read the installation drawing rather than assuming that the fastener passes through the frame.
Weld-on mounting
Because welding requirements depend on known materials and procedures, use a qualified fabricator when those details or the required skills are unavailable.
Do not assume an unknown plated, coated, aluminum, stainless, or mixed-material product is weldable merely because of its shape. Follow the manufacturer’s instructions for restoring protection to exposed steel after fabrication.
Holding, access control, and forced-entry resistance
Separate three requirements:
- Holding: keeps an aligned gate from drifting or swinging under ordinary conditions.
- Routine access control: requires a padlock, key, code, credential, or release action.
- Forced-entry resistance: addresses cutting, prying, impact, fastener removal, frame attack, and bypass.
A slide bolt may perform the first job well. A padlock loop may add the second. Neither fact establishes the third.
For a consequential opening, request applicable test information, installation requirements, and compliance documentation rather than judging by size or appearance.
How to install and align a gate bolt
A bolt should secure a gate that is already structurally sound and resting in its normal position. It should not drag the gate into alignment every time it closes.
1. Inspect the gate system
Check that:
- The post is stable
- Hinges are secure
- The gate closes predictably
- Rails, stiles, welds, and joints are sound
- The gate does not require lifting by hand
- The receiving post or inactive leaf is stable
- A stop provides a repeatable closing position where needed
Repair serious sag, loose hinges, split wood, cracked joints, post movement, or frame distortion first.
2. Choose a structural mounting location
Place the bolt on a rail, stile, tube, reinforced profile, or other structural member. The handle must have clear travel, and the receiver must attach to material capable of supporting it.
For a horizontal bolt, establish a straight path across the gap. For a vertical bolt, ensure the raised rod clears the ground during gate movement while still reaching the receiver when lowered.
3. Test the position before drilling
With the gate against its normal stop:
- Hold or lightly clamp the bolt in place.
- Extend and retract it several times.
- Check handle clearance.
- Confirm that the rod remains supported.
- Mark the hardware only after it moves smoothly.
- Position the receiver around the rod’s natural path.
Do not pull the rod sideways to make it enter the keeper. Separate guides must align with one another so tightening them does not pinch or bend the rod.
4. Fasten the bolt to a wooden gate
Use the specified fasteners and appropriately sized pilot holes. A DIY latch-installation account illustrates two common mistakes: pilot holes made too large for the screws and driver damage to screw heads (The Art of Doing Stuff’s installation account).
Practical checks include:
- Marking holes accurately
- Drilling straight
- Avoiding unnecessary material removal
- Seating fasteners without crushing the mounting surface
- Replacing split or decayed wood rather than covering it with a plate
There is no universal pilot-hole or screw size for gate bolts. Follow the product instructions and account for the gate’s actual material and condition.
5. Use an approved method on a metal gate
Depending on the documented system, installation may use specified fasteners, threaded inserts, through-bolts, clamps, or welding. Do not improvise a method merely because it appears mechanically possible.
If the frame construction, hardware material, or installation requirements are unknown, consult the gate or hardware manufacturer or use a qualified fabricator.
6. Position and install the receiver
Keep the gate closed in its natural resting position. Extend the rod and place the receiver around it without levering the gate up, down, or sideways.
Then:
- Mark the receiver.
- Confirm that it has sound anchoring material.
- Fasten it provisionally.
- Cycle the bolt repeatedly.
- Open and close the gate fully.
- Make permitted adjustments.
- Tighten the components.
- Test again.
A keeper that works only when the gate is lifted is not correctly aligned.
7. Install a vertical receiver
A cane or drop bolt should enter a fixed receiver freely. Use the receiver arrangement approved for the product and site.
During layout and inspection, account for:
- Mud and silt
- Gravel
- Vegetation
- Ice and snow
- Soil or paving movement
- Drainage
- The ability to clean the receiver
- Gate movement while the rod is raised
Do not assume a universal socket diameter or depth. Match the receiver to the rod and follow the manufacturer’s drawing.
8. Protect exposed metal
Where approved drilling or fabrication exposes ordinary steel, follow the product or gate manufacturer’s instructions for surface preparation and compatible coating repair. Avoid coating buildup that interferes with rod movement.
Follow product-specific lubrication guidance.
Final installation checklist
- [ ] Gate, posts, hinges, and frame are sound
- [ ] Bolt is attached to structural material
- [ ] Receiver is firmly anchored
- [ ] Rod reaches its intended engagement
- [ ] Rod does not bind
- [ ] Gate does not require lifting or pulling
- [ ] Handle has clear travel
- [ ] Gate opens fully without collision
- [ ] Fasteners are firm
- [ ] Mounting material is not crushed or split
- [ ] Vertical receiver remains accessible for cleaning
- [ ] Open- or closed-position retention works as designed
- [ ] Intended padlock fits at full engagement
- [ ] Users can operate the hardware safely
- [ ] Required coating repairs are complete
- [ ] Any applicable access or safety requirement has been checked
Troubleshoot binding, sag, corrosion, and loose hardware
The bolt misses the keeper
Inspect:
- Hinge fasteners and pins
- Gate sag
- Post movement or rotation
- Loose frame joints
- Cracked welds or split timber
- Frame deformation
- Loose bolt plate
- Loose or bent keeper
Look for both vertical and horizontal displacement. The gate may have dropped, racked, moved away from the post, or twisted.
Moving an adjustable keeper can correct minor variation. Repeatedly relocating it is not a structural repair. Recurring or substantial misalignment calls for inspection of the hinges, post, frame, and fasteners.
The rod is difficult to slide
Check for:
- Corrosion
- Dirt or sand
- Dried lubricant
- Paint buildup
- Bent or misaligned guides
- A distorted backplate
- Damaged adjustment threads
- Burrs on the rod or receiver
- Unevenly tightened fasteners
- Padlock hardware touching moving parts
Correct the cause rather than leaving the hardware loose.
A vertical bolt will not enter the receiver
Clear and inspect the receiver for:
- Mud
- Gravel
- Leaves
- Vegetation
- Ice
- Compacted debris
- Corrosion
- Physical damage
- Soil or paving movement
- Gate sag or post movement
If the gate’s resting position has changed, determine why before enlarging or relocating the receiver.
Wind or vibration retracts the bolt
Some bolts use a hooked handle and catch to retain the rod against vibration or wind-driven movement. This is a product feature, not a universal characteristic (Abbey Hardware’s explanation of bolt retention).
If the rod retracts:
- Confirm the permitted mounting orientation.
- Check whether the handle reaches its catch.
- Inspect the catch for wear or deformation.
- Confirm full engagement.
- Check whether the gate is striking its stop.
- Replace the bolt with a retained design if necessary.
Do not rely on corrosion, bent guides, or overtightening to hold the rod in place.
Threads or adjustment parts are damaged
One customer reviewing the listed Kencove locking bolt reported that its threads could be damaged easily. That is an anecdote about one purchase, not evidence of general product performance.
Nevertheless, inspect threaded hardware for cross-threading, flattened threads, seized nuts, and deformation. Do not force damaged adjustment parts into service.
Establish a maintenance routine
Inspection frequency depends on use and exposure. Check:
- Screws, through-bolts, nuts, and washers
- Welds and mounting plates
- Guides and sliding rod
- Handle and retention catch
- Keeper or ground receiver
- Gate stop
- Supporting frame
- Receiving post
- Hinges
- Coating damage and corrosion
Price expectations, buying checklist, and safety limits
Price can help set a budget, but it cannot establish fit, durability, security, or compliance.
Broad marketplace price examples
The supplied TS Distributors snapshot shows some basic bolts at only a few dollars. The seller supplied the prices, and no original capture date was included, so they should be treated as volatile marketplace examples rather than current quotations (TS Distributors’ catalog).
Other supplied retailer snapshots show some long or locking products at roughly $40–$60 as displayed, while one electric drop bolt was displayed at $571.77. The Outlaw page did not identify the currency in the supplied material, and prices and variants may change. These source snapshots were reviewed for this guide on August 26, 2026 (Outlaw Industries’ listings).
It does not independently reveal load capacity or quality.
Likewise, ratings, review totals, and marketplace rankings do not establish:
- Structural capacity
- Fastener pull-out resistance
- Cycle life
- Corrosion performance
- Padlock security
- Weather suitability
- Regulatory compliance
- Fit on a particular gate
Marketplace best-seller positions are based on sales and are updated frequently, so they indicate commercial activity rather than engineering suitability (Amazon’s gate-latch best-seller category).
Pre-purchase checklist
- [ ] Mechanism: slide, barrel, tower, padbolt, cane, foot, drop, keyed, or electric
- [ ] Direction: horizontal or vertical
- [ ] Gate movement: swing, double swing, or slide
- [ ] Leaf function: single leaf, active leaf, or inactive leaf
- [ ] Dimensions: body, rod, brackets, and handle
- [ ] Usable throw: sufficient for the measured gap and receiver
- [ ] Rod diameter: compatible with the guides and receiver
- [ ] Mounting footprint: fits a structural frame member
- [ ] Receiver: correct keeper, ground catch, socket, or stop
- [ ] Receiver included: confirmed rather than assumed
- [ ] Material: base metal and relevant grade
- [ ] Finish: documented process rather than color alone
- [ ] Mounting method: approved for the gate and product
- [ ] Fasteners: specified and suitable for the substrate
- [ ] Orientation: permitted direction and handedness
- [ ] Access side: one-sided or genuinely two-sided
- [ ] User reach: practical for intended users
- [ ] Padlock fit: shackle diameter, reach, and clearance
- [ ] Retention: holds the rod open or closed if required
- [ ] Application data: obtained where consequences warrant it
- [ ] Adjustment: enough for alignment without masking gate movement
- [ ] Warranty: including relevant exclusions
- [ ] Documentation: current drawing and installation instructions
- [ ] Compliance: required approvals identified
A compatible keeper, ground catch, sleeve, stop plate, backing plate, or fastener kit may be sold separately. Confirm all parts needed for a complete system.
When a basic bolt is the wrong solution
Do not treat a basic manual bolt as compliant hardware for a regulated opening. This concern is particularly important for:
- Pool gates
- Childcare or play-area gates
- Accessible routes
- Emergency-egress openings
- Automated vehicle gates
- Openings subject to self-closing or self-latching requirements
The evidence supplied for this guide does not establish the requirements for those applications. For pool gates specifically, one vendor overview notes that local rules may require features such as self-closing, self-latching, and outward-opening operation; it also makes clear that actual requirements vary (Iron Fence Shop’s gate-latch overview).
Check the rules governing the property with the authority having jurisdiction and obtain any required product documentation. A padlock hole, high mounting position, or large bolt does not by itself establish compliance.
A note on making a cane bolt
A cane bolt can be fabricated from steel rod and a bracket, but that is an advanced metalworking project rather than a shortcut around product selection. A supplied DIY tutorial outlines measuring, cutting, drilling, welding, testing, and coating, but does not provide a steel grade, bracket thickness, weld specification, load design, or comprehensive safety procedure.
Do not treat an unspecified fabricated bolt as proven for a heavy, automated, regulated, or security-critical gate.
Frequently asked questions
What is the difference between a gate bolt, slide bolt, barrel bolt, and padbolt?
A gate bolt is the broad functional term for rod-type hardware used to hold a gate. Slide bolt describes the sliding action. Barrel bolt often refers to a compact guided rod, while padbolt commonly describes a sliding bolt arranged for a padlock.
Because suppliers use these names inconsistently, compare the mechanism, throw, rod diameter, plate dimensions, receiver, orientation, and locking arrangement.
What type of bolt should I use to hold one side of a double gate?
A vertical cane bolt, foot bolt, or drop bolt is the usual category for the inactive leaf. It enters a fixed ground receiver, creating a stable leaf against which the active gate can close.
Choose according to rod travel, ground conditions, handle reach, gate clearance, and receiver design. Use separate closing hardware between the leaves where required.
Can a gate bolt be locked with a padlock?
Many can, but not all. A padlockable model may use an integrated loop, staple, or aligned holes.
Confirm shackle diameter, reach, body clearance, access side, and alignment at full engagement. Padlock compatibility provides a locking option; it does not prove resistance to cutting, prying, fastener removal, or bypass.
Is stainless steel better than galvanized steel for a gate bolt?
Not universally. Stainless and galvanized products vary by alloy, coating process, fabrication, fasteners, maintenance, and environment.
Obtain the stainless grade or galvanizing specification where exposure matters. Do not choose solely by a generic material label or color.
Can I use a basic gate bolt on a pool gate?
Do not assume that you can. A manual bolt may not provide the self-closing, self-latching, operating, or child-safety characteristics required by local rules. Vendor guidance discussing pool-oriented latches also cautions that requirements vary by jurisdiction (Iron Fence Shop’s overview).
Confirm the applicable rules with the local authority and use documented hardware intended for that application. A padlock loop alone does not establish pool-gate compliance.
The dependable buying rule is straightforward: identify the bolt’s exact job, measure the complete bolt-and-receiver geometry, match the mounting method to a sound gate frame, and verify the product-specific drawing before ordering. Smooth alignment and a stable gate matter as much as the bolt itself. Regulated or higher-security openings require purpose-designed, documented hardware rather than merely a larger rod or padlock loop.