
Choose the Right Post System Before You Start Driving
Best for light residential fencing when soil or mounting surface, panels, gates and exposure all match; covers driving, anchoring and stop conditions.
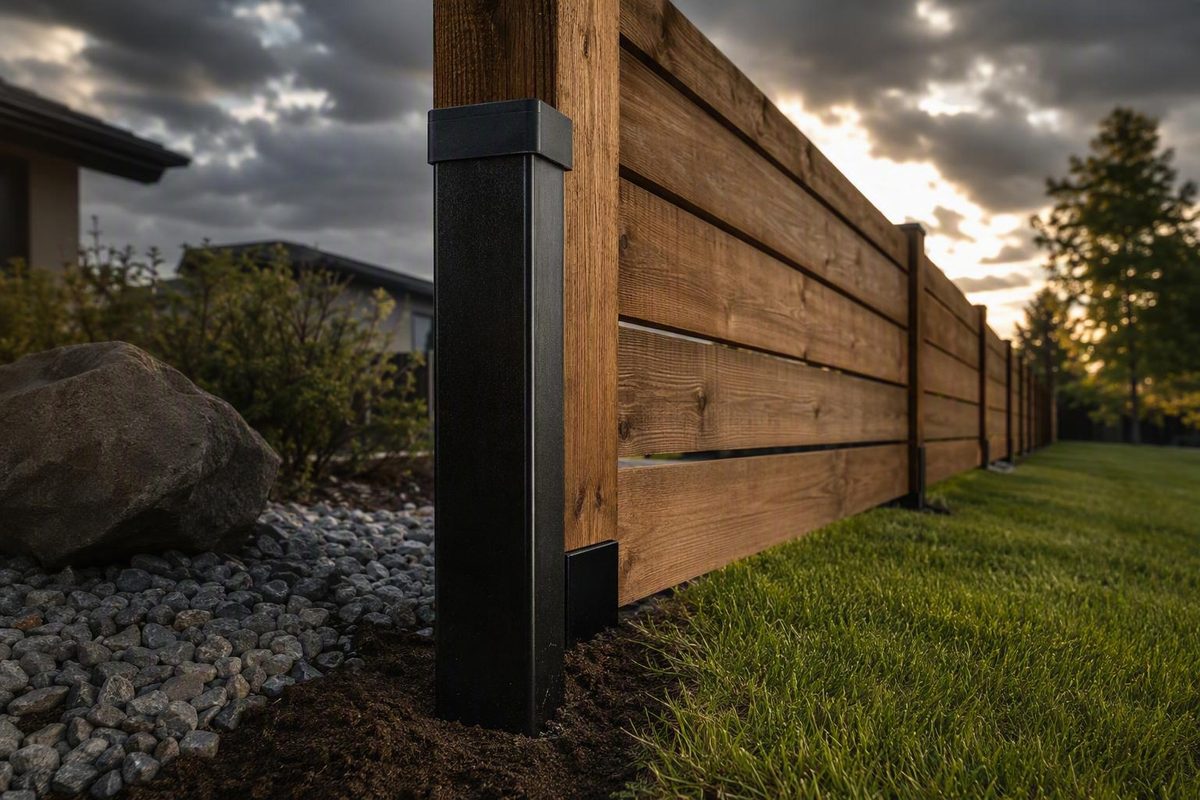
A no dig fence post is most suitable for decorative, garden, picket, and other light residential fencing when the complete system matches the soil or mounting surface, panels, gates, and site exposure. “No dig” means avoiding a conventional excavated post hole—not avoiding all preparation, driving, drilling, or anchoring. If you cannot verify penetration, soil criteria, component compatibility, or load and wind limits, pause rather than assume the label proves suitability.
The short answer: when a no-dig post makes sense
No-dig systems are a reasonable option when the fence is light, the ground can restrain the specified support, and all components belong to a compatible system.
| Site or project | Likely direction | Reason |
|---|---|---|
| Light fence in firm soil | Consider a compatible driven system | Firm ground is more likely to restrain a correctly sized spike, rod, or post. |
| Sound concrete or pavement | Use a purpose-designed anchored base | Surface mounting avoids a soil hole but normally requires drilling and specified anchors. |
| Loose or sandy ground | Proceed only with manufacturer criteria and ratings | The soil may not provide adequate lateral restraint. |
| Rocky ground | Treat as a potential stop condition | Rock may prevent full penetration or force the support out of line. |
| Heavy gate, tall privacy panel, or exposed site | Do not proceed without product-specific structural data | These conditions can impose loads beyond those intended for light decorative systems. |
No-dig does not mean zero site work or no concrete in every configuration. Some systems use an internal pipe beneath an above-ground sleeve; others use anchored base plates on pavement. Concrete may still be permitted or required for particular products.
Before buying, establish the intended soil, support dimensions, required penetration, post spacing, panel limits, gate approval, and wind or lateral-load limits. Missing information means the system is not sufficiently specified.
Five systems sold under the no-dig label
“No dig” covers several distinct load paths:
-
Spike anchor: A pointed metal support is driven into the ground. Its box-shaped receiver holds a separate post, usually secured with bolts.
-
Driven post or rod: The support itself is hammered manually or installed with a mechanical driver. A garden stake, steel U-post, and purpose-designed structural fence post are all “driven,” but they are not interchangeable.
-
Internal-support system: A pipe, rod, or spike is installed first. A visible post sleeve slides over it and is secured with a collar or bracket. The sleeve may primarily provide the finished exterior rather than transfer loads directly into the ground.
-
Freestanding jack fence: Crossed supports form an X, with horizontal rails spanning between them. The assembly rests on the ground instead of relying on burial or driven anchors.
-
Hard-surface system: The post attaches to a base plate or bracket anchored into suitable concrete or pavement. It avoids a conventional soil hole but generally still requires drilling.
Terminology matters
- Structural post: Transfers fence loads into the ground or substrate.
- Finishing post: Completes the end or appearance of a fence run and may not be a stand-alone support.
- Sleeve: Visible post body installed over an internal support.
- Rod or stake: Slender driven support whose suitability depends on its design and the soil.
- Spike or anchor: Ground-driven component that supports or receives a post.
- Bracket, collar, or base: Connects structural and finishing components.
- Kit: A packaged group of parts, which may not include everything required for installation.
Retail categories can place structural posts, finishing posts, U-channel stakes, anchors, panels, gates, and accessories together. Never give a small decorative spike or nylon stake the same capacity assumptions as a driven structural steel post.
Check soil, fence loads, and exposure before buying
Walk the proposed fence line and record:
- Soil firmness: Dense natural soil, compacted fill, loose fill, sand, or persistently soft ground.
- Buried obstructions: Rock, roots, old foundations, drainage lines, or utilities.
- Grade changes: Whether panels must step, rack, or leave gaps.
- Drainage: Ponding, erosion, or soil that regularly becomes soft.
- Fence height and material: The panel area and resulting leverage.
- Panel weight: Lightweight open pickets versus substantial solid sections.
- Ends and corners: Where loads may concentrate.
- Gate use: Leaf width, weight, hinge arrangement, and frequency of operation.
- Wind exposure: Sheltered conditions versus open ground and prevailing winds.
Firm or compacted ground is a more plausible application for a driven support than loose or sandy soil. There is no universal penetration depth; use the requirement for the exact system.
Evaluate gates independently. Approval for an intermediate panel post does not establish approval for a gate post.
Do not infer suitability from height, material, reviews, or terms such as “heavy duty.” Require technical limits for the complete post, panel, connection, and foundation assembly.
Stop purchasing or installation if:
- the ground is unstable;
- an obstruction prevents correct alignment;
- the specified penetration cannot be achieved;
- a correctly assembled test section continues to move;
- the gate lacks approved posts, hardware, or anchoring; or
- documentation for the intended load and wind exposure is unavailable.
Use a compatibility worksheet, not visual guesswork
Complete this worksheet before ordering:
| Item | Project requirement |
|---|---|
| Manufacturer and collection | |
| Post type, shape, and dimensions | |
| Sleeve inside and outside dimensions | |
| Internal support diameter or profile | |
| Required penetration | |
| Post spacing | |
| Panel height and weight | |
| End-post configuration | |
| Corner configuration | |
| Gate width, weight, and compatibility | |
| Required fasteners | |
| Caps, collars, and brackets | |
| Included parts | |
| Parts sold separately |
Post length is not automatically finished fence height or penetration depth. A listed five-foot post might include an in-ground section, serve as an above-ground sleeve, or belong to a collection with a different nominal panel height.
Collection names matter. Lowe’s associates selected YARDLINK “universal” posts with named Grand Empire, Grand Ambrose, and Grand Eastmont collections. In that context, “universal” means compatible within documented collections—not with every panel on the market (Lowe’s YARDLINK collection listings).
Dimensions matter as well. One aluminum-fence retailer describes a bracket specifically intended to join a 2-1/2-inch square sleeve to a 1-5/8-inch round support pipe; a visually similar bracket or pipe is not necessarily a substitute (Quick Ship Aluminum Fence’s post-system guidance).
An apparently similar DIY fence may also use a completely different foundation. One WamBam picket kit includes a panel, post, and cap but states that the post must be set in separately purchased concrete and that pipe anchors are not included (WamBam’s product-specific installation details). Product instructions override retailer filters and category labels.
Basic installation sequence for soil and hard surfaces
In the US, contact 811 before installing a fence and follow your state’s waiting and clearance instructions. Before driving a support, arrange utility locating; a narrow rod or spike can still contact an underground service (Pro Tool Guide’s no-dig safety and installation overview). Separately, verify the property line and ask the relevant local authority whether setbacks, permits, or other requirements apply. Requirements vary, so this is a planning step rather than a statement that any particular rule governs every project.
For a soil-driven system
- Mark the fence line with string, stakes, or marking paint.
- Establish corners, ends, and the specified post spacing.
- Position the compatible anchor, rod, or structural post.
- Drive it with the tool specified for that component.
- Check plumb and alignment repeatedly while driving.
- Install the separate post or sleeve, if used.
- Secure the approved collars, bolts, or brackets.
- Attach compatible panels, caps, and finishing components.
- Recheck the line, hardware, and movement before installing or operating a gate.
Corners provide fixed references for a string line and intermediate-post alignment.
Typical tools include string, stakes or marking paint, a level, the specified mallet, sledgehammer, or post driver, and the wrench or screwdriver required by the connections. Larger driven posts may require mechanical equipment.
For a hard-surface system
- Verify that the post design and existing substrate are compatible.
- Obtain the specified base plate, anchors, fasteners, edge clearances, and drilling instructions.
- Lay out each base and confirm panel spacing.
- Drill and prepare the holes as directed by the base and anchor documentation.
- Install and secure the base.
- Check the post for plumb.
- Attach the compatible panels and finishing parts.
Spacing, penetration, fasteners, drilling details and base dimensions vary by system. Obtain those values from the documentation for the exact post, panel, base, anchor, and substrate.
No-dig posts versus concrete-set posts
| Consideration | No-dig system | Conventional concrete-set post |
|---|---|---|
| Excavation | Avoids a conventional post hole | Requires excavated holes |
| Concrete | Often avoided, but not always | Commonly used around buried posts |
| Tools | Driving or drilling tools plus connection tools | Digging, mixing, leveling, and bracing tools |
| Landscape disturbance | Usually less excavation | More soil removal and cleanup |
| Alignment correction | Driven supports may be difficult to realign | A hole may allow adjustment before concrete sets |
| Surface options | Soil-driven or purpose-designed surface mount | Primarily excavated ground installation |
| Likely applications | Commonly light decorative, garden, and residential systems | Broader range when properly specified |
| Evidence limitation | The “no dig” label gives no capacity rating | Concrete alone does not prove adequacy |
In one retailer’s aluminum-fence guidance, conventional posts typically extend 24 to 36 inches into excavated holes and are often set in concrete. That range describes the cited installation context; it is not a universal footing specification (Quick Ship Aluminum Fence’s comparison).
Reduced excavation, potentially fewer tools, and less landscape disturbance are recurring claimed benefits of no-dig systems—not guaranteed savings.
For demanding loads or unsuitable ground, a properly specified conventional footing or another verified anchoring design may be more appropriate. Neither method is universally cheaper, faster, stronger, or longer-lasting without comparable engineering and installed-cost data.
Why no-dig fences wobble—and what to inspect first
If the fence feels loose or begins to lean:
- Stop loading it. Do not operate the gate or lean materials against the fence.
- Inspect the soil. Look for loose fill, saturation, erosion, or disturbed ground.
- Confirm penetration. Verify that every support reached the specified depth.
- Check support size and spacing. Confirm the correct rods, spikes, posts, and panel intervals were used.
- Check plumb and line. Deflection may indicate an obstruction or disturbed soil.
- Tighten approved connections. Inspect bolts, collars, brackets, and panel fasteners.
- Inspect ends, corners, and gate posts. Movement may be most visible where loads concentrate.
- Consult the manufacturer. Request an approved correction, replacement part, or alternate foundation.
Do not present landscaping pegs or gravel glue as structural repairs. In one tradesperson Q&A, respondents considered them inadequate for stabilizing a wobbling rod-supported fence. Longer rods, T-posts, rebar, ties, and attachment to a solid structure were mentioned only as anecdotal suggestions, not manufacturer-approved remedies (MyBuilder’s no-dig fence discussion).
Any proposed reinforcement should be reviewed for compatibility, safe detailing, corrosion considerations, and warranty conditions. If the specified system cannot be stabilized in the actual soil—or lacks ratings for the intended panel, gate, or exposure—replace it with a properly specified stronger support or conventional footing.
Price the complete system
Count posts, supports, brackets, panels, gates, caps, fasteners, delivery and tools or equipment rental. Check what the kit includes before comparing it with a concrete-set installation. The cheaper post can still produce the more expensive complete fence.
Use the manufacturer’s instructions for the exact system. If the soil, exposure, gate or panel falls outside its documented use, choose a suitably specified alternative before installing it.