
How to Keep Two Gate Leaves Aligned, Anchored, and Secure
Compare latch types, access and locking options, then measure the center gap, frame and mounting area for a secure, compatible setup.
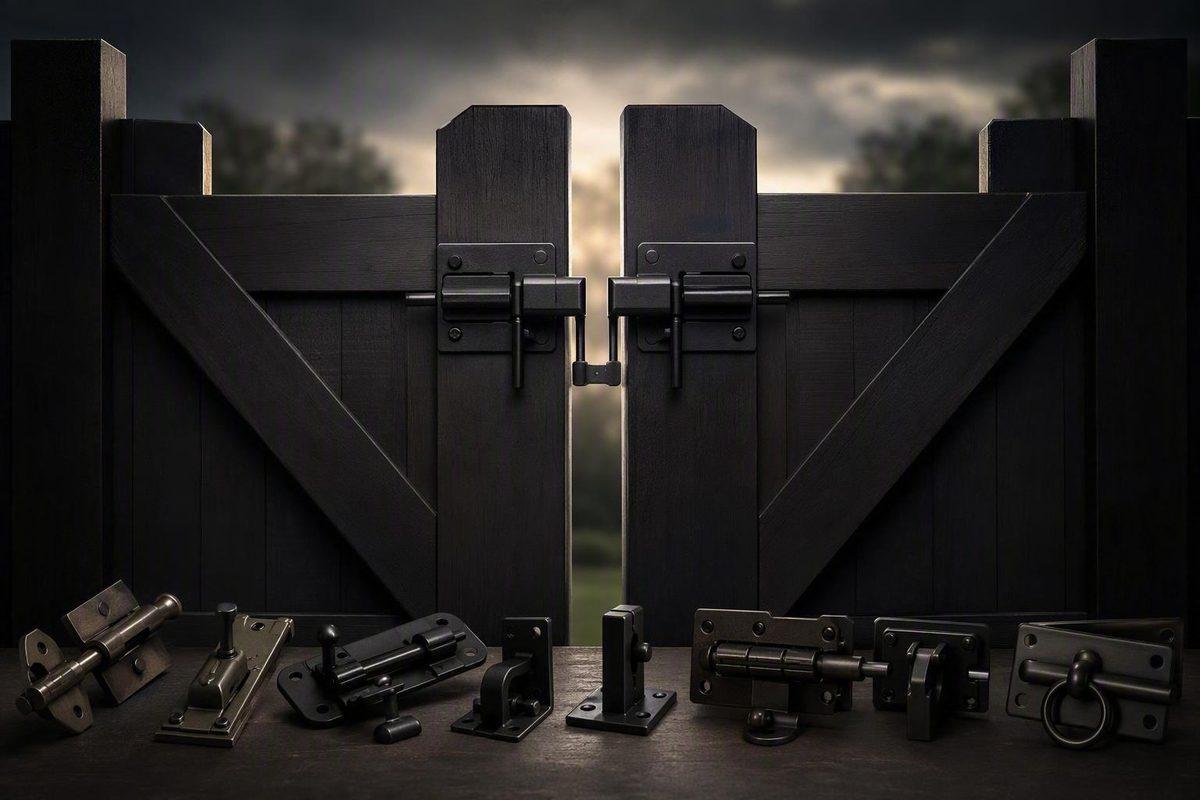
Most conventional double-swing gate installations use one latch on the active leaf and one ground-engaging drop rod or cane bolt on the passive leaf. The anchored passive leaf provides a stable keeper surface; release it only when the full opening is needed.
Do not choose gate latches for double gates by style or a “heavy duty” label alone. Check the center gap, frame or stile dimensions, mounting area, documented leaf weight, swing direction, operating side, locking needs, weather exposure, and any pool or local-code requirements. Purpose-built double-drive latches can use a different arrangement, but only within the manufacturer’s stated application and compatibility limits.
The standard double-gate setup: one latch and one anchored leaf
A conventional double-swing gate divides the work between two leaves:
- Active leaf: Opens for ordinary access and carries the operating latch.
- Passive leaf: Usually remains closed and is restrained by a drop rod or cane bolt.
- Keeper or strike: Mounts on the passive leaf and receives the latch.
- Drop-rod receiver: Accepts the passive leaf’s vertical rod at ground level.
- Gate stop: Receives the gate in its closed position and limits overtravel.
This arrangement lets the active leaf function like a normal walk gate. When a vehicle, mower, trailer, or other large equipment needs the entire opening, unlatch the active leaf and then release the passive leaf’s rod.
Manufacturer guidance describes the same principle: secure one leaf with a cane bolt so the other has a fixed surface against which to latch. The rod can enter a lined ground opening or a manufactured receiver—called a “ground stop” by that source—but this drop-rod receiver is separate from the center gate stop that receives closing contact (PalmSHIELD drop-rod guidance).
Typical configuration, viewed from the operating side:
                         CLOSED POSITION

   LEFT POST                                           RIGHT POST
      │                                                     │
   HINGES                                                HINGES
      ║                                                     ║
      ║   PASSIVE LEAF        CENTER GAP      ACTIVE LEAF   ║
      ║  ┌──────────────┐         ↕          ┌────────────┐  ║
      ║  │              │  KEEPER ◄── LATCH │            │  ║
      ║  │              │                    │            │  ║
      ║  │      DROP ROD│                    │            │  ║
      ║  └──────────┬───┘                    └────────────┘  ║
      ║             │                ▲                       ║
                    ▼             GATE STOP
             DROP-ROD RECEIVER

      Passive-leaf swing ↙                  ↘ Active-leaf swing
      after rod release                       opens first
The left and right roles can be reversed. What matters is that the passive leaf remains stable while the active leaf closes and latches against it.
A latch is not a structural correction.
The one-latch-plus-one-rod arrangement is common, not universal. DAC, for example, identifies its Strong Arm products as double-drive latches and says those specific designs eliminate a separate drop rod. That is a product-specific configuration, not a reason to omit the passive-leaf anchor from an ordinary latch installation. Follow the exact model’s frame, gap, mounting, and application requirements (DAC Strong Arm specifications).
Latch-type decision table
Choose a latch according to how the gate must operate. Access from one or both sides, locking method, mounting geometry, and tolerance for changing alignment are separate considerations.
The table below summarizes mechanical and operating differences supported by the available product and vendor guidance. It is not a comparative strength, security, or cycle-life ranking.
| Latch type | Operation and access | Locking and typical fit | Alignment consideration or limitation |
|---|---|---|---|
| Lever | May provide one- or two-sided operation; lever settles into a keeper | Padlockable versions exist; used on wood or metal gates | Vendor guidance describes keeper-style levers as more forgiving of modest alignment changes than a precision bolt |
| Thumb or ring | Commonly configured for operation from both sides | Decorative wood and ornamental gates; locking varies | Keeper geometry and mounting space must match; a long drop bar may not fit a narrow stile |
| Gravity or fork | Catch closes around or receives the mating component | Used across agricultural, chain-link, and ornamental systems; locking varies | Fit depends on the specified frame, gap, and catch position; no general tolerance rating is established here |
| Flip | Available as one-sided hardware | May accept a padlock; can suit controlled utility access | Unsuitable where routine operation from both sides is required |
| Barrel or slide bolt | Usually operated from one side | Padlockable models exist; often used on utility gates | Bolt and receiver must continue to align as the leaves move or settle |
| Surface deadbolt | Keyed, digital, or mechanical-code operation may be available | Presented by vendors for higher-security applications | Requires rigid leaves and continuing bolt-to-receiver alignment |
| Double-drive design | Connects paired leaves according to the product design | Access and locking are model-specific | Compatibility cannot be generalized beyond the listed frame, gap, mounting, and gate application |
Vendor guidance favors keeper-style lever latches for some gates whose alignment changes because the lever can lift and settle into a catch. A barrel bolt or surface deadbolt depends on closer continuing alignment between the bolt and receiver. No comparative cycle, load, or durability testing was supplied, so this is a mechanical distinction rather than proof that one type is universally better. Deadbolts can suit higher-security applications when rigid frames, sound hinges, and stable posts preserve the required alignment (Abbey Hardware’s double-gate guide).
A one-sided flip latch may make sense where access is intentionally controlled from one side. Weatherables, for example, describes its double-gate flip latch as one-sided and padlockable. That operating arrangement may suit a utility or dumpster enclosure, but not a gate that must routinely open from both sides (Weatherables flip-latch details).
Available locking arrangements include:
- Non-locking
- Padlockable
- Built-in keyed
- Digital or mechanical code
- One-sided locking
- Two-sided locking
None is universally superior. Check shackle fit, exposure to cutting or prying, fastener access, mounting strength, and the gate frame itself.
Also distinguish two-sided operation from two-sided locking. A latch may release from both sides without providing a keyed cylinder or equivalent locking control on both sides.
Measure the gate before choosing hardware
Inspect the gate before taking purchase measurements. Lift each leaf gently at its latch edge and watch for hinge play. Check whether the posts move, the frames rack, or the center gap changes as the leaves swing.
Measure with both leaves supported in their intended closed position.
Use this pre-purchase checklist:
- Center gap: Measure between the leaves where the latch will mount.
- Gap variation: Compare the gap at the top, latch height, and bottom.
- Latch clearance: Confirm the space needed by the body, keeper, handles, and moving parts.
- Round-frame diameter: Measure the actual tube rather than relying on a general gate description.
- Square-frame size: Measure the outside dimension of ornamental tubing.
- Stile width: Check the available flat mounting width on wood or vinyl.
- Gate thickness: Needed for through-bolts, spindles, thumb pieces, and two-sided hardware.
- Mounting area: Note pickets, trim, mesh, welds, rails, frame joints, and other obstructions.
- Leaf weight: Obtain the documented weight from the gate manufacturer, supplier, or installer. If it is unavailable, have the gate or proposed hardware compatibility verified rather than relying on an unsupported estimate.
- Swing direction: Record whether the gate swings inward, outward, or both ways.
- Operating side: Decide whether users must release it from one side or two.
- Closed-position movement: Note sag, wind movement, seasonal changes, and contact with the stop.
A long drop bar can extend beyond a narrow wooden stile. One seller illustrates a builder-added mounting area for a particular bronze thumb latch, but that project-specific modification should not be treated as a universal repair for every gate (360 Yardware’s thumb-latch example).
DAC’s published double-drive specifications show why measurements matter:
| DAC double-drive model | Listed frame compatibility | Listed center gap |
|---|---|---|
| Commercial round-frame | 1-5/8- or 2-inch round frame | 2-1/2 to 6 inches |
| Commercial ornamental | 2-inch square frame | 2-1/2 to 3-1/4 inches |
| Residential round-frame | 1-3/8-inch round frame | 2 to 4 inches |
DAC also lists an adapter for a 1-3/4-inch square frame and states that a double-drive latch requires two adapters. Its residential section identifies a 1-3/8-inch frame, while one black-model description mentions a 1-3/8- or 2-inch frame. Confirm that model’s compatibility with the manufacturer rather than resolving the inconsistency by assumption. These dimensions and adapter requirements are manufacturer specifications, not independently verified performance ratings.
Terms such as residential, commercial, and heavy duty are categories, not dimensions. A useful specification identifies compatible frame sizes, center-gap range, mounting method, system components, required clearances, and applicable leaf-weight limits. Without those details, the label alone cannot establish fit.
Build the complete hardware system
A center latch is only one component of the closing system. Plan for:
- Latch
- Keeper, catch, or strike
- Passive-leaf drop rod or cane bolt
- Aligned drop-rod receiver
- Gate stop
- Hinges selected for each leaf
- Fasteners suitable for the gate material and mounting loads
- Optional padlock, keyed lock, or code lock
- Optional dummy handle for pulling or visual balance
The gate stop and latch perform different jobs. The stop receives the leaf as it closes and limits overtravel; the latch holds the leaves closed. The stop does not replace the latch or passive-leaf restraint. Position it so that it receives closing contact without preventing complete latch engagement.
The drop rod also needs an aligned receiver. Available guidance supports a ground opening, lined sleeve, or manufactured receiver, but it does not establish one universal diameter, depth, or installation method.
Terminology varies. Drop rod, cane bolt, and foot bolt are all used for vertical leaf-restraint hardware, but the sources do not use those names consistently enough to guarantee that the products are interchangeable. Likewise, keeper, catch, and strike generally refer to the component engaged by the latch. Buy by dimensions, function, and manufacturer compatibility rather than by name alone.
A dummy handle may make a leaf easier to pull or create a balanced appearance.
Match the latch to material, duty, swing, and exposure
The gate’s construction determines the mounting surface and narrows the compatible hardware.
| Gate construction | Verify before purchase | Hardware direction | Condition to inspect |
|---|---|---|---|
| Wood | Stile width, thickness, rigidity, mounting area | Lever, thumb/ring, gravity, bolt, or compatible surface lock | Confirm that the specified fasteners and mounting area suit the wood gate |
| Vinyl | Gate system, reinforcement, approved mounting points | System-specific or documented compatible hardware | Follow the gate manufacturer’s reinforcement and fastening instructions |
| Round-frame chain link | Actual tube diameter, center gap, clamp or bolt geometry | Fork, gravity, flip, or compatible round-frame double-drive latch | Do not substitute nominal descriptions for measured frame size |
| Square ornamental metal | Tube size, clearance, mounting method, leaf weight | Fork, lever, deadbolt, or compatible ornamental double-drive latch | Confirm that the product is approved for the actual frame and gate series |
| Manufacturer-specific system | Exact series, model, upright, post, hinges, and clearances | Complete listed kit | Do not transfer the kit’s limits to unrelated gates |
Swing direction affects latch position, visibility, and access. With an inward-swinging gate, operating hardware can often be placed toward the property side. On an outward-swinging gate, the latching portion may be visible or reachable from the street side.
Check the full swing for interference with the stop, trim, adjacent fencing, grade, vehicles, and the other leaf. Confirm that the operating side remains accessible when one leaf is closed.
Keep standalone replacement latches separate from complete hinge-and-latch kits when comparing ratings. Ameristar’s catalog, for example, lists double-gate kits for named gate series with maximums ranging from 62 to 3,000 pounds per leaf. Its commercial, heavy-commercial, and industrial Strong Arm kits specify 3 inches of latch clearance while listing different per-leaf maximums. Those are limits for the named kits and compatible gate series, not generic ratings for a latch installed on an unrelated gate (Ameristar ornamental gate hardware catalog).
For wet or coastal locations, check whether the exact hardware is offered in stainless steel, bronze, galvanized steel, or with a documented protective coating. Review the specified material, coating, warranty, and maintenance instructions rather than relying on color or “weather resistant” wording.
Bolt-on, through-bolted, and welded products all exist, but no single mounting method suits every wood, vinyl, hollow-metal, or thin-wall frame. Use the gate and hardware manufacturers’ instructions for the actual substrate and system.
Automated gates require separate review. The available evidence does not support automation-specific latch recommendations. Confirm any latch or passive-leaf restraint with the gate-operator manufacturer or a qualified gate-automation professional before ordering or installation.
Pool-barrier double gates require a separate safety check
Pool barrier warning: Do not assume that an ordinary double-gate latch—even one marketed as self-latching or lockable—satisfies the requirements for a pool enclosure.
The U.S. Consumer Product Safety Commission recommends that pool-barrier gates open away from the pool, be self-closing and self-latching, include locking devices, and be maintained so they close and latch completely every time. If the release is less than 54 inches from the gate bottom, CPSC recommends placing it on the pool side at least 3 inches below the top, with no opening larger than 1/2 inch within 18 inches of the release. The document is guidance rather than a universally mandatory federal standard, and state or local requirements may differ or add restrictions. CPSC also warns that a barrier is not childproof and cannot replace adult supervision (CPSC Safety Barrier Guidelines for Residential Pools).
On a double gate, evaluate the complete opening. The passive leaf, drop rod, receiver, stop, center gap, and active-leaf latch must work together without defeating complete closure, reliable latching, locking, or restrictions on a child’s access to the release. Check the requirements of the authority having jurisdiction before selecting the hardware.
Troubleshoot alignment before replacing the latch
When a double-gate latch stops engaging, diagnose the assembly in this order:
- Anchor the passive leaf. Put its drop rod fully into the receiver.
- Set both leaves in their intended closed position. Do not pull them into alignment with the latch.
- Check hinges and posts. Lift the free edge of each leaf and watch for hinge play, loose fasteners, frame flex, or post movement.
- Compare the center gap. Measure at the top, latch height, and bottom.
- Inspect the keeper. Impact marks may show whether the latch passes above, below, or beside it.
- Check the stop. Confirm that it supports the closed position without holding the leaves short of full engagement.
- Operate the passive-leaf rod. It should enter and leave the receiver without binding.
- Inspect the mounting surface. Look for loose fasteners, distorted brackets, cracked wood, or movement under operating load.
Common symptoms often point beyond the latch itself:
| Symptom | Likely system-level causes |
|---|---|
| Latch misses above or below keeper | Gate sag, hinge wear, loose hardware, frost movement, or shifting posts |
| Leaves bounce open | Poor stop contact, excessive closing speed, or incomplete engagement |
| Center moves in wind | Unrestrained passive leaf or flexible gate frame |
| Drop rod binds | Misaligned or blocked receiver, bent rod, or changed gate height |
| Gap widens or narrows | Post movement, hinge adjustment, frame racking, or seasonal movement |
| Hardware repeatedly loosens | Inadequate mounting area, unsuitable fasteners, or damaged substrate |
It does not repair a sagging leaf, worn hinge, flexible frame, or unstable post. Correct those causes first, then position the keeper where the properly supported gate closes naturally.
Use this maintenance checklist:
- Confirm full latch engagement rather than surface contact alone.
- Operate the drop rod and clear debris from its receiver.
- Tighten and inspect mounting fasteners.
- Check hinges for wear, looseness, and changed adjustment.
- Compare the center gap at the top and bottom.
- Inspect frames and posts for movement.
- Look for corrosion, coating damage, or bent parts.
- Confirm that the stop remains firm without blocking engagement.
- Test every required operating and locking side.
For a pool-barrier gate, take the gate out of service until any failure to close and latch completely has been corrected (CPSC Safety Barrier Guidelines for Residential Pools).
The buying sequence is straightforward: designate the active and passive leaves, correct structural alignment problems, measure the center gap and mounting surfaces, choose the required access and locking operation, and match those conditions to documented compatibility limits. Add the passive-leaf restraint, receiver, and stop wherever the selected system requires them. For pool, automated, unusually heavy, wind-exposed, or code-regulated gates, verify the complete assembly with the relevant authority, manufacturer, or qualified professional before ordering.